How to Configure a Social Authentication Policy using Google
Step 1: Enable Sign in with Apple Capability
Log in to the Apple Developer Portal with your Apple Developer Account.
Navigate to Certificates, Identifiers & Profiles and select Identifiers.

For this process, you will need to have an Identifier. If you have not already created one, please click on the blue ‘=’ icon and create it.

b. If you already have an Identifier, click on it in the list to open it. For this process, we need to enable the Capability for ‘Sign in with Apple’.

Step 2: Create a Services ID
Important Note:
The Identifier created as the Services ID in this step will be the Client ID used in the Social Authentication Policy in RapidIdentity.
1.From your Apple Developer Portal, select Certificates, Identifiers and Profiles > Identifiers.
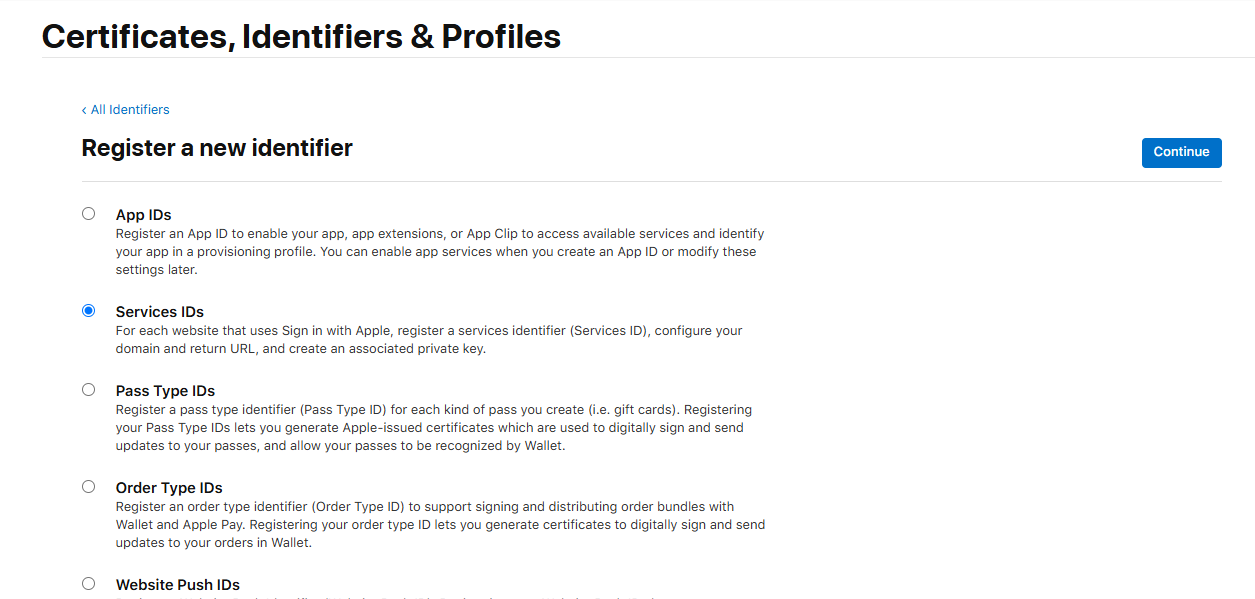
2.On the Identifiers page, select Register a New Identifier, then select Services IDs.

On the next screen, you will be asked to provide a Description and an Identifier.

Once those are entered into the fields, click ‘Continue’ in the top right corner. On the next screen, you will be given an opportunity to confirm your information, and then click ‘Register’ in the top right corner. At this point, it will appear in the list of saved Services IDs.
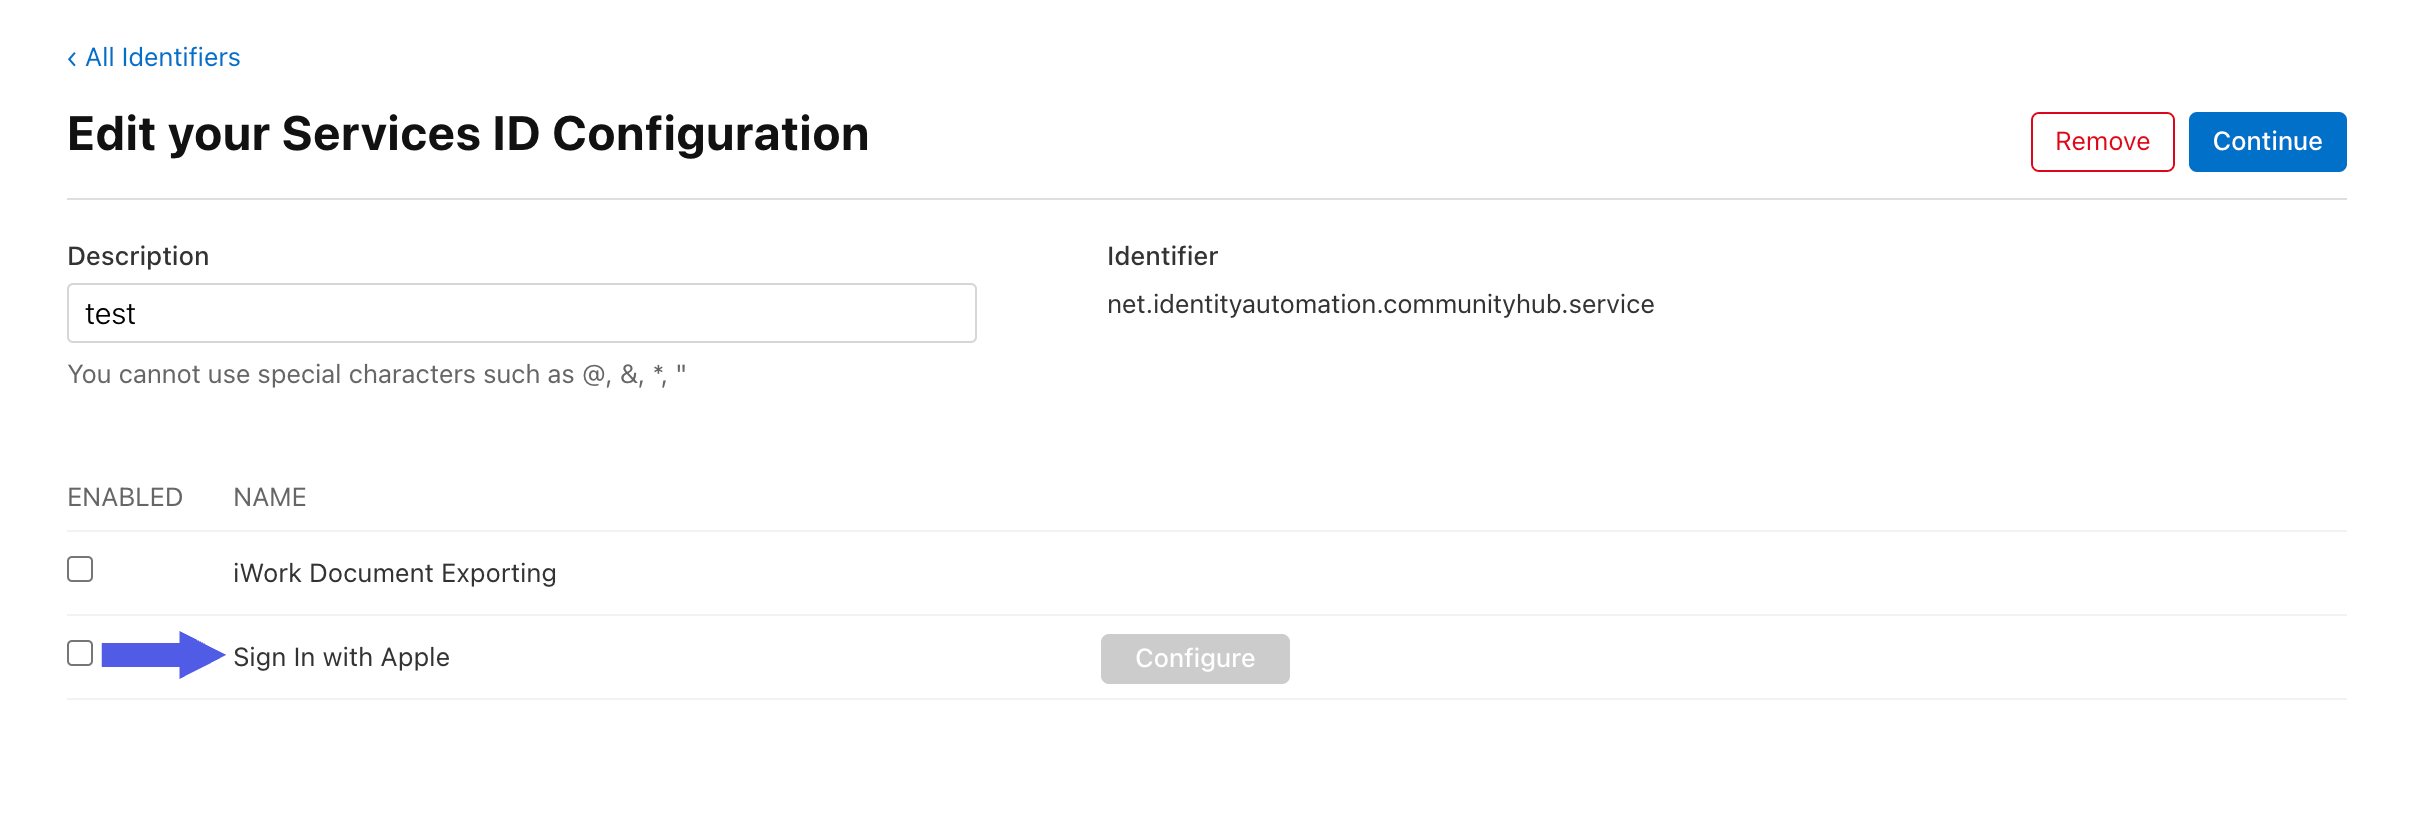
Click on the previously created Services ID, and enable ‘Sign in with Apple’ by checking the box next to it in the list at the bottom of the screen.

Before clicking ‘Continue’ in the top right corner, we need to click ‘Configure’. This button enables when the checkbox next to ‘Sign in with Apple’ is checked.
On this screen, we will need to add the Domain and Return URL for your tenant.

Example Formats:
Domain: <tenant domain>
Return URL without Unified Login: https://<tenant domain>/idp/socialCallback?n=apple
Return URL with Unified Login: https://<tenant domain>/idp/unifiedSocialCallback?n=apple
Once the Domain and Return URL is entered, hit ‘Next’ in the bottom right. You will be able to confirm your data on the next screen, and then click ‘Done’ in the bottom right.
To complete this process, click ‘Continue’ on the ‘Edit your Services ID Configuration’ Screen. You will once again see a screen to confirm all of your details, and if correct, click ‘Save’ in the top right corner.
Step 3: Generate a Private Key
From your Apple Developer Account home screen, navigate to the ‘Certificates, Identifiers & Profiles’ section and click ‘Keys’.
On the Keys Screen, click the blue + button at the top of the screen to create a new key.
Enter a ‘Key Name’ in the field at the top of the screen, and you can choose to add a Key Description but it is not required. Next, click the checkbox next to ‘Sign in with Apple’.

After clicking ‘Continue’ in the top right, you will be prompted to review your selections. To finish this process, click ‘Register’ in the top right corner.
The last step is to download your Private Key, and make a note of your Key ID that will be displayed on the screen. Both of these will be needed to configure the Social Authentication Policy in RapidIdentity.
WARNING
After downloading your key, it cannot be re-downloaded as the server copy is removed. If you are not prepared to download your key at this time, click Done and download it at a later time. Be sure to save a backup of your key in a secure place.
Step 4: Obtain Team ID
Log in to your Apple Developer Account.
Navigate to Membership.

Make note of your Team ID. This will be used to configure the Social Authentication Policy in RapidIdentity.

Step 5: Enable Social Authentication Policy in RapidIdentity
1.Log into your RapidIdentity Tenant Administrator Account, and navigate to Configuration → Policies → Authentication.

Select the Authentication Policy that you will be enabling Social Authentication for, if it was previously created. If not, create an Authentication Policy before going to the next step.
Under the ‘Authentication Methods’ tab for the policy, you will see a list of method options. Click on ‘Social’, and then check the box next to Enabled.

Next, check the box next to Apple, which will open the required credentials to configure this authentication method. Please use the Apple credentials created and gathered in the previous steps to fill in the fields. Once added and saved, the credentials will be obscured in the UI for security purposes.
.png)
Note:
To use your private key, please ensure you exclude the following lines and include only the key itself.
-----BEGIN PRIVATE KEY-----
-----END PRIVATE KEY-----
At this point, Users who fall into the criteria for this policy will be able to authenticate via the Apple Social Authentication method. For more details on the end user experience, please review this document.