Configuring SAML SSO with Google
Google supports a SAML-based Single Sign-On service for its web-based application to configure your Identity Provider (IdP) server connection. In the information provided in the link above, the third-party identity provider is Identity Automation through RapidIdentity Federation.
The preliminary SAML authentication configuration steps require that both RapidIdentity Portal and RapidIdentity Federation IdP are internet accessible and are configured as described.
Follow these steps to configure G Suite for SAML. A G Suite Admin Console login is required to complete this configuration.
Note: Google may update their setup sequence without notification, therefore, the steps below may vary slightly.
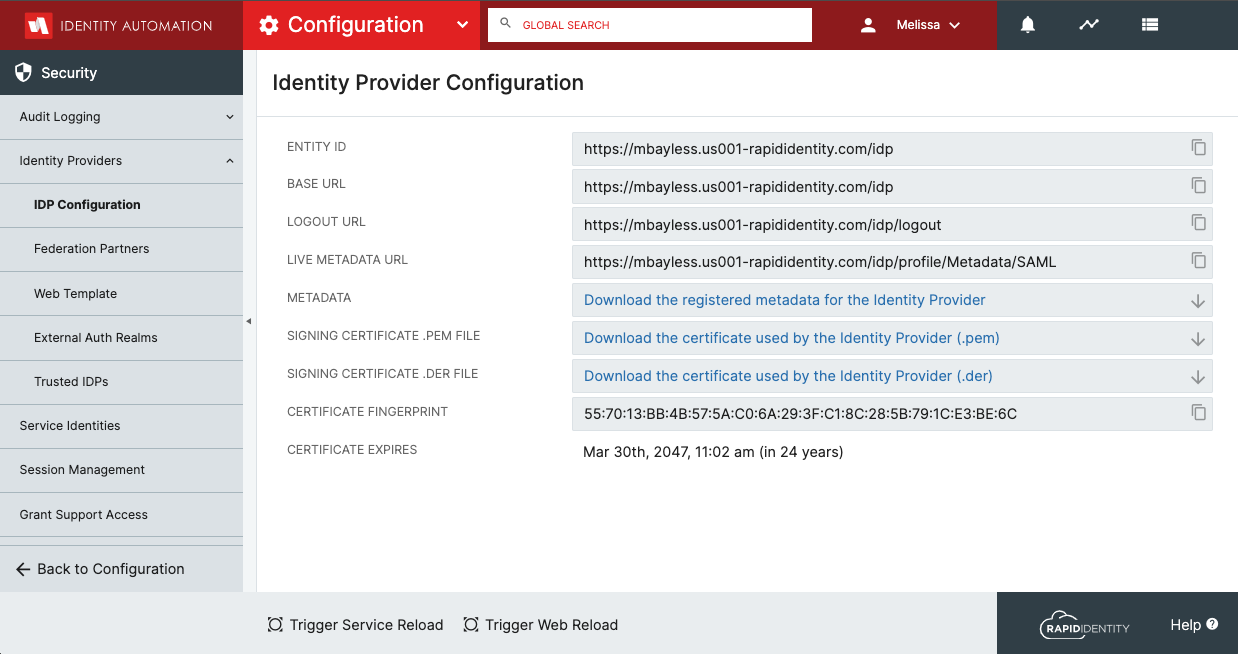
Launch the Identity Provider Configuration Workspace
- From the RapidIdentity Configuration Module, select Identity Providers from the Security menu.
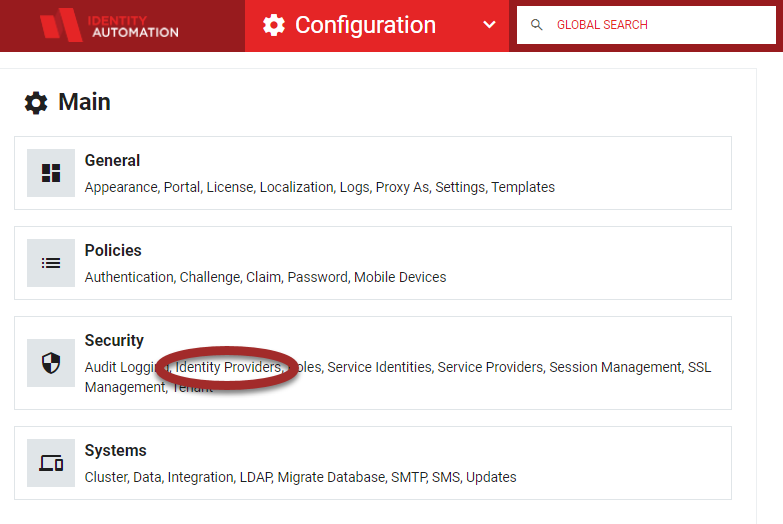
- The Identity Provider Configuration workspace will launch.
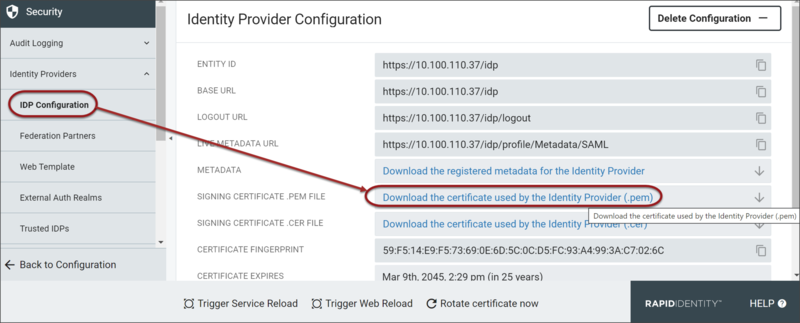
- Click Download the certificate used by the Identity Provider (.pem)to download the certificate.
- Keep this browser window open as the Base URL and Logout URL are necessary during upcoming steps. At that time, the certificate will be uploaded to the G-Suite Admin portal.
Set up SSO in the G Suite Admin Console
- In a different browser window, login to Google Admin Console
- Navigate to Menu
-> Security -> Authentication -> SSO with third party IdP
- Click Set up single sign-on (SSO) with a third party IdP.
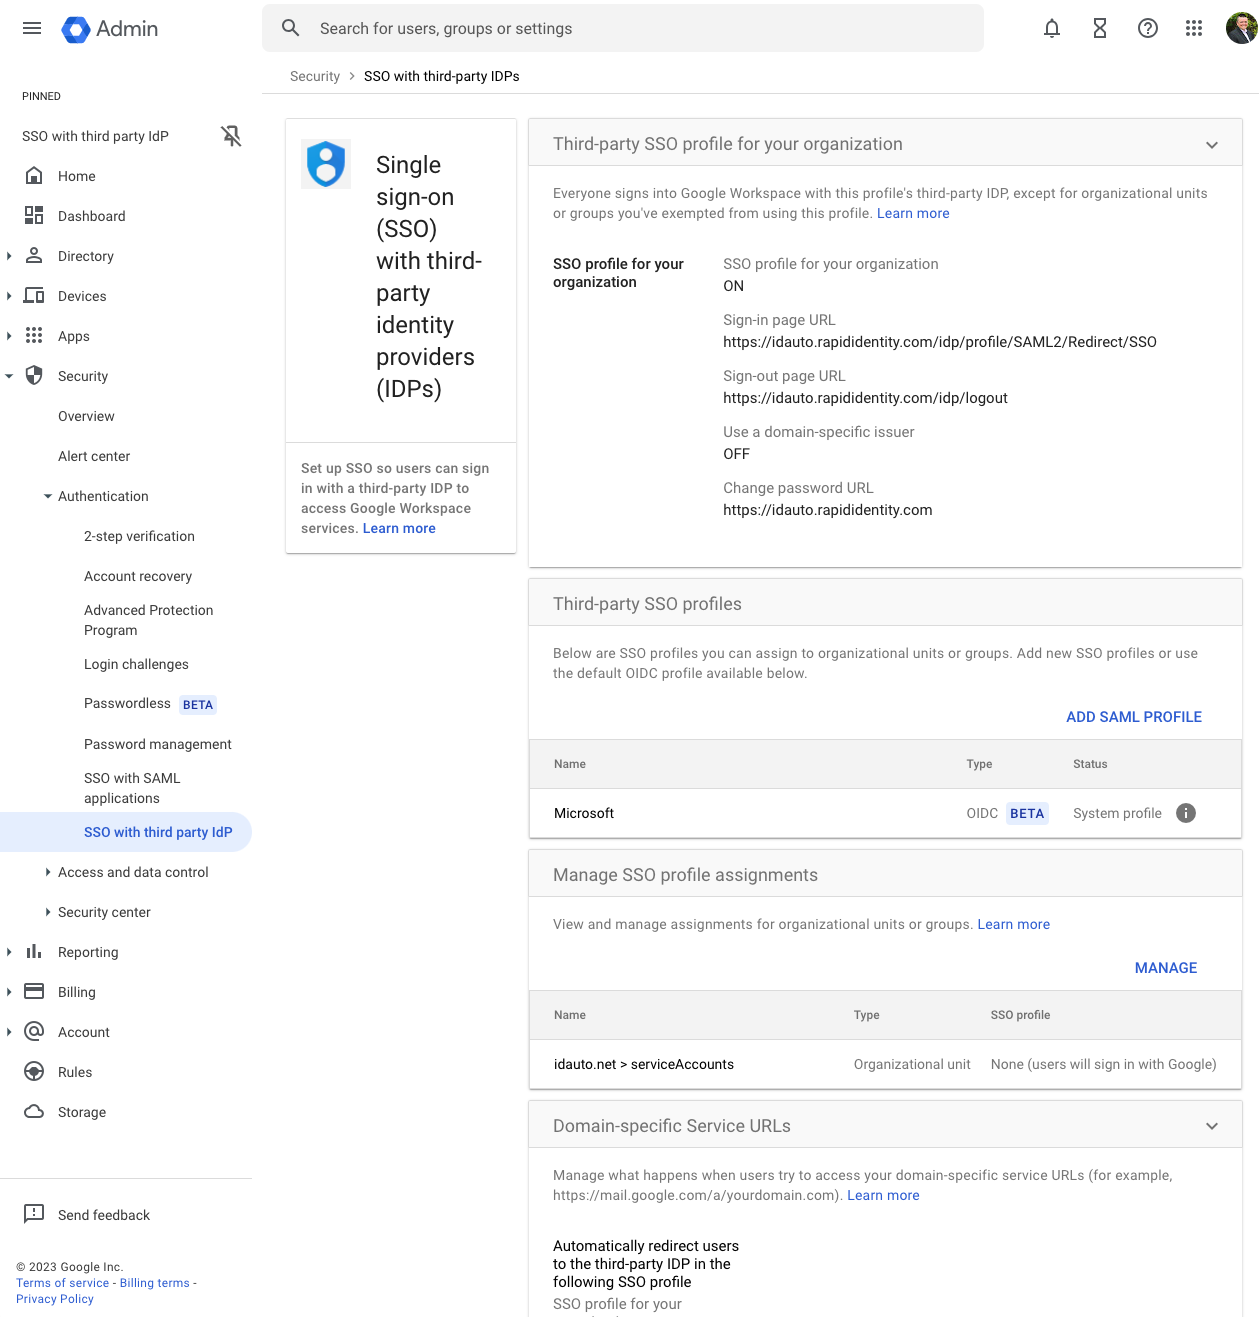
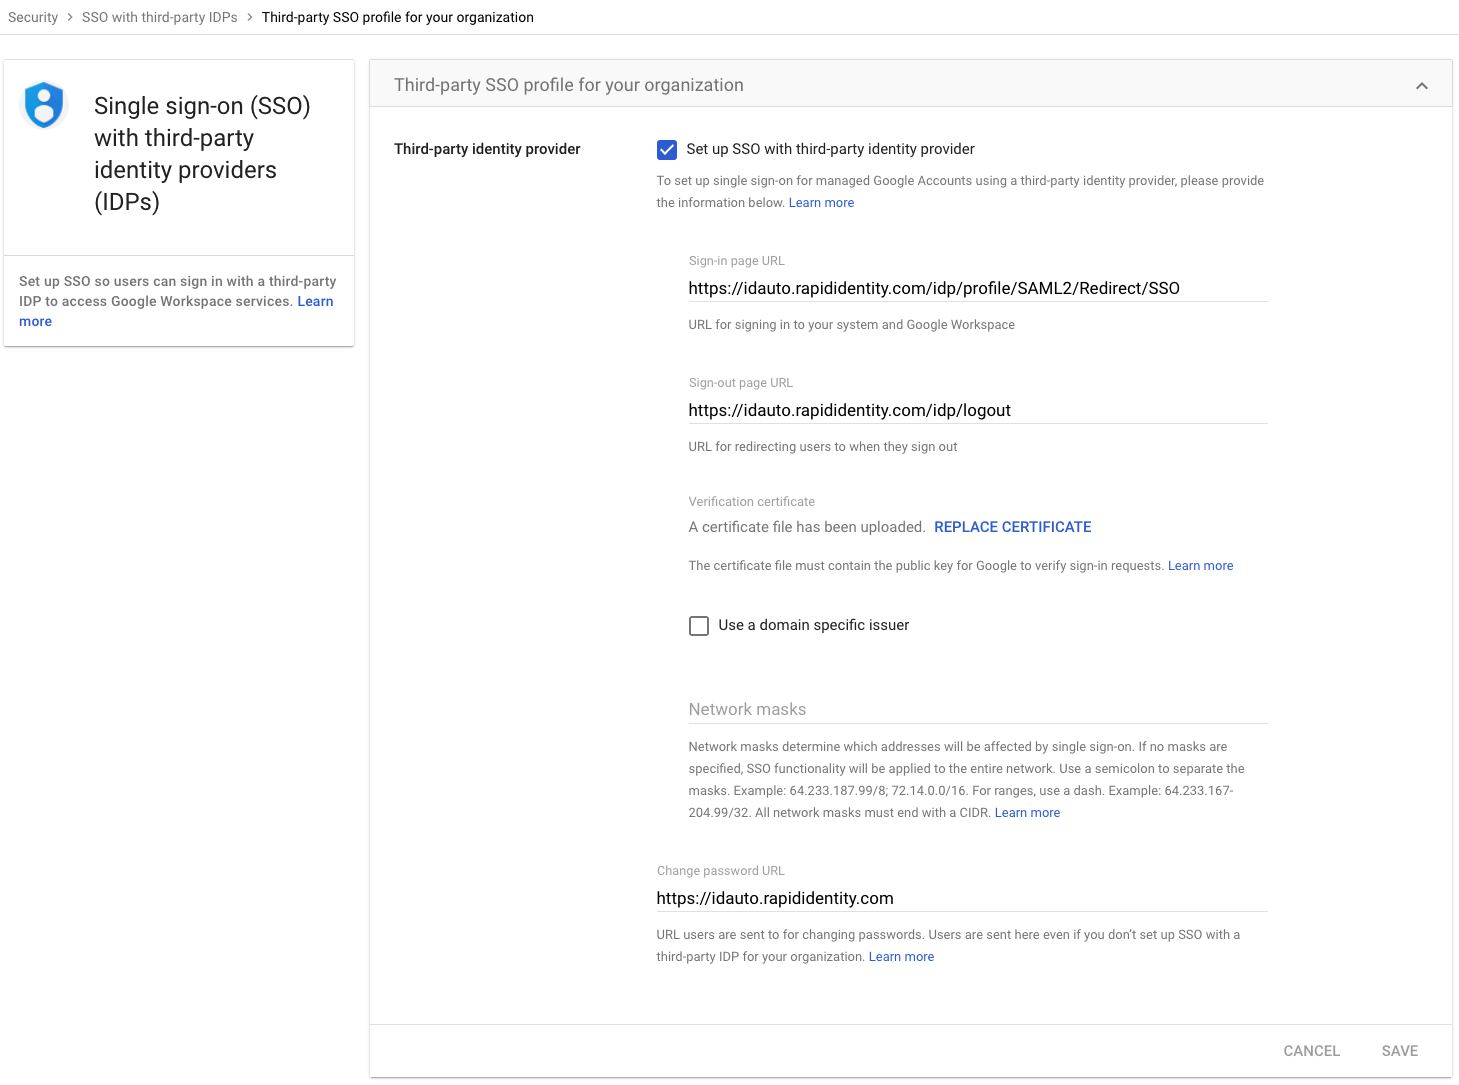
- Click on Third Party profile for your organization to set your settings
- For the Third-party Identity Provider section, enter the information as described below:
- Sign-in Page URL - https://YOUR-RAPIDIDENTITY-TENET/idp/profile/SAML2/Redirect/SSO
- Sign-out Page URL - https://YOUR-RAPIDIDENTITY-TENET/idp/logout
- Use a domain-specific issuer - OFF
- Change Password URL - https://YOUR-RAPIDIDENTITY-TENET
- Click REPLACE CERTIFICATE to upload the certificate that was downloaded in from RapidIdentity.
- Click Save at the bottom of the page to save the configuration.
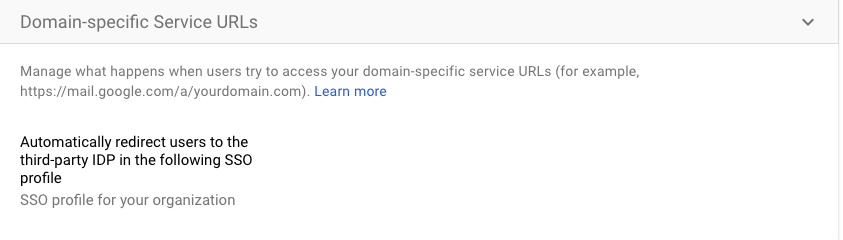
- Click on Domain Specific URLs from the SSO with third party IdP screen and set this setting to Automatically redirect users to the third party IDP in the following SSO Profile
- Create a SAML 2.0 Federation Partner for G Suite
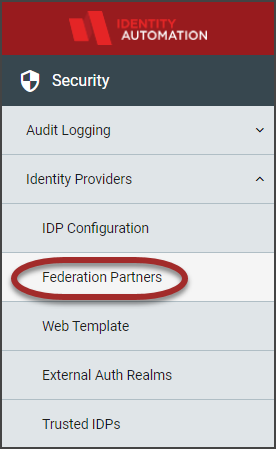
- In the RapidIdentity Configuration module, click Federation Partners from the Identity Providers section.
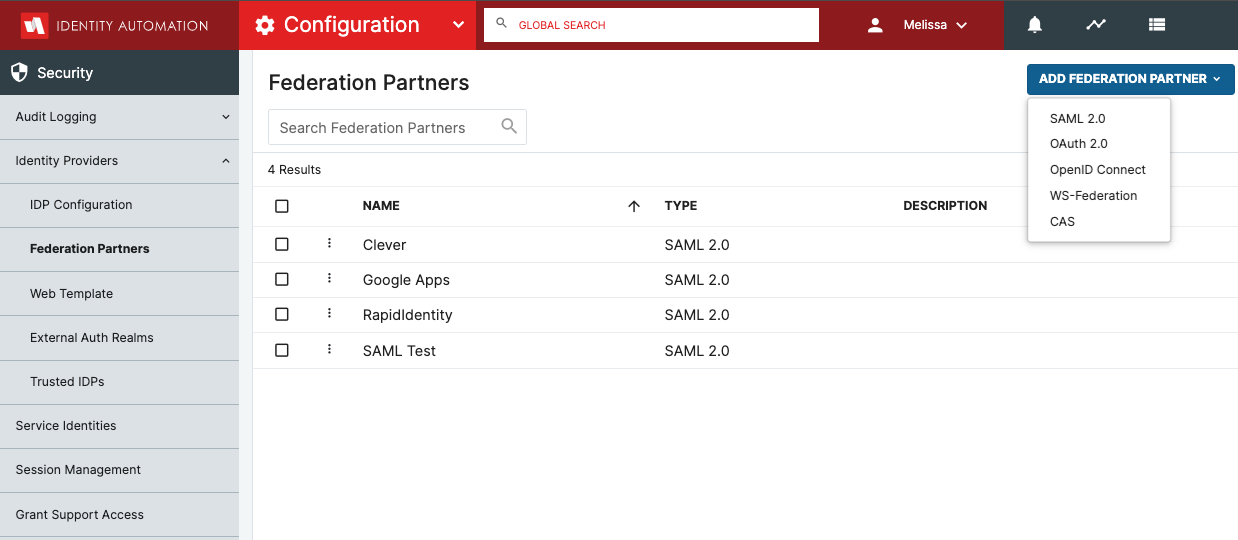
- Click the Add Federation Partner drop-down button and select SAML 2.0.
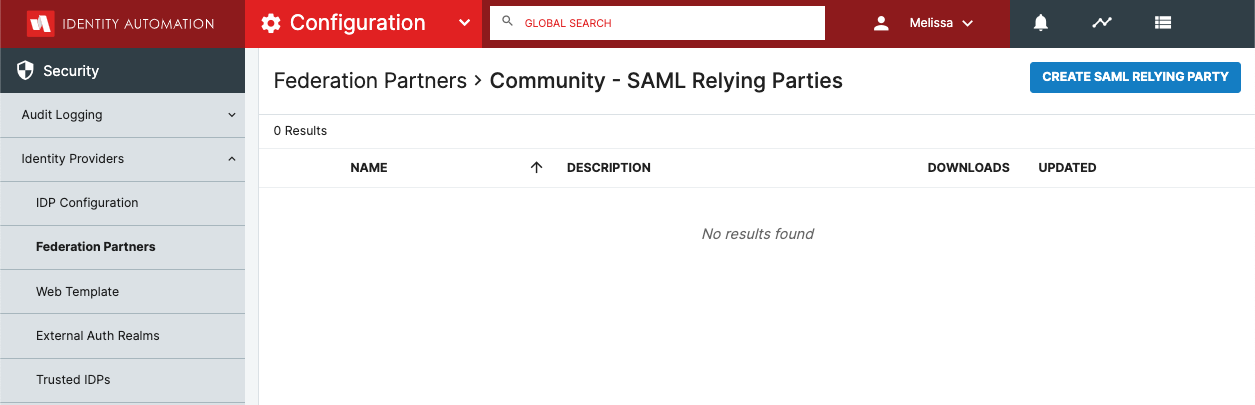
- In the RapidIdentity Configuration module, click Federation Partners from the Identity Providers section.
- Click Create SAML Relying Party
- Open the General section
- set the Name and Descriptionto be Google Apps and Copy Paste the markup code snippet into the METADATA field and be sure to change the YOURDOMAINHERE to your google domain
.png)
<EntityDescriptor entityID="google.com" xmlns="urn:oasis:names:tc:SAML:2.0:metadata">
  <SPSSODescriptor protocolSupportEnumeration="urn:oasis:names:tc:SAML:2.0:protocol">
    <NameIDFormat>urn:oasis:names:tc:SAML:1.1:nameid-format:unspecified</NameIDFormat>
    <AssertionConsumerService index="1" Binding="urn:oasis:names:tc:SAML:2.0:bindings:HTTP-POST"
      Location="https://www.google.com/a/YOURDOMAINHERE/acs" />
  </SPSSODescriptor>
</EntityDescriptor>
- set the Name and Descriptionto be Google Apps and Copy Paste the markup code snippet into the METADATA field and be sure to change the YOURDOMAINHERE to your google domain
10. Open the SSO Settings section and set the values to match below and click Save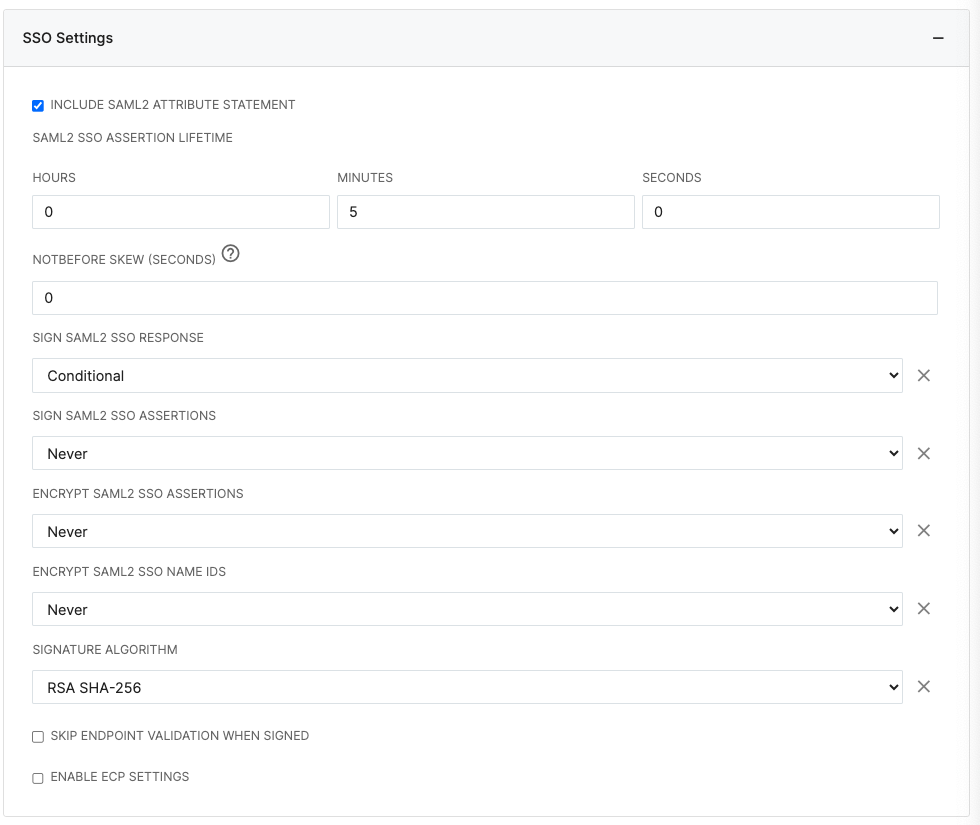
11. Open the Attribute Mapping and Add the Attributes Below (if you do not have these attributes you can click the Add New Attribute+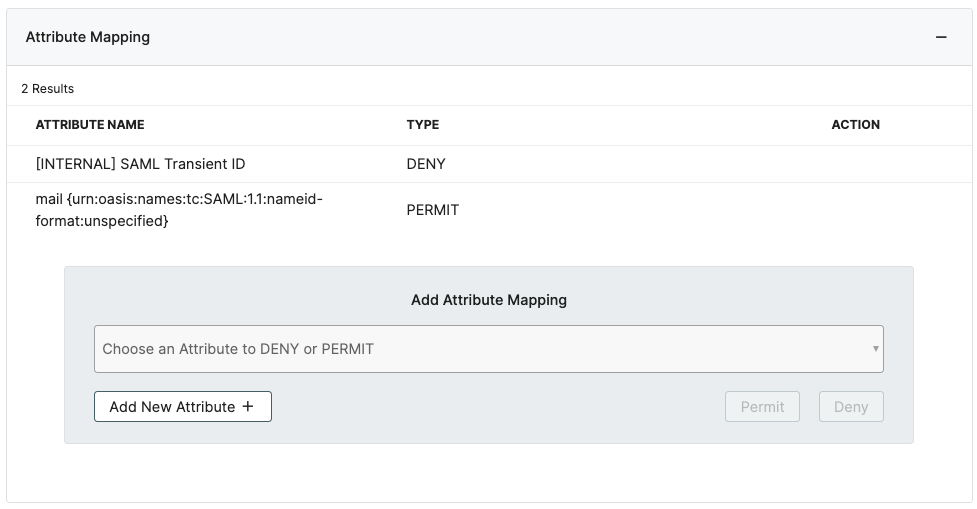
12.Click Save
13. Click on IDP Configuration form the Security Menu and click on Trigger Service Reload and Trigger Web Reload at the bottom