📘 Creating an Active Directory (AD) Service Account for RapidIdentity
This article guides you through the process of creating a service account in Active Directory (AD) for use with RapidIdentity. This account is typically used by RapidIdentity Connect or other RapidIdentity components to read and write user data in your AD environment.
⚠️ Important Permission Notes:
The service account must be granted the Replicating Directory Changes permission at the domain level to enable directory synchronization.
Membership in the Account Operators group is sufficient for most read/write operations (e.g., password resets for standard users, attribute updates).
If the account must manage Domain Admin-level users (e.g., reset passwords or modify attributes), it must be granted Domain Admin privileges.
🧾 Step-by-Step Instructions
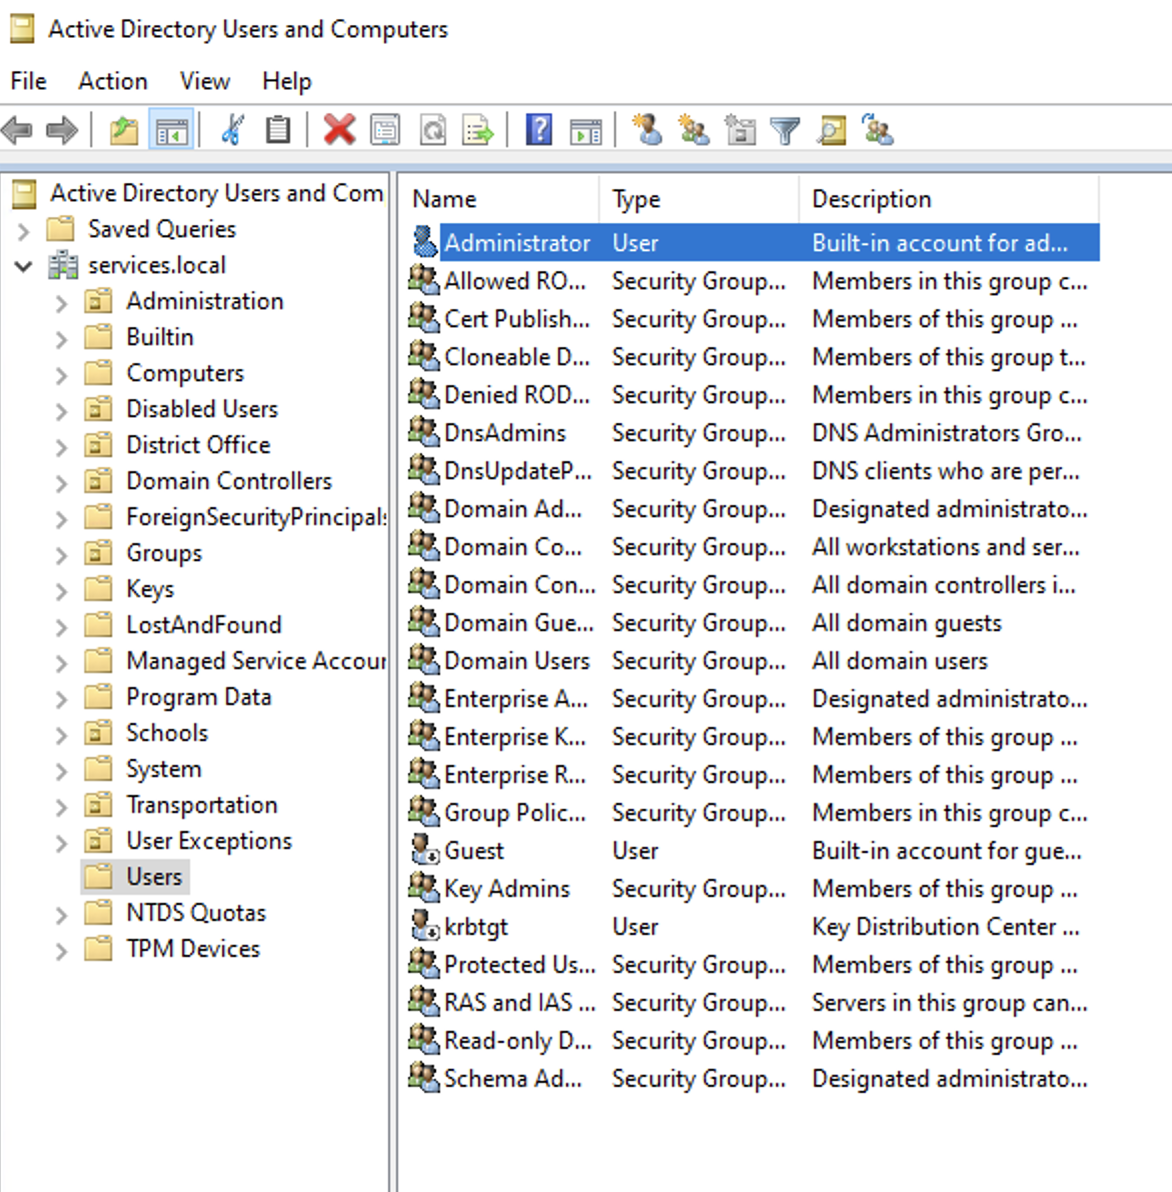
Step 1: Open Active Directory Users and Computers
Log in to a domain controller or a server/workstation with RSAT tools installed.
Launch Active Directory Users and Computers (ADUC).
Navigate to the desired Organizational Unit (OU) where you want to create the service account.
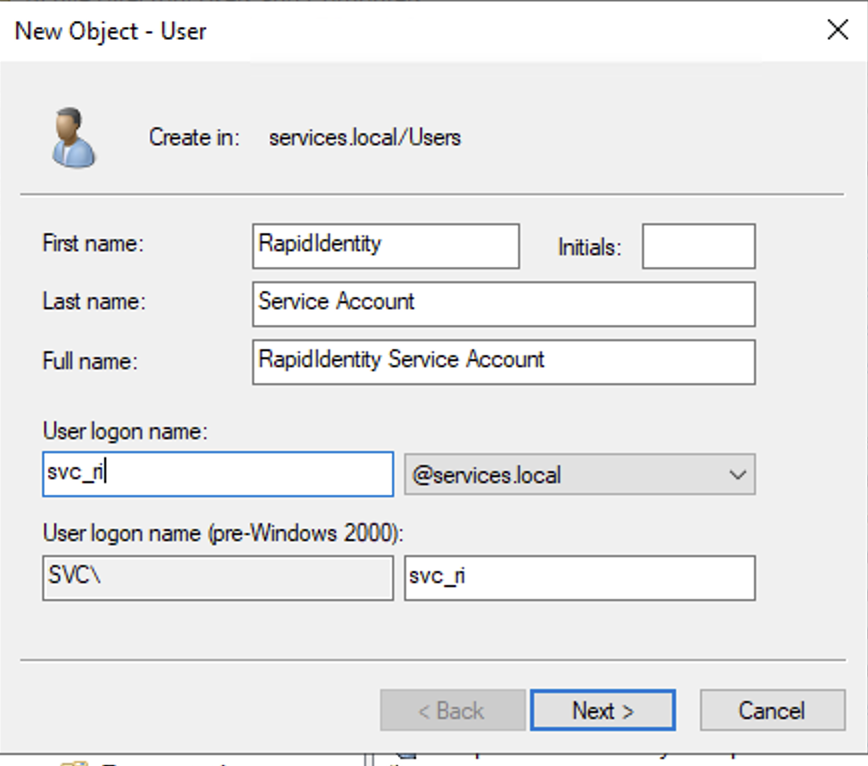
Step 2: Create a New User
Right-click the OU and select New > User.
Enter a First Name, Last Name, and User logon name (e.g., svc_ri).
Click Next.
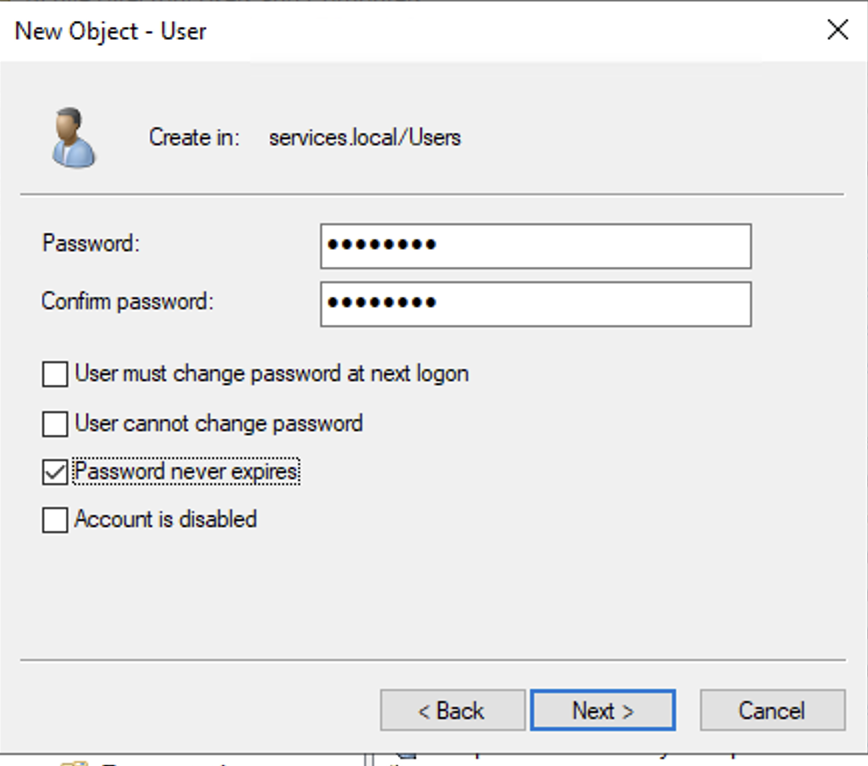
Step 3: Set the Password
Assign a strong password for the service account.
Uncheck "User must change password at next logon".
Check "Password never expires".
Click Next, then Finish.
Step 4: Assign Group Membership (Minimum Required)
Right-click the newly created user and select Properties.
Go to the Member Of tab.
Click Add, then type Account Operators, and click Check Names.
Click OK to confirm.
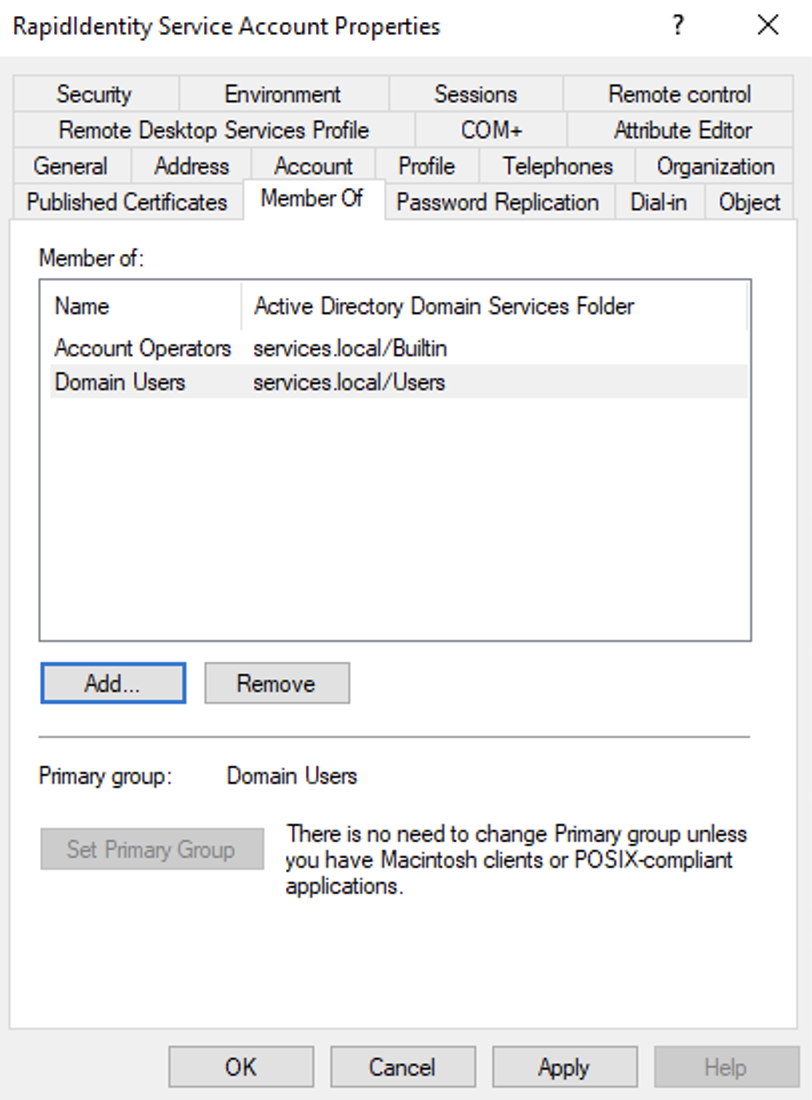
🔐 If you need to manage Domain Admin users, add the account to the Domain Admins group instead.
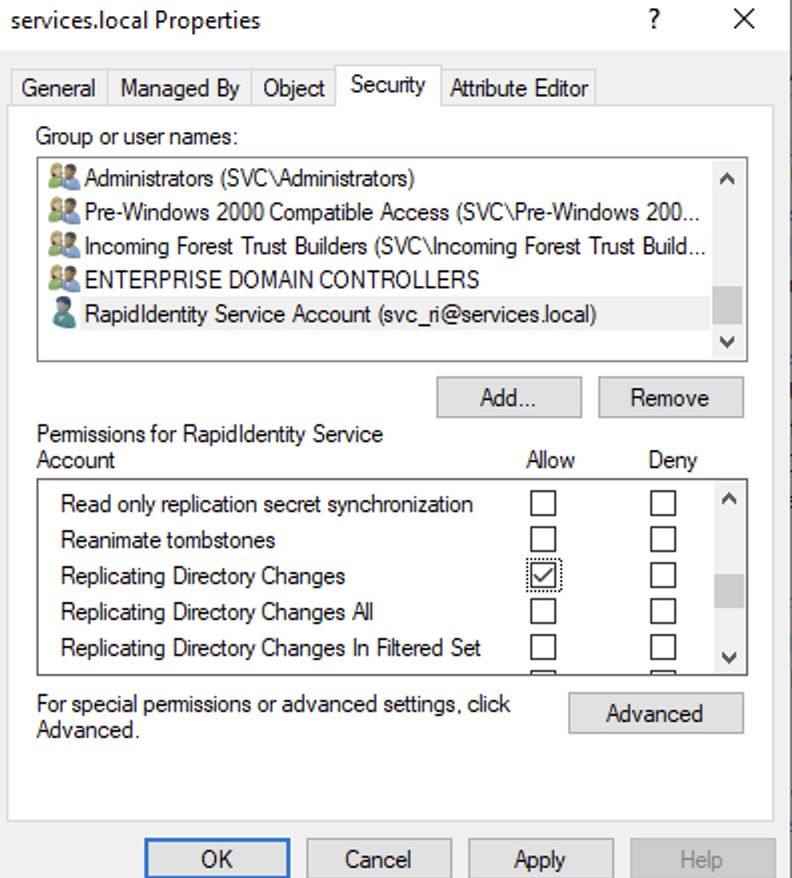
Step 5: Assign "Replicating Directory Changes" Permission
This permission allows the service account to read password hashes and track changes for synchronization.
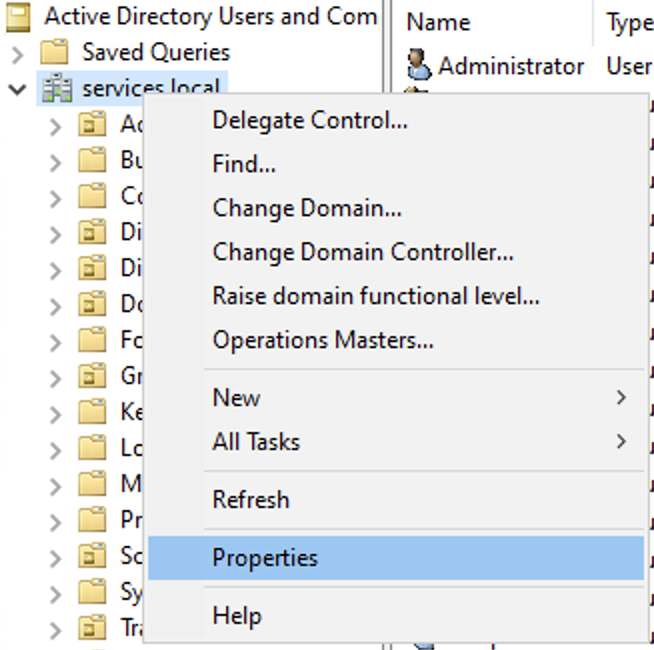
Open Active Directory Users and Computers with Advanced Features enabled (View > Advanced Features).
Right-click the domain node (e.g., yourdomain.local) and select Properties.
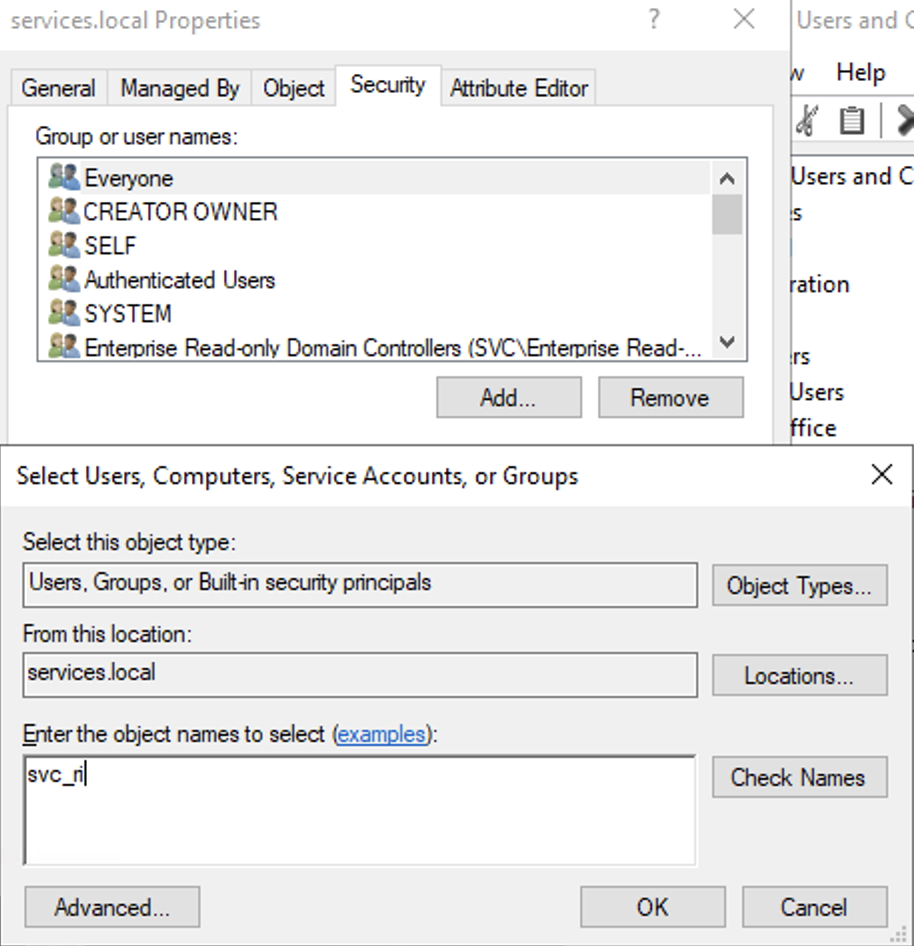
Go to the Security tab, then click Add.
Click Add > Select a Principal, then search for the service account.
Choose the following:
Permissions: Check Replicating Directory Changes
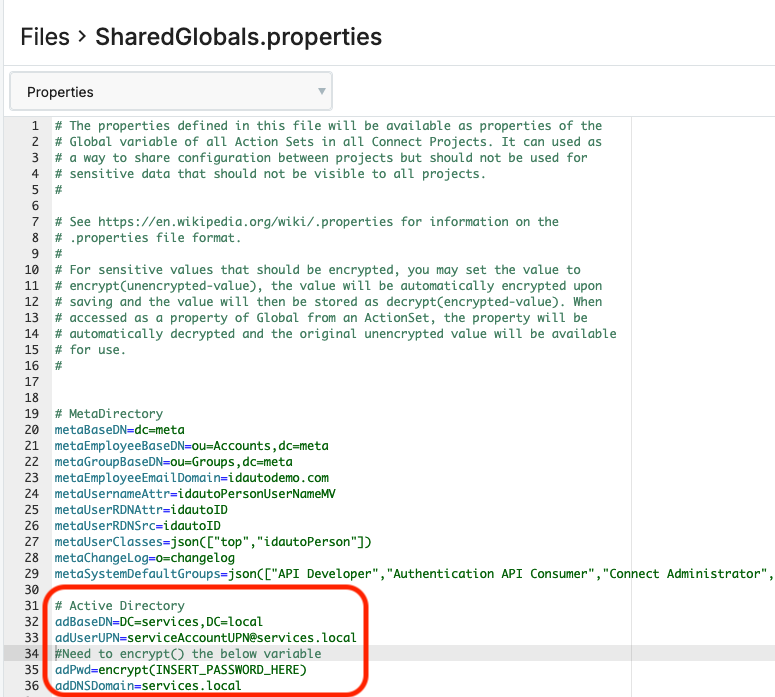
Step 6: Save Credentials in Connect
As the final step, save the credentials inside the SharedGlobals.properties file as described below.
Navigate to Connect via Log in to Portal > Select "Connect" in the main dropdown at the top.
On the left, click "Files".
Under Files, select the "SharedGlobals.properties" file, and click "Edit" at the bottom of the page.
Add in the following highlighted variables (screenshot) into the Shared Globals for Active Directory.
Click "Save" at the bottom of the page.