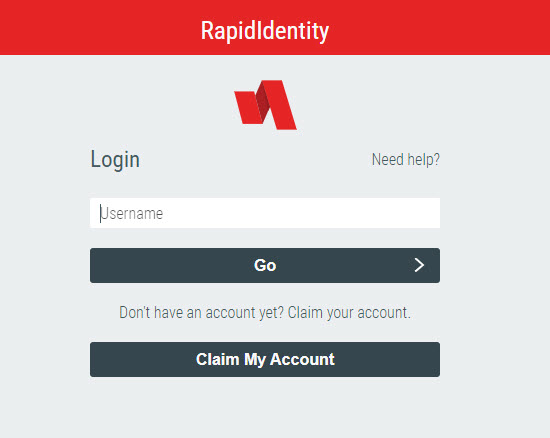
Customizing the Login Page to Your System
This is the default RapidIdentity Login page, but each of these elements can be altered through various Configuration settings to customize for your environment.
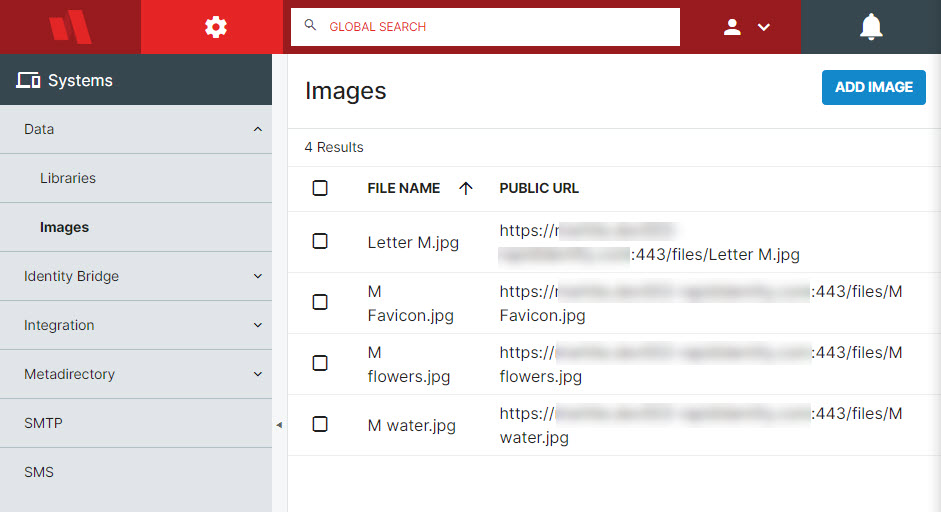
1. Upload Images
First, you need to upload your logos to be used to Configuration > Systems > Data > Images. You will need an image for each of the following elements:
- Login logo
- Favicon (in the browser tab)
- Login background if applicable
- Logos to show in the top left, in both narrow and wide view
Doing this will provide URLs that can be used to insert their values into other fields during the process.
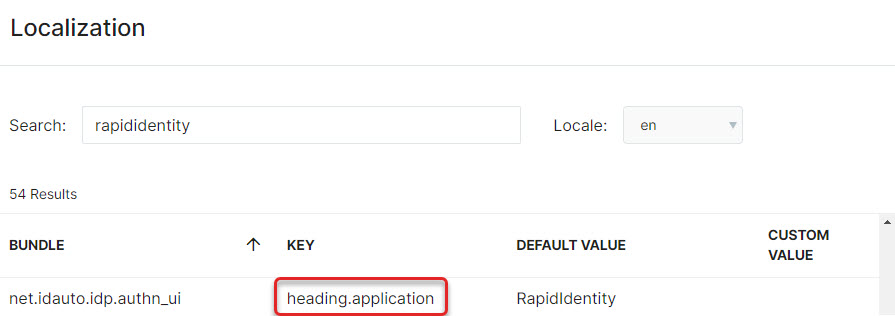
2. Change the Header Text
In Configuration > General > Localization, search for the heading.application setting. (Initially, it is easiest to search for "RapidIdentity", then scroll through the options to find this in the KEY field.)
Hover over the rightmost column and click Edit to change what shows up on the main login screen as a header.
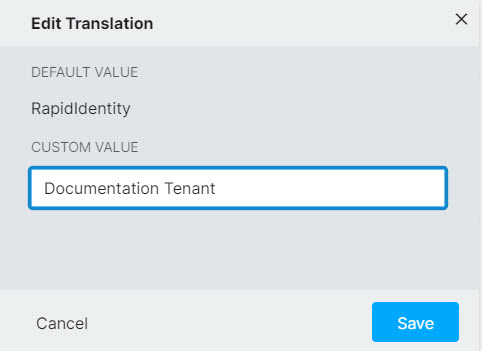
If you find that your header text has not changed, click Refresh Cache on the bottom action bar of Configuration > General > Localization.
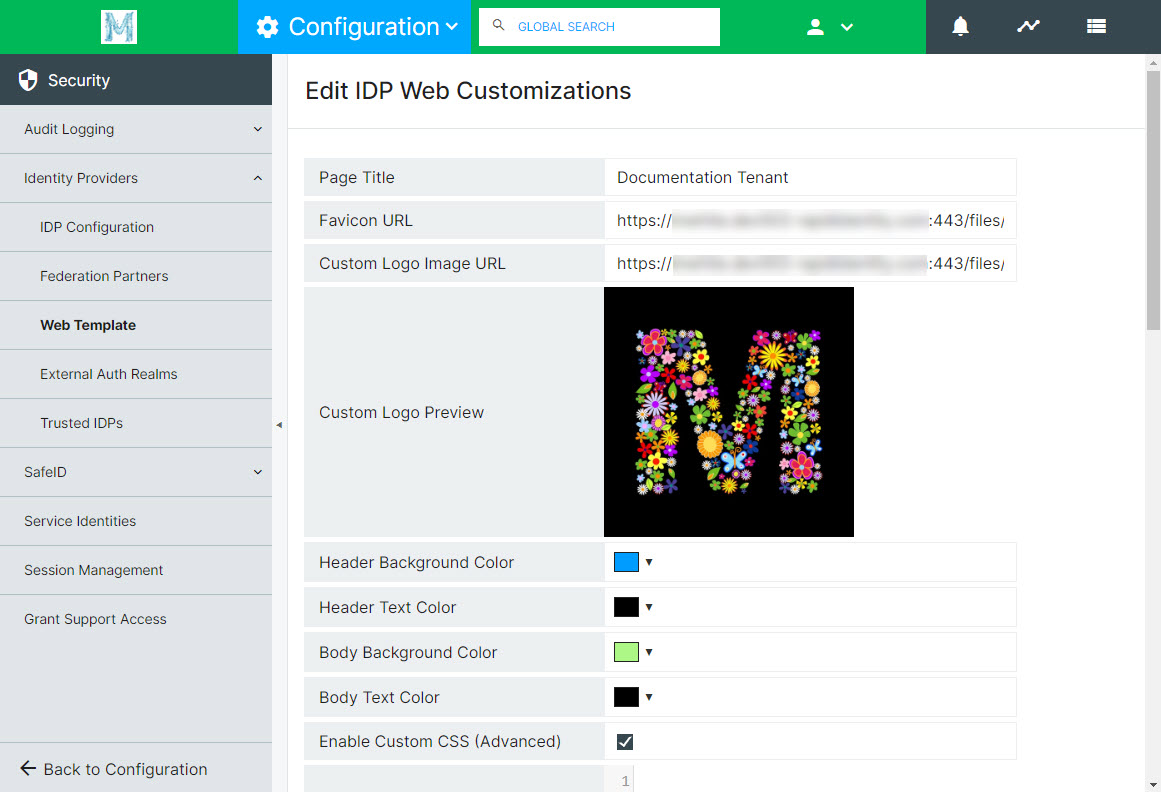
3. Update the Web Template
Next, navigate to Configuration > Security > Identity Providers > Web Template. This is where you will set up the finalized settings for your login page.
-
Page Title: This will show up as the header stripe at the very top of your login page
-
Favicon URL: This will be the icon that shows up in the tab of your browser when on the login page
-
Custom Logo Image URL: This will be the logo that appears between the header stripe and the authentication field.
-
Set up the colors for the header, header text, background, and body text. Enable Custom CSS if you have any CSS that you would like to apply to the logo, to enlarge, decrease, or apply other changes dynamically.
-
Don't forget to Save! Then click Trigger Web Reload and refresh your browser for the changes to take effect.
-
On this screen, scroll down and click the checkbox next to Load Helplinks in Same Tab/Window for more user-friendly Claim Account and Forgot Password processes.

-
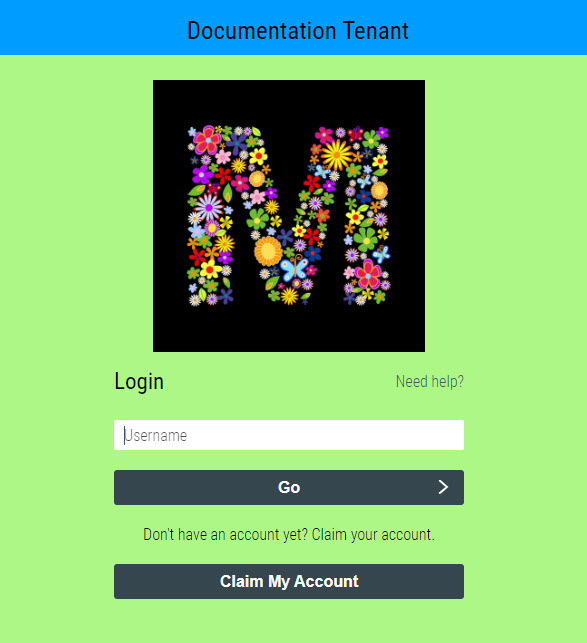
To verify all changes have occurred, Log Out and view your new Login Page!
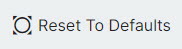
You can always click Reset to Defaults in Configuration > Security > Identity Providers > Web Template to return your Login page to the RapidIdentity Defaults and begin a new customization theme.
4. Set Up Logged In Preferences
To update the rest of the branding on the rest of the system after login, go back to the Configuration main menu and navigate to Configuration > General > Appearance. Here is where you will place the logo URLs to be used for Wide Logo, Narrow Logo, and Favicon. You will likely need to switch between this window and Configuration > Systems > Data > Images to copy/paste the URLs provided. Make sure to Save after each addition. You can also change the default colors to show up in the top bar of the user's RapidIdentity experience.
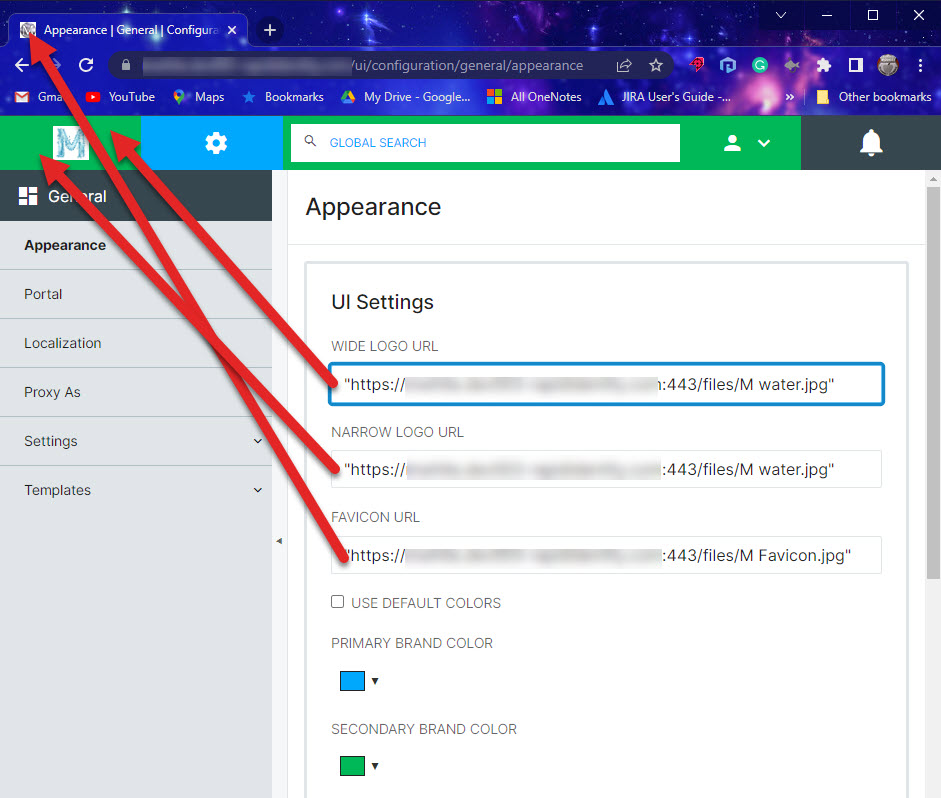
Image URLs with spaces in them must be surrounded by quotation marks (") in order to register in the system properly.