Windows Authentication Client Project Setup, Installation, and Upgrade on a VM
OVERVIEW: This document includes Project Setup creation and Setup Installation process on VM.
Note:
RapidIdentity Client for Windows is for RapidIdentity Cloud only and is not meant for on-premise systems. Installing the RapidIdentity Client for Windows requires an API Key for the RapidIdentity Cloud tenant. An API Key is associated with a Service Identity in RapidIdentity. Instructions for creating a Service Identity are here.
AuthClient Setup Installation on VM
We have two methods to install the RapidIdentity Authentication Client for Windows.
Silent Install
- Open command prompt as Admin user on a Windows 10 machine.
- Run this command:ActionScript
msiexec.exe /i "RapidIdentity Client for Windows.msi" /quiet /passive APIKEY="your secret api key" SERVER_URL="your server url" DOMAIN="."- Example: msiexec.exe /i "C:\AuthC_install\RapidIdentity Client for Windows.msi" /quiet /passive APIKEY="$s5TOu3vlTlabyHe9Q17AgQ==.1KRQp0gAoOdIvGdZqS02Te2HzxzIpU85/uv0TD5uVWQ=$" SERVER_URL="https://iac53adaf6cd3d440c8f5765dc08fc8f6c.dev-rapididentity.com DOMAIN="."
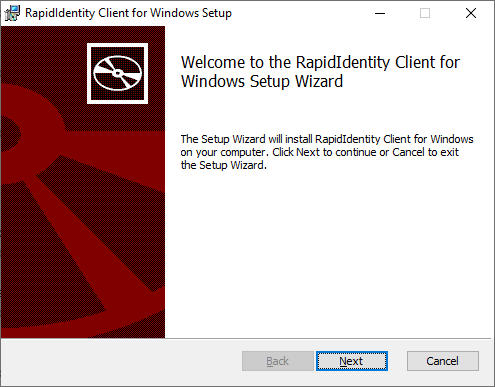
Installation with Wizard
- Log in to the Windows 10 machine as an Admin user, and navigate to the folder that has the Windows Client installer.
- Open Rapididentity Client for Windows setup screen. Right-click on the installer file and click on install, then click Next on the Windows Setup Wizard to begin the installation.
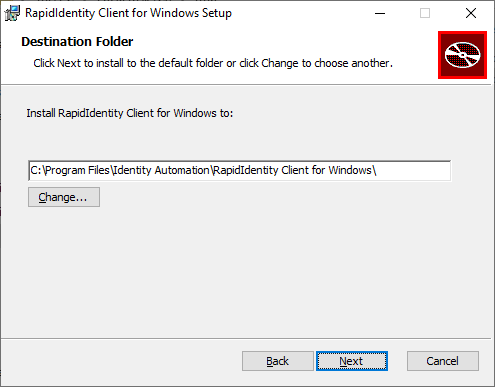
- On validation, it opens the destination folder screen. Click Next.On the Configuration screen, fill in the following fields as noted below. Click 'Next' when complete.
- Domain: Accounts will authenticate to this domain. NOTE: Use DOT (.) to use a local account in a Non-Domain-joined installation or the NetBIOS name of the Domain in a Domain-joined installation.
- Server URL: Server URL
- API Key: Secret API Key generated in RapidIdentity Service Identities Server.
- For further details on where to locate the Secret Key, see Step 6 of this article
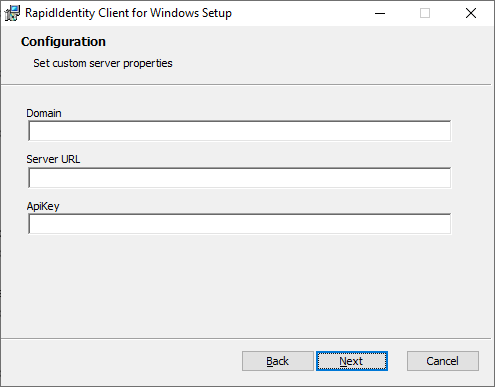
- For further details on where to locate the Secret Key, see Step 6 of this article
- Click Install and the installation process will begin. Next, the Ready to Install window will open. Select the folder in which the file is to be installed and click Next.
- Once done, it displays the completion screen with a Finish button. Click on Finish, and the Installer window closes.
- Open Control panel > Programs > Uninstall a Program, and you will see RapidIdentity Client for Windows is displayed in the list.
Upgrade
The user can upgrade RapidIdentity Client for Window MSI silently and with the help of Wizard. When the user already has a previous installer on their machine and wants to upgrade, the User needs to download the Upgraded setup on their machine first.
Silent Upgrade: This process will automatically pick previous configurations.
- Open command prompt as an admin user on the Windows 10 machine
- And run this command:ActionScript
(example : msiexec.exe /i "C:\AuthC_install\RapidIdentity Client for Windows.msi" /quiet /passive)msiexec.exe /i "RapidIdentity Client for Windows.msi" /quiet /passive - AuthClient should be Upgraded successfully user can check the version of setup in the control panel
Upgrade via the Wizard
- Login to the windows 10 machine as an Admin user and navigate to the Windows auth client installer folder.
- Double click on the New installer setup.
- The user will get a window in with filled configurations (the same configuration on which the previous installer is installed).
- The user needs to do next and finish the upgrade process.
Please Note:
The Windows Authentication Client does not support the Remote Desktop Protocol.
The Windows Authentication Client does not support the Remote Desktop Protocol.