Creating a SAML SSO Federation with Canvas
Canvas supports several authentication services, including SAML, that can be used to establish RapidIdentity as the Identity Provider for Canvas.
Creating a SAML SSO Federation beween Canvas and RapidIdentity requires administrative privileges in both systems.
Configure Canvas for SAML SSO with RapidIdentity:
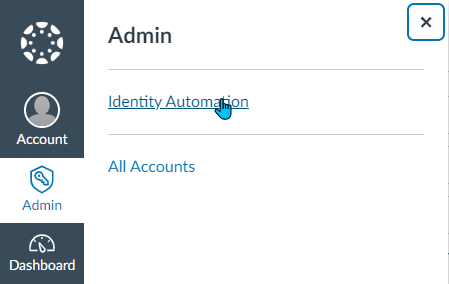
As a Canvas Administrator within the Canvas Application:
-
Select "Admin" from the left-hand navigation menu and choose the Account you want to federate.
-
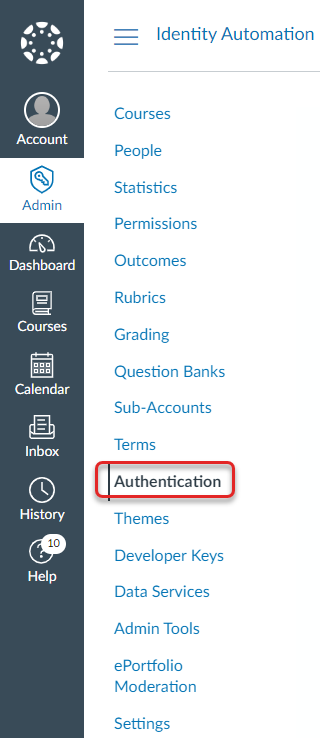
Select "Authentication" from the left-hand navigation sub menu.
-
Scroll to the SAML section in the Authentication Settings menu on the right-hand side, and enter the following information in the appropriate fields:
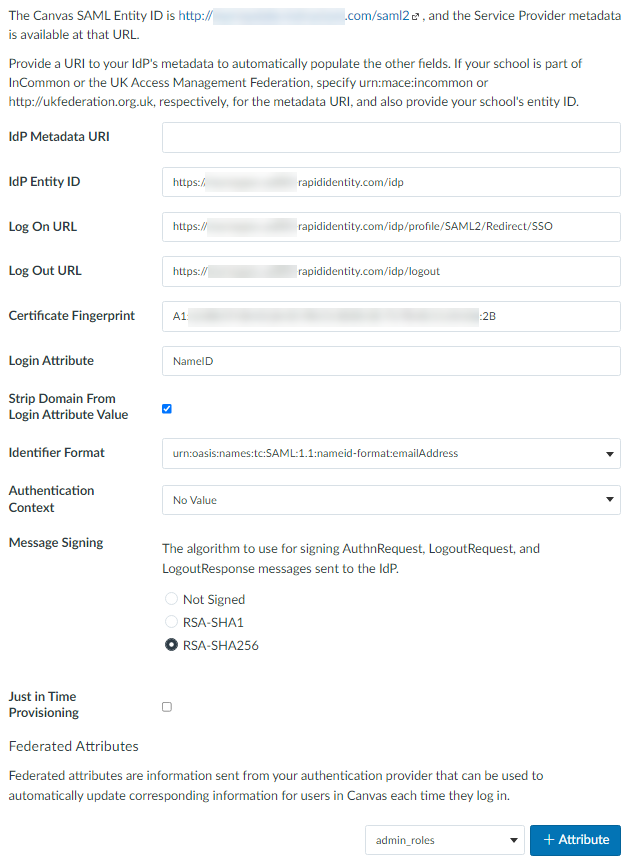
a. Enter the RapidIdentity Live Metadata URL in the IdP Metadata URI field. Note that this field is optional. Canvas uses this field to pre-populate the rest of the input fields. At the time this document was written, there is a known error Metadata uri invalid schema that doesn't allow for the saving of the configuration. If you receive this error, simply leave this field blank.
b. Enter the RapidIdentity Entity ID in the IdP Entity ID field.
c. Enter the RapidIdentity Base URL in the Log On URL field.
d. Enter the RapidIdentity Logout URL in the Log Out URL field.
e. Enter the RapidIdentity Certificate Fingerprint in the Certificate Fingerprint field
All information outside of the Log On URL can be found at https://[RapidIdentity Cloud Host]/ui/configuration/security/identity-providers/idp. The Log On URL can be found within the RapidIdentity Metadata located at https://[RapidIdentity Cloud Host]/idp/profile/Metadata/SAML under the SingleSignOnService tag with the attribute binding of urn:oasis:names:tc:SAML:2.0:bindings:HTTP-Redirect.
f. Enter NameID for the Login Attribute and collaborate with the RapidIdentity Tenant Administrator to ensure that RapidIdentity sends the appropriate data value in the NameID Assertion that will match a data value in each user's profile in Canvas.
The SAML NameID assertion sent from the IdP should be used for the Login Attribute in Canvas and must include a data value that matches a data value that exists in each user's Profile in Canvas. Typical values include the user's Full Name, Display Name and Default Email.
Don't forget to share the expected data value with the RapidIdentity Tenant Administator and let them know it's to be returned on the SAML NameID assertion.
- Set the Strip Domain From Login Attribute Value to true.
-
If you are using the mail attribute as the data value sent in the NameID assertion from RapidIdentity select
urn:oasis:names:tc:SAML:1.1:nameid-format:emailAddress for the Identifier Format value. -
Leave the Authentication Context set to No Value.
-
Set Message Signing to RSA-SHA256.
-
Copy the Canvas SAML Entity ID URL and the Direct Login URL that are listed at the top of the SAML configuration section, and provide them to the RapidIdentity Tenant Administrator so they can configure SAML SSO with Canvas in RapidIdentity.
Example
-
Also let the RapidIdentity Administrator know the User Attribute that should be sent in the NameID Assertion
Configure RapidIdentity for SAML SSO with Canvas
As a RapidIdentity Tenant Administrator within RapidIdentity:
-
Select Configuration from the Module Selector at the top of the screen.
-
Select Identity Providers from the Security Section.
-
From the the Identity Providers > (IDP) Configuration Screen:
- Copy the Live Metadata URL, Entity ID, Base URL, Logout URL and Certificate Fingerprint and provide them to the Canvas Administrator so they can configure SAML SSO with RapidIdentity in Canvas.
-
Select Federation Partners from the left-hand navigation bar.
-
Click the Add Federation Partner button at the top of the screen and choose SAML 2.0 from the drop-down menu.
-
Click the Create SAML Relying Party button at the top of the screen and open the General section.
-
Enter a name for this SAML configuration (Canvas SAML SSO would be an appropriate name)
-
Enter a description for this SAML configuration (This is not required, but may be useful to other administrators in the future).
-
Using the Canvas SAML Entity ID URL from the Canvas Administrator:
-
Open the URL in a separate browser tab.
-
Copy the contents of that URL into the clipboard.
Copying the Canvas MetadataCopy the entire contents of the Canvas SAML Entity ID URL from the <md: EntityDescriptor to the </md: EntityDescriptor> statements.
-
-
Paste the contents of the Canvas Metadata into the Metadata input area.
-
Leave the default SSO Settings.
-
Open the Attribute Mapping Section.
-
Click Add New Attribute from the button in the Add Attirbute Mapping window to add the attribute to be sent from RapidIdentity to Canvas with a data value that will match a data value on the Canvas User's profile.
Use the NameID for the Canvas Login AttributeThe SAML NameID assertion that RapidIdentity sends to Canvas should be used for the Login Attribute in Canvas and, when used, must include a value that matches a value that exists in each user's Profile in Canvas.
Typical values include the user's Full Name, Display Name or Default Email.
Collaborate with the Canvas Administrator to choose the appropriate attribute, like the mail attribute for example, that is guaranteed to have matching data values in both RapidIdentity and Canvas. Another attribute values typically used in the NameID assertion from RapidIdentity is the sAMAccountName
-
Select Name ID from the Select New Attribute Type.
-
Enter mail in the LDAP Attribute field (if you are using the user's email as the data value to be sent in the assertion, otherwise, choose the attribute that contains the appropriate data value).
-
Select Email Address in the Name Format (if you are using the user's email).
-
Click the Create button to save this attribute.
-
In the Add Attribute Mapping window, click the Choose an Attribute to DENY or PERMIT drop down menu and select the mail {urn:oasis:names:tc:SAML:1.1:nameid-format:unspecified attribute from the list and click the Permit button.
-
Click the Save button to save your changes.
-
Click the Trigger Service Reload button at the bottom of the screen to update the running RapidIdentity service with your changes.
Create an SSO Application for Canvas in RapidIdentity
This is an optional step but necessary if your users leverage RapidIdentity's SSO Portal or Applications Module to access their SSO applications.
As a RapidIdentity Tenant Administrator within RapidIdentity:
-
Select Applications from the Module Selector at the top of the screen.
-
Select Catalog from the left-hand navigation menu and click the Add Application button at the top of the screen.
-
Enter a NAME for the application. This is the label associated with the application that users will see on their Dashboard, in their Applications module and in their SSO Portal if so configured. In this instance, Canvas LMS would be an appropriate name.
-
Use the pencil tool in the ICON area to select an icon from the icon library or upload a new icon from your device.
Notes:- Uploaded icon size is limited to 128kb
- The background and/or boarder color around the icon can be selected using the color picker or entering the HTML color code in the ICON area if desired
-
Enter a brief DESCRIPTION of the application to provide context for your users. Three lines of of the description is shown with the Application when displayed in the Applications Module Card View.
-
Select the CATEGORIES associated with the application from the drop down menu if so desired.
-
Set the STATUS to enable the application for use when ready
-
Use the Direct Login URL from the Canvas Administrator for the Application URL
Example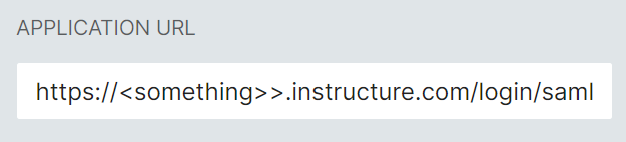
-
Check the REQUIRE BOOKMARK if you want the SSO Application to show on the user's Dashboard screen in Enterprise View and assign a numeric value other than 0 for Priority if you want it to appear ahead of other SSO Applications on the user's Dashboard and Application screens in Enterprise View.
Note:Bookmarks and Priorities defined on the SSO Application only apply to Applications in Enterprise View. Bookmarks and Priorities in the SSO Portal (Classroom View) are configured in SSO Portal Personas.
-
Click the Save button at the bottom of the screen to save the SSO Application definition.
Test the SAML SSO Federation between Canvas and RapidIdentity
Once the Canvas configuration and RapidIdentity configuration is complete, you can test the federation using a user account that exists in both RapidIdentity and Canvas in several different ways. However, if you created an SSO Application for Canvas, the easiest method woud be to log the user account into RapidIdentity and launch the Canvas SSO Application.
If the user is able to access Canvas without having to enter their user credentials the SAML SSO federation is complete.