Install and Configure Azure AD Connect to Sync On Premises AD Users
- 02 Apr 2025
- 4 Minutes to read
- Print
- DarkLight
Install and Configure Azure AD Connect to Sync On Premises AD Users
- Updated on 02 Apr 2025
- 4 Minutes to read
- Print
- DarkLight
Article summary
Did you find this summary helpful?
Thank you for your feedback!
Install and Configure Azure AD Connect to Sync On Premises AD Users
We're going to see the steps on how to install and configure Azure Active Directory Connect tool on domain controller (Windows Server) to sync on premises active directory users with Azure Active Directory.
Installation Prerequisites
A domain-joined host server running Windows Server 2016 or greater with a minimum of 4-GB RAM and .NET 4.7.2+ runtime. One can visit this link for detailed configuration. Windows 10 or later machine domain joined to domain controller.
Before we start the Azure AD Connection with our on premise AD user should have an user on Azure with Global Administrator role. For Example we have a user here having 1 role assigned (Global).
.png)
.png)
Download .NET 4.7.2+ (or any latest) framework runtime: Download
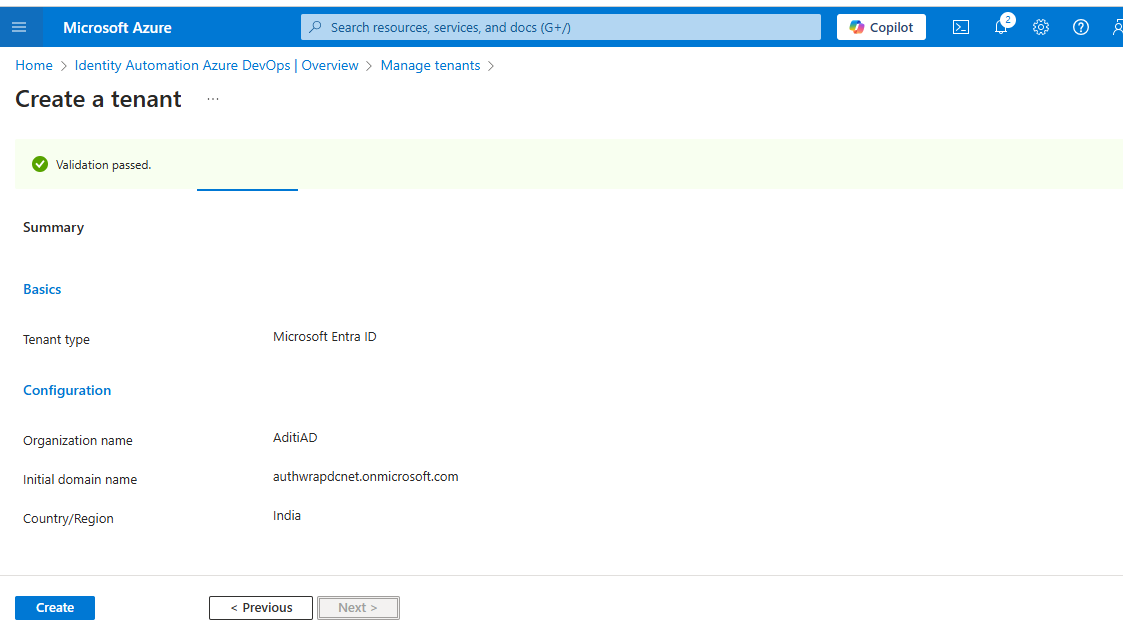
Create a new EntraID tenant in order to Sync a new domain/OU and add the Global Admin user under this tenant.
Make Google Chrome as your default browser instead of Edge for better experience.
Create a user on your on Premise AD with following permissions, if you want to use existing AD user (at step 12: AD Forest Account) and select “Use existing AD account” option.
.png)
Steps for Installing Azure AD Connect
Sign in to the Azure portal using an account with global administrator permissions.
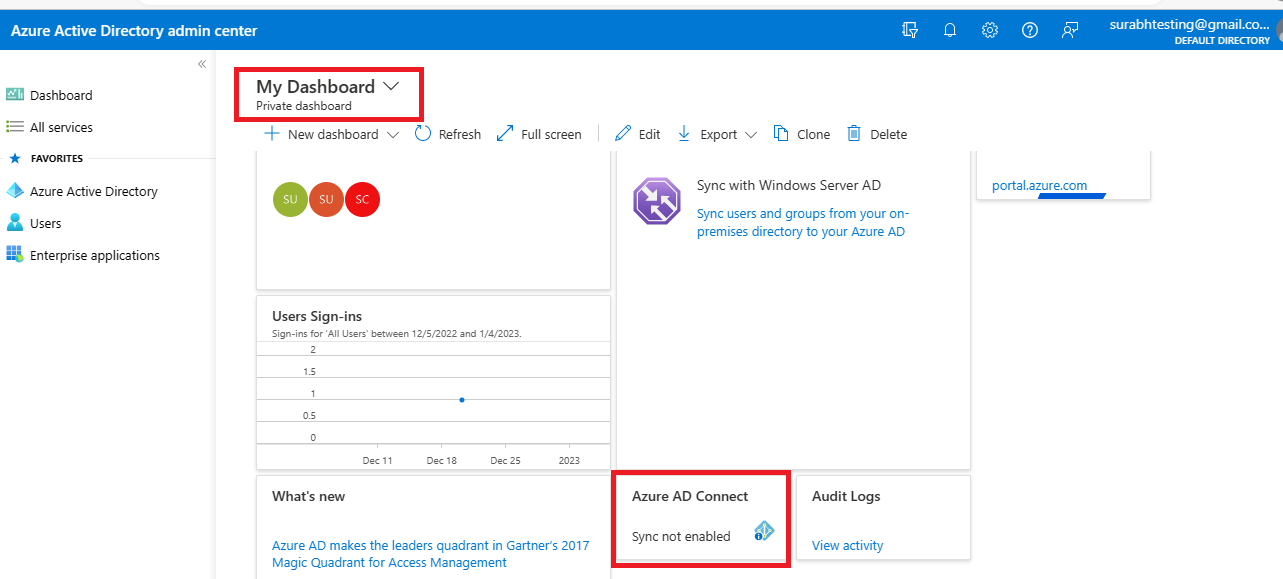
In our Azure active directory as we can see Azure AD Connect is not enabled.
Click on go to Azure AD Connect link to download the latest version of Azure AD setup. One can copy the url and download directly into their domain controller.
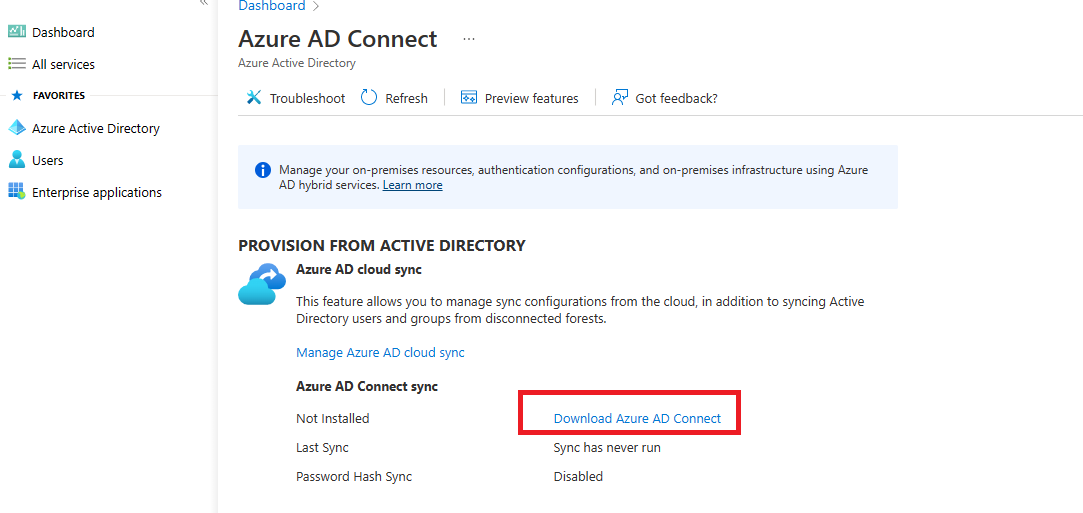
This is a msi package which we need to install on our domain controller, after downloading the Azure AD Connect run this setup to start the installation.

If you get following error while start AD Connect, please review this Help Document.
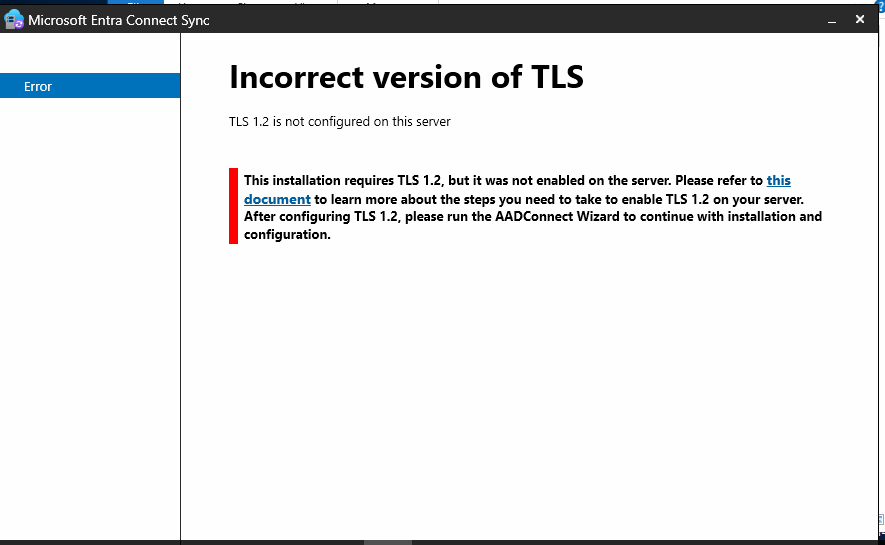
You can use the following PowerShell script to enforce TLS 1.2 on your Microsoft Entra Connect server.
If (-Not (Test-Path 'HKLM:\SOFTWARE\WOW6432Node\Microsoft\.NETFramework\v4.0.30319'))
{
    New-Item 'HKLM:\SOFTWARE\WOW6432Node\Microsoft\.NETFramework\v4.0.30319' -Force | Out-Null
}
New-ItemProperty -Path 'HKLM:\SOFTWARE\WOW6432Node\Microsoft\.NETFramework\v4.0.30319' -Name 'SystemDefaultTlsVersions' -Value '1' -PropertyType 'DWord' -Force | Out-Null
New-ItemProperty -Path 'HKLM:\SOFTWARE\WOW6432Node\Microsoft\.NETFramework\v4.0.30319' -Name 'SchUseStrongCrypto' -Value '1' -PropertyType 'DWord' -Force | Out-Null

If (-Not (Test-Path 'HKLM:\SOFTWARE\Microsoft\.NETFramework\v4.0.30319'))
{
    New-Item 'HKLM:\SOFTWARE\Microsoft\.NETFramework\v4.0.30319' -Force | Out-Null
}
New-ItemProperty -Path 'HKLM:\SOFTWARE\Microsoft\.NETFramework\v4.0.30319' -Name 'SystemDefaultTlsVersions' -Value '1' -PropertyType 'DWord' -Force | Out-Null
New-ItemProperty -Path 'HKLM:\SOFTWARE\Microsoft\.NETFramework\v4.0.30319' -Name 'SchUseStrongCrypto' -Value '1' -PropertyType 'DWord' -Force | Out-Null

If (-Not (Test-Path 'HKLM:\SYSTEM\CurrentControlSet\Control\SecurityProviders\SCHANNEL\Protocols\TLS 1.2\Server'))
{
    New-Item 'HKLM:\SYSTEM\CurrentControlSet\Control\SecurityProviders\SCHANNEL\Protocols\TLS 1.2\Server' -Force | Out-Null
}
New-ItemProperty -Path 'HKLM:\SYSTEM\CurrentControlSet\Control\SecurityProviders\SCHANNEL\Protocols\TLS 1.2\Server' -Name 'Enabled' -Value '1' -PropertyType 'DWord' -Force | Out-Null
New-ItemProperty -Path 'HKLM:\SYSTEM\CurrentControlSet\Control\SecurityProviders\SCHANNEL\Protocols\TLS 1.2\Server' -Name 'DisabledByDefault' -Value '0' -PropertyType 'DWord' -Force | Out-Null

If (-Not (Test-Path 'HKLM:\SYSTEM\CurrentControlSet\Control\SecurityProviders\SCHANNEL\Protocols\TLS 1.2\Client'))
{
    New-Item 'HKLM:\SYSTEM\CurrentControlSet\Control\SecurityProviders\SCHANNEL\Protocols\TLS 1.2\Client' -Force | Out-Null
}
New-ItemProperty -Path 'HKLM:\SYSTEM\CurrentControlSet\Control\SecurityProviders\SCHANNEL\Protocols\TLS 1.2\Client' -Name 'Enabled' -Value '1' -PropertyType 'DWord' -Force | Out-Null
New-ItemProperty -Path 'HKLM:\SYSTEM\CurrentControlSet\Control\SecurityProviders\SCHANNEL\Protocols\TLS 1.2\Client' -Name 'DisabledByDefault' -Value '0' -PropertyType 'DWord' -Force | Out-Null

Write-Host 'TLS 1.2 has been enabled. You must restart the Windows Server for the changes to take affect.' -ForegroundColor Cyan
Agree to the license terms and click on Continue
Since we don't have a verified domain in our Azure active directory and we are using our local domain which is non-routable domain for Microsoft Azure active directory therefore we can see warning. So now click Customize for custom installation.
.png)
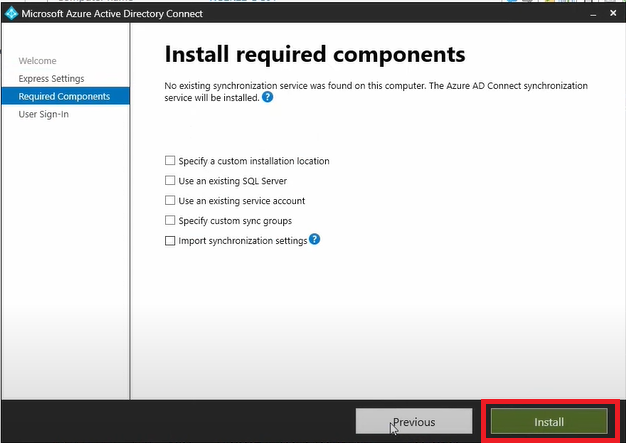
Once you have completed your selection as per your requirement click Install. In our case we are leaving all details as it is, we are not going to select any options.
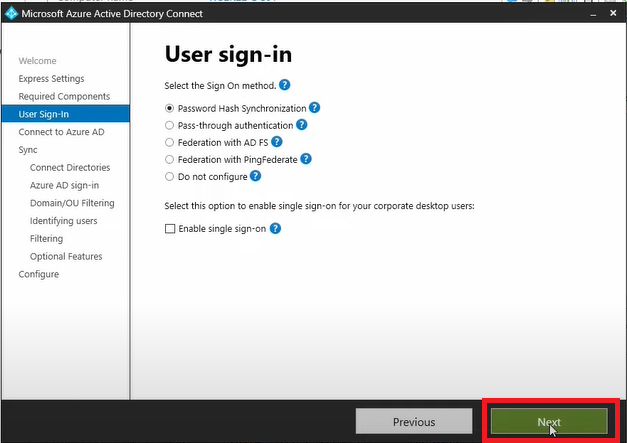
Then we’ll get a variety of sign in options options available here and we need to select the right one for our organization, however most organization pick Password Hash Synchronization and click Next.
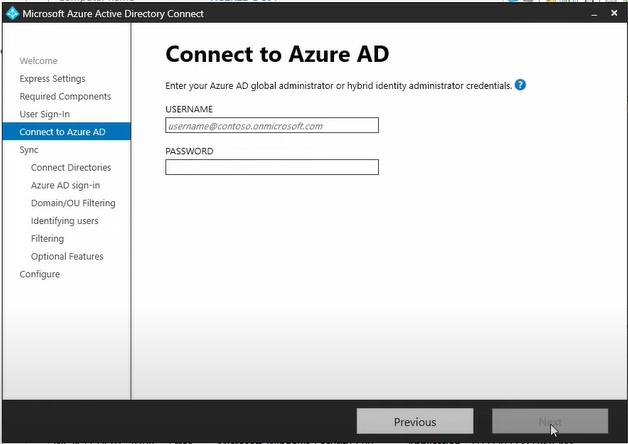
Here, enter Azure global administrator's username and password and click next, then it will connect to Microsoft to verify the username and password.
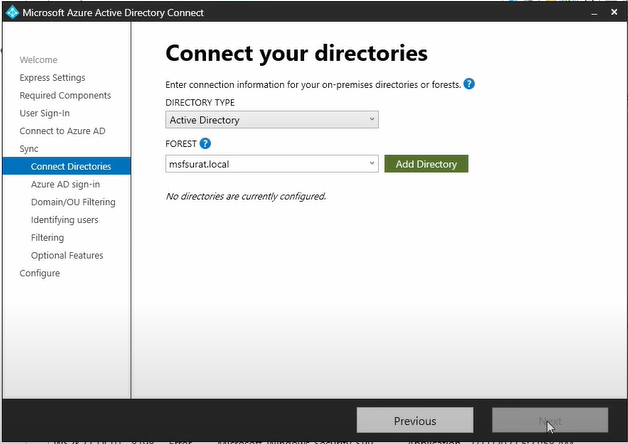
We will then need to add a local active directory in the Connect your directories screen under forest selector directory and then click on Add Directory to add a local active directory and click on Next. To find the domain name of local directory go to Server Manager > Local Server on domain controller.
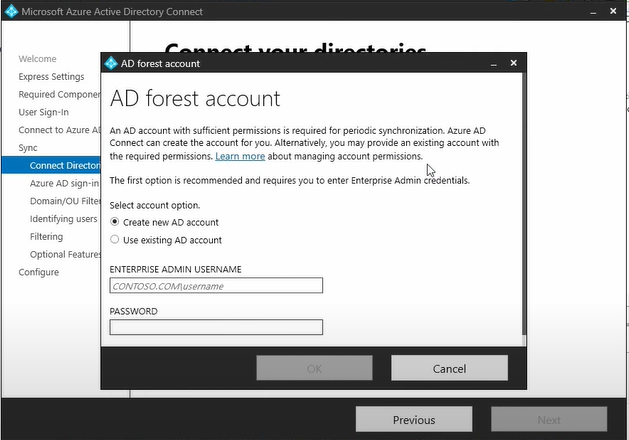
In a pop-up window we will be prompted to select either create a new account or use existing account. This account will be used for directory synchronization. We will use our local administrator's credential (ex: authdc\administrator) to add an active directory connection and click Ok and then click Next.
Note: Create an user on your On-Premise AD with following permissions if you want to use existing AD user and select Use existing AD account.
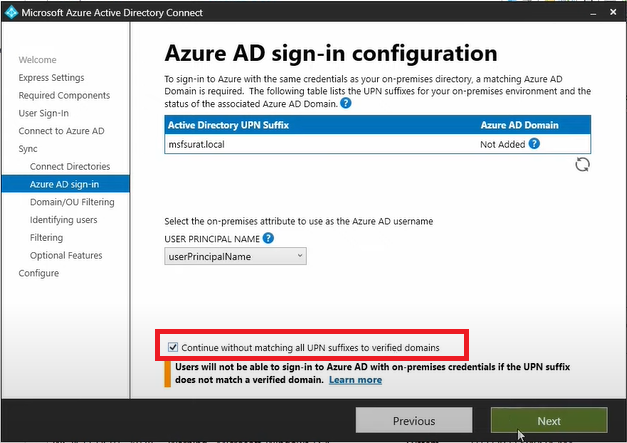
Select Continue without matching all UPN suffixes to verified domains checkbox and then click Next.
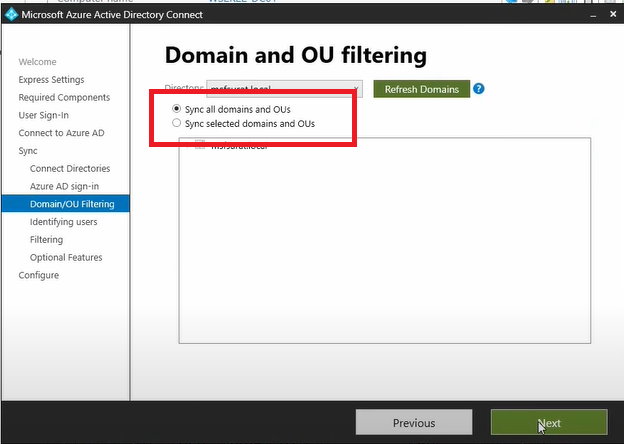
On the Domain and OU filtering, we can leave everything as default to sync the entire active directory data and click Next.
Leave the default settings for the basic setup and click Next.
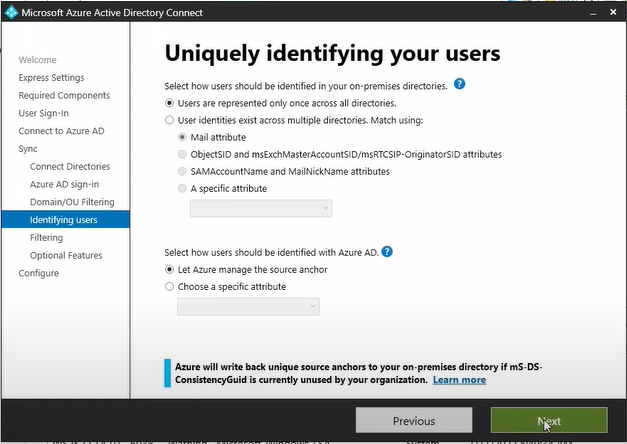
Click Next
.png)
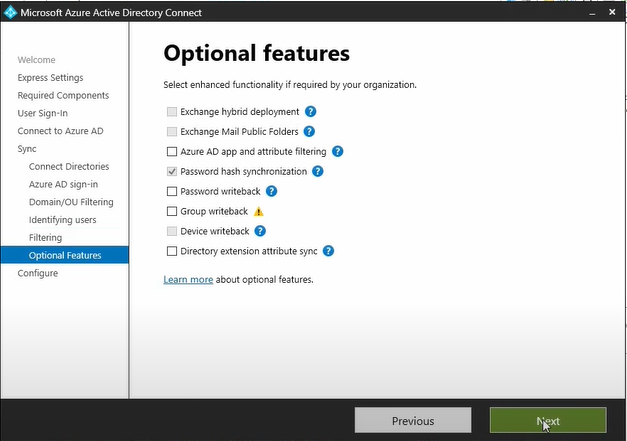
On the Optional features tab select any additional feature, if required and click Next.
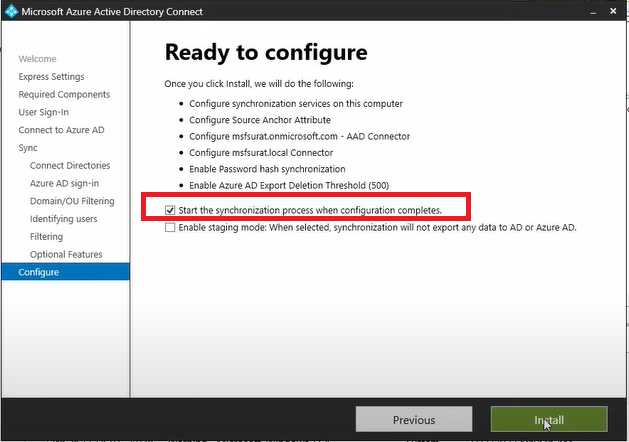
Make sure you have selected checkbox for Start the synchronization process when configuration completes and then click Install.
Azure AD Connect configuration completed and synchronization process has been
started. Now click Exit.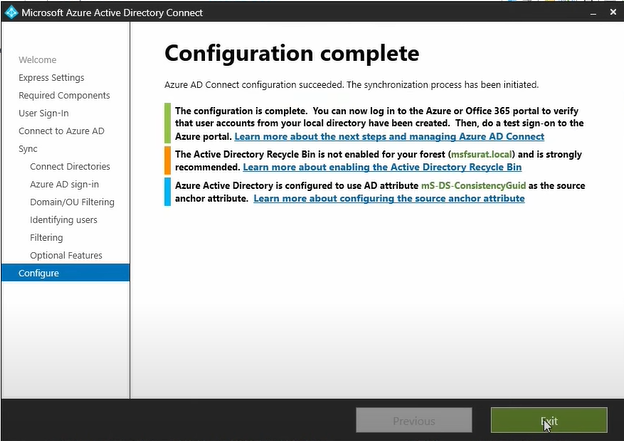
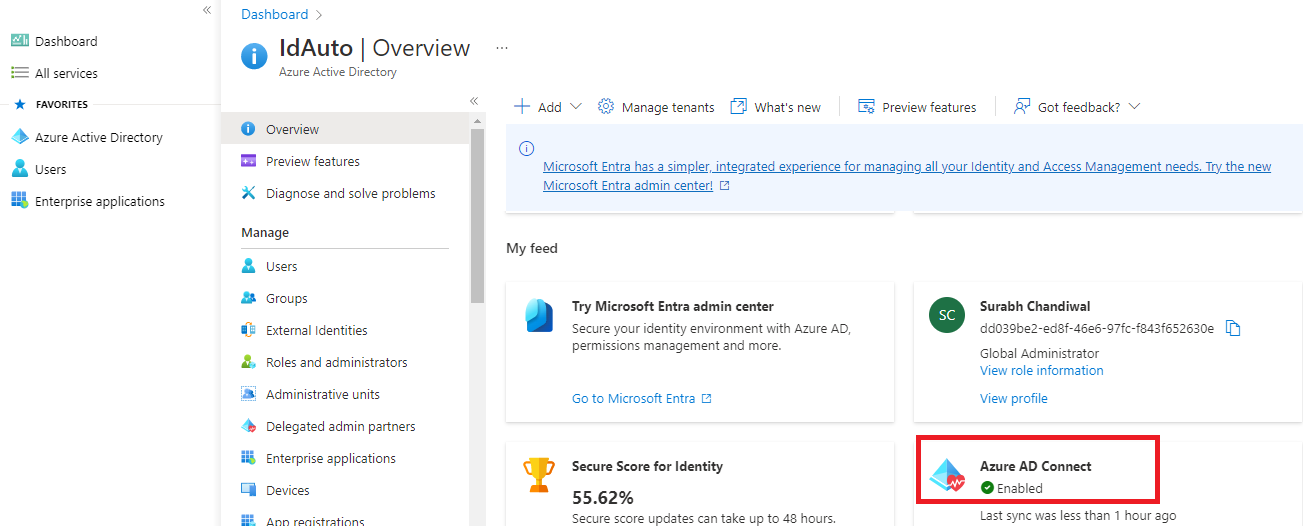
Now go to Azure portal. Under Azure Active Directory you will see Azure AD Connect as enabled.
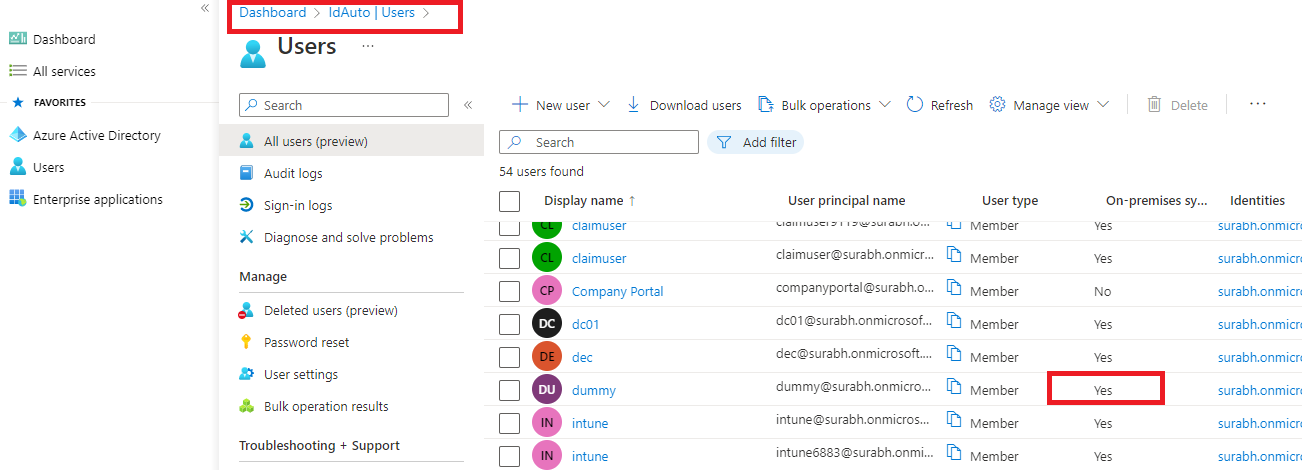
Click on users, here we can see the users from our on premises active directory under On-premise sync enabled column.
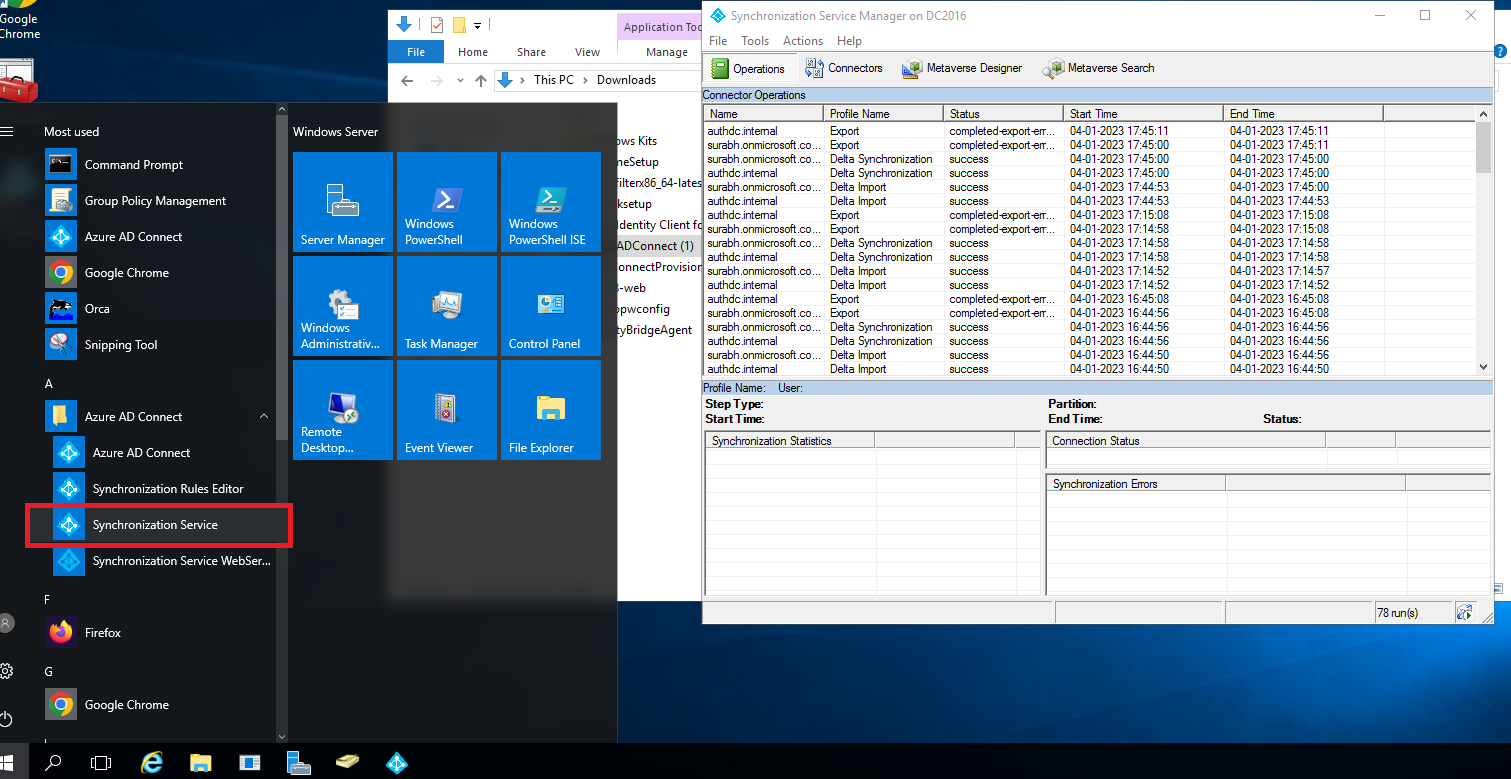
Alternatively, go to windows server 2016, then click on start menu and click on Synchronization Service. Here we can find that it already started the synchronization.


Was this article helpful?