Installation
- 04 Apr 2025
- 3 Minutes to read
- Print
- DarkLight
Installation
- Updated on 04 Apr 2025
- 3 Minutes to read
- Print
- DarkLight
Article summary
Did you find this summary helpful?
Thank you for your feedback!
Installation of RapidIdentity Client for Windows can be done interactively or silently by using command-line installation options.
To begin both installation options, one must be logged in as a local administrator on the device. Then, follow the steps for the corresponding installation option below.
Note:
RapidIdentity Client for Windows is for RapidIdentity Cloud only and is not meant for on-premise systems. Installing the RapidIdentity Client for Windows requires an API Key from the RapidIdentity Cloud tenant. An API Key is associated with a Service Identity in RapidIdentity. Instructions for creating a Service Identity are here.
Interactive Installation
For Domain-Joined installments, the following prerequisites are required:
Available Authentication into RapidIdentity Cloud version 2021.7.27 or later (base requirement for all)
Windows 10 Machine must be domain-joined
Users' identities exist in both the RapidIdentity User Store and Active Directory with synced passwords
An API key has been assigned to the Authentication API Consumer role for the appropriate Service Identity (base requirement for all)
For more information on the latest version, please refer to the following resources:
To install the latest version of the RapidIdentity Client for Windows, right click the link below to Save As. Once the RapidIdentity Client for Windows installer is downloaded, right-click on the file to install.
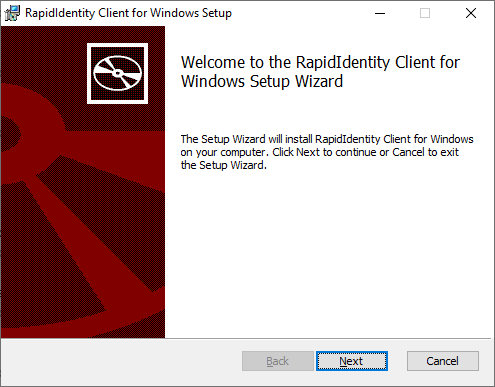
When presented with the Windows Setup Wizard, click Next to begin the installation.
Fill in the following fields as noted below. Click 'Next' when complete.
.png)
Domain: Accounts will authenticate to this domain. NOTE: Use DOT (.) to use a local account in a Non-Domain-joined installation or the NetBIOS name of the Domain in a Domain-joined installation.
Server URL: Server URL. NOTE: Server URL should start with 'https://'
API Key: Secret API Key generated in RapidIdentity Service Identities Server.
For further details on where to locate the Secret Key, see Step 6 of this article.
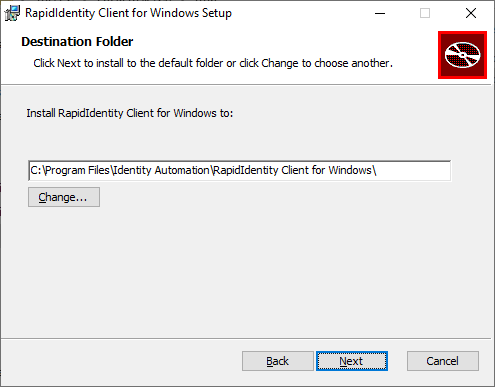
Select the folder in which the file is to be installed and click Next.
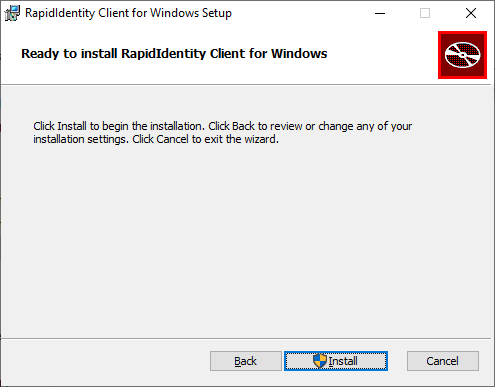
Click Install on the Ready to install window.
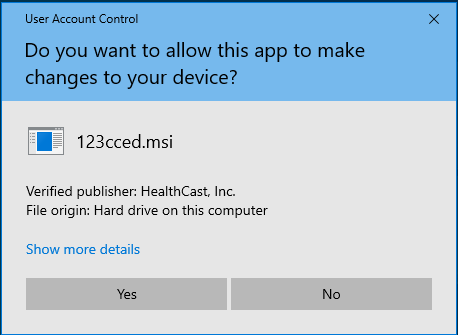
Click Yes to allow this app to make changes to the device if applicable.
Once the installation is complete, click Finish to exit the Setup Wizard.

Command-Line Installation
From an administrative command prompt (or remote deployment package), execute the RapidIdentity Client for Windows install with the required command-line options. Below are the minimum values that need to be configured.
Set API Key: APIKEY=
Set the URL: SERVER_URL=
Set the Domain: DOMAIN=
To install using the command line, open the Command Prompt and right-click on it from under the "Best match" section, and select Run as administrator.
Navigate to the location where the "RapidIdentity Client for Windows.msi" file is located, and execute the following command. The install will proceed silently and will only reboot the device if /forcerestart is added to the command line.
msiexec.exe /i "Path for the installer" /quiet /passive APIKEY="api key string" SERVER_URL="tenant url"  DOMAIN="domain name" ENABLE_FAST_USER_SWITCHING="0 or 1"

Example : msiexec.exe /i "C:\AuthC_install\RapidIdentity Client for Windows.msi" /quiet /passive APIKEY="$s5TOu3vlTlabyHe9Q17AgQ==.1KRQp0gAoOv0TD5uVWQ=$" SERVER_URL="https://iac53adaf6cd3d440c8f5765dc08fc8.com"  DOMAIN="." ENABLE_FAST_USER_SWITCHING="1"
Deploying the Windows Client with Command Line Parameters
The Windows Client provides a mechanism to automate installation via the command line for administrative installations. This information could be used by administrators to create a Command Line script that is run during user login on machines the client should be installed on.
Download the Windows Client Installer via the link at the top of this article.
Open the command prompt as an admin user on the Windows 10 machine.
Run the following command:
msiexec.exe /i "RapidIdentity Client for Windows.msi" /quiet /passive APIKEY="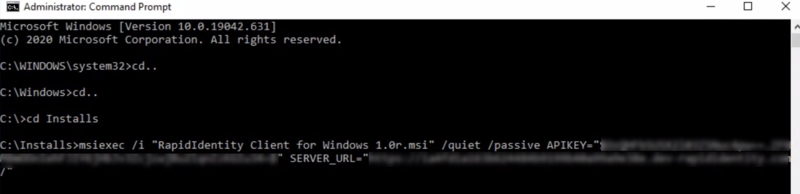
Note:
Once the command has been run, the installation process starts in the background. However, it can be tracked in Task Manager if desired.

The Windows Client should proceed to install and should be present on the appropriate machines upon completion.
Please Note:
The Windows Authentication Client does not support the Remote Desktop Protocol.
If you're using external Logo URLs ensure that your firewall isn't blocking the URL.
Was this article helpful?