Installing Exchange Agent 2022.7.15
The instructions below assume that a previous version of the Exchange Agent is already installed and functional.
Prerequisites are as follows:
- RapidIdentity On-Premise customers must upgrade to 2022.0.4
- RapidIdentity Cloud customers must upgrade to 2022.8.2
How to Install Exchange Agent 2022.7.15
Open the Azure AD Portal at https://portal.azure.com and login
- In the Search bar at the top enter App Registrations and enter then click on New Registration
.png)
- Enter RapidIdentity Exchange Agent for the name and click Register in the Bottom Left
.png)
- The App is now registered and we will need to apply API Permissions to it
- Click on Manifest in the left menu to show the Manifest that we will need to modify
.png)
- The section we will be updating is the requiredResourceAccess Section which by default looks like this
.png)
- Copy the code snippet below and replace the entire RequiredResourceAccess section so that it looks like the below section and click Save

"requiredResourceAccess": [
		{
			"resourceAppId": "00000002-0000-0ff1-ce00-000000000000",
			"resourceAccess": [
				{
					"id": "dc50a0fb-09a3-484d-be87-e023b12c6440",
					"type": "Role"
				}
			]
		},
		{
			"resourceAppId": "00000003-0000-0000-c000-000000000000",
			"resourceAccess": [
				{
					"id": "e1fe6dd8-ba31-4d61-89e7-88639da4683d",
					"type": "Scope"
				}
			]
		}
	],
ActionScript
- Click on API Permissions in the left navigation
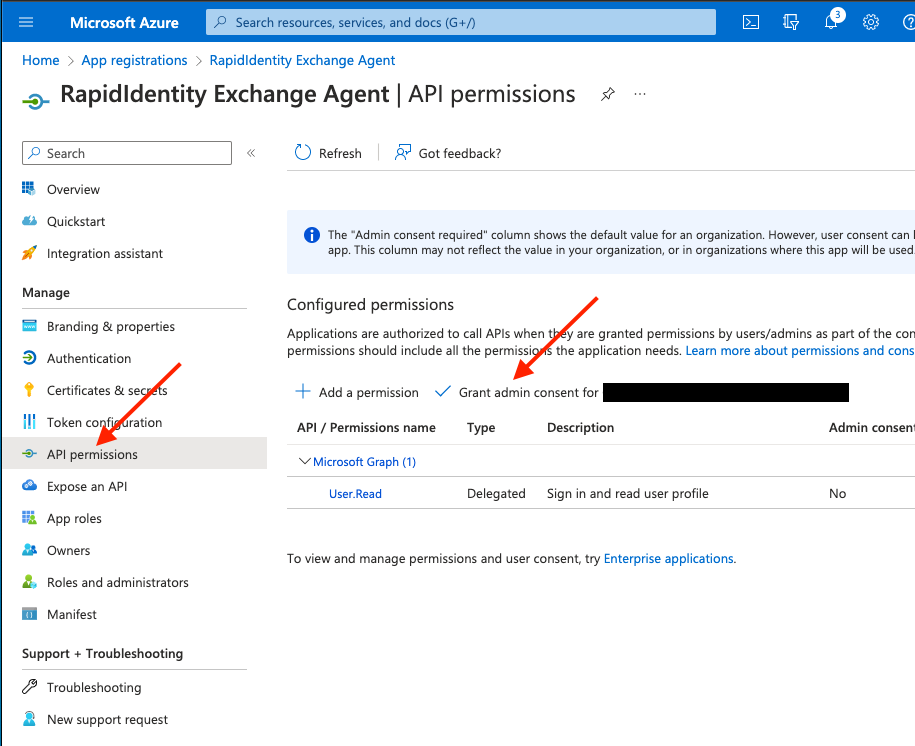
- Click Yes to Grant Permissions on the popup screen

Login to your On-Premise Exchange Agent Server
- Generate a self-signed certificate by first downloading the Create-SelfSignedCertificate.ps1 attached to this article to your server
- Run PowerShell as an Administrator and execute the following
- Set-ExecutionPolicy -Scope Process -ExecutionPolicy Bypass
- Y to confirm
- .\Create-Self-SignedCertificate.ps1
- Supply values as follows:
- CommonName: RapidIdentity
- StartDate: 2022-09-01
- EndDate: 2027-09-01
- Enter Password to Protect Private Key: <ANYPASSWORDYOUWILLREMEMBER>
.png)
- Supply values as follows:
- Set-ExecutionPolicy -Scope Process -ExecutionPolicy Bypass
- Open the directory where you ran the PowerShell Script from and you will now see your certificates
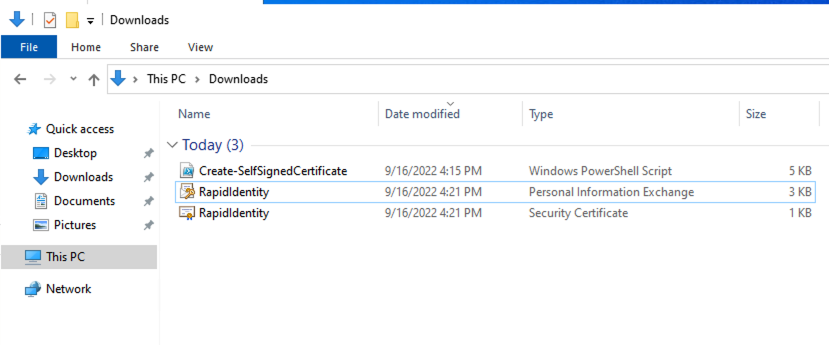
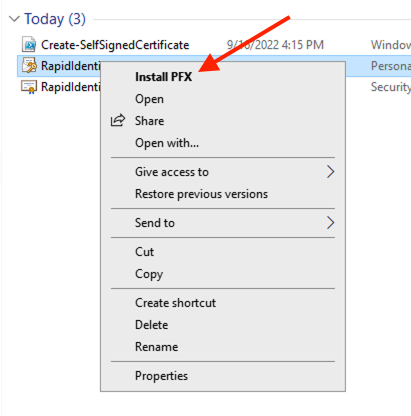
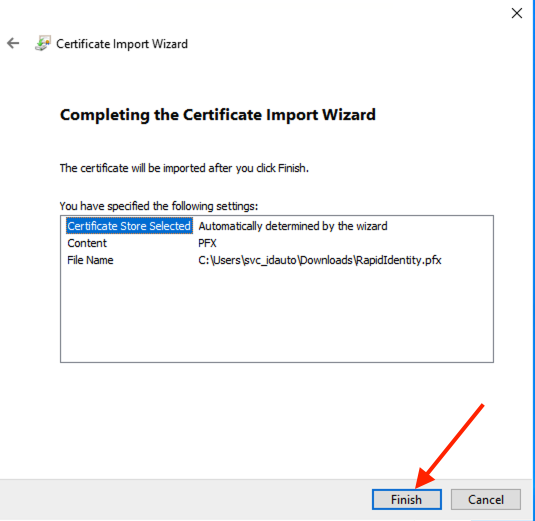
- Right click on the RapidIdentity file listed with Type of Personal Information Exchange and Select Install PFX
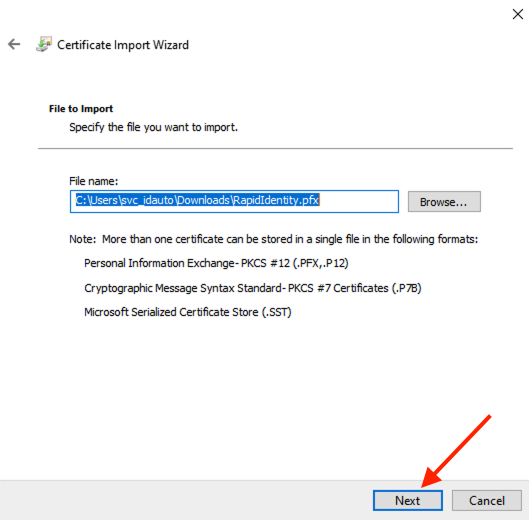
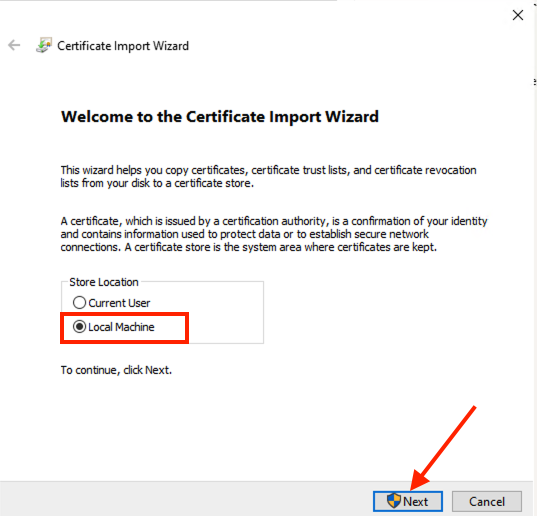
- Select Local Machine and click Next

- Click Next
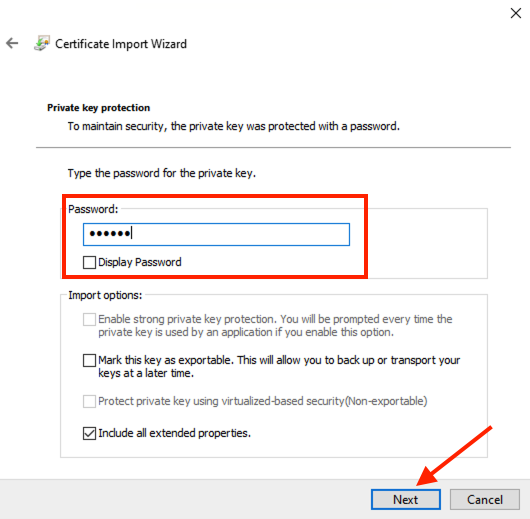
- Enter the password you set in step 2 when you generated the certificate and click next
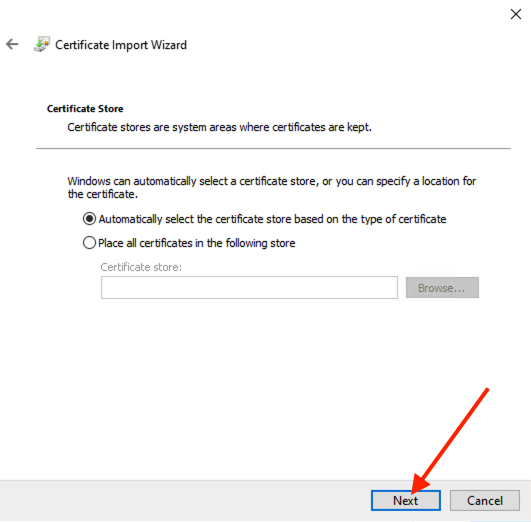
- Click Next on the Certificate Store Prompt
- Click Finish
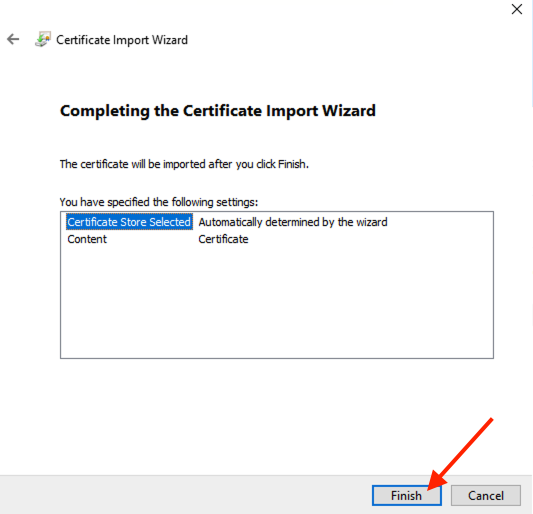
- Right click on the RapidIdentity file listed with Type of Security Certificate and Select Install Certificate
- Select Local Machine and click Next
- Click Next on the Certificate Store Prompt
- Click Finish
Go back to the Azure AD Portal at https://portal.azure.com
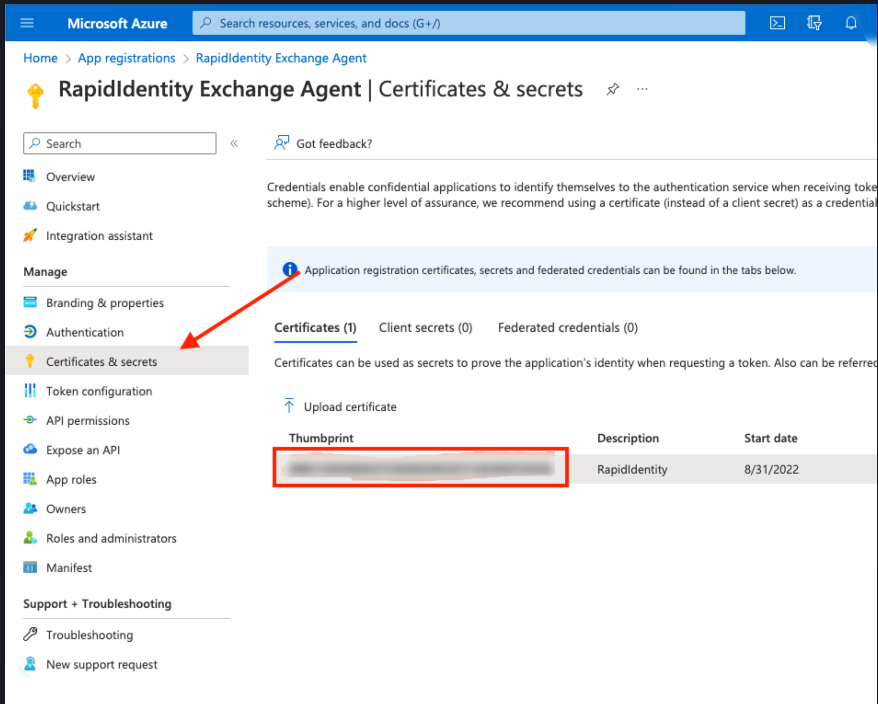
- Click on Certificates & Secrets on the left Navigation (make sure you are still in the App Registrations - RapidIdentity Exchange Agent section
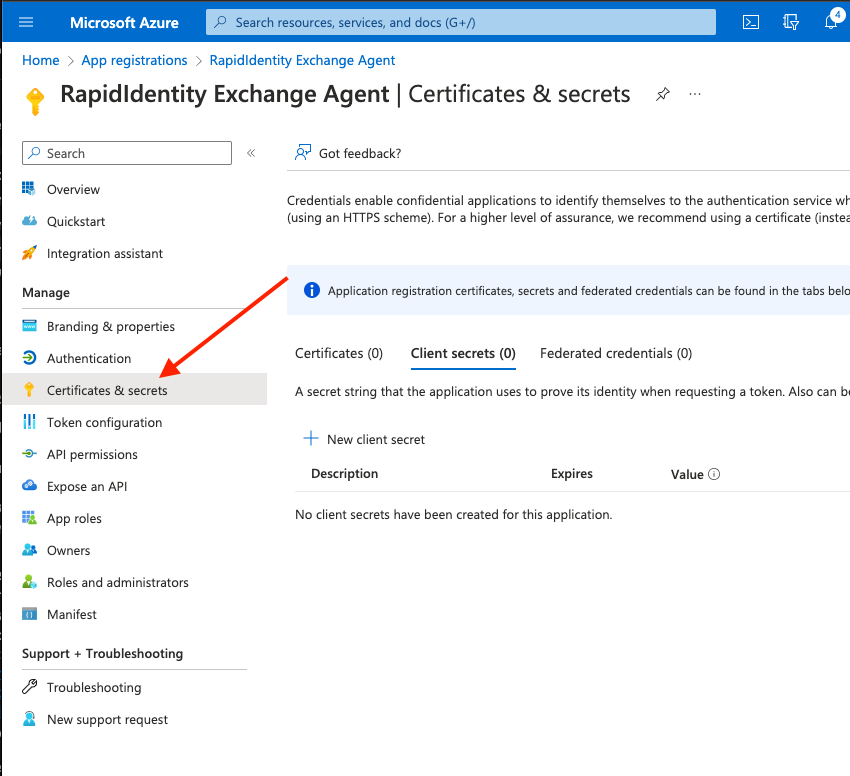
- Click on Certificates and then on Upload Certificate
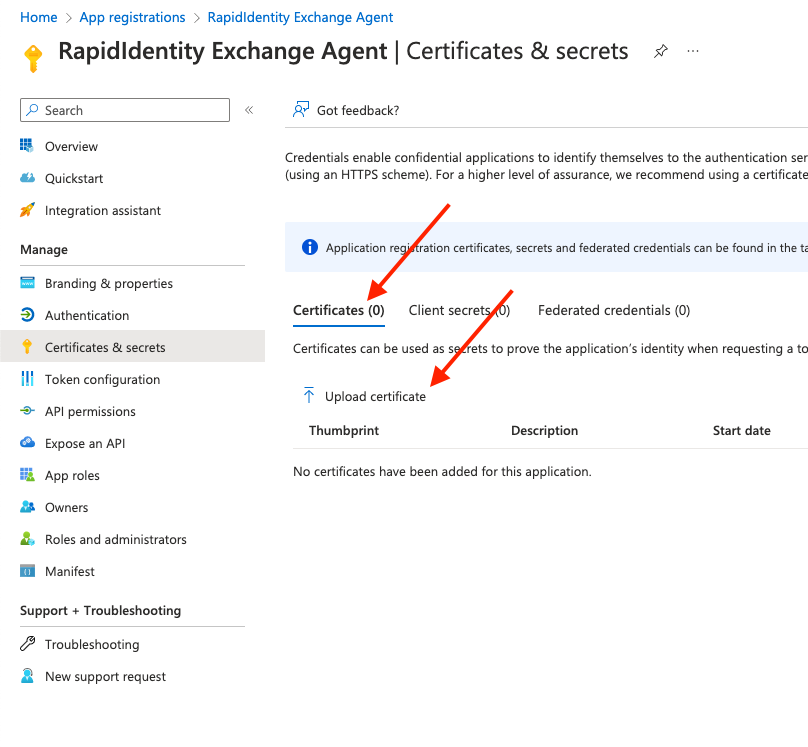
- Select the RapidIdentity.cer file that you just imported on your Exchange Agent Server and Enter the Description of RapidIdentity then Click Add

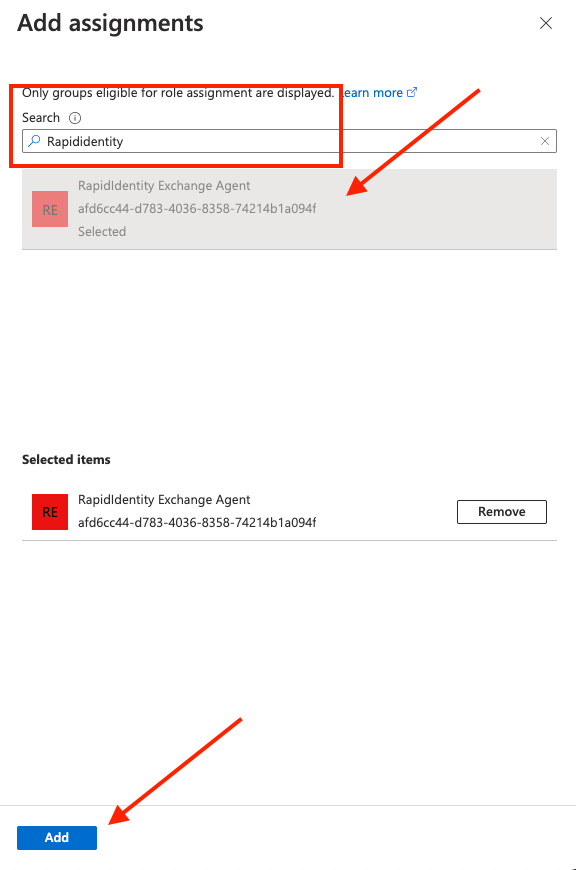
- In the top search bar, Search for Azure AD Roles and Administrators
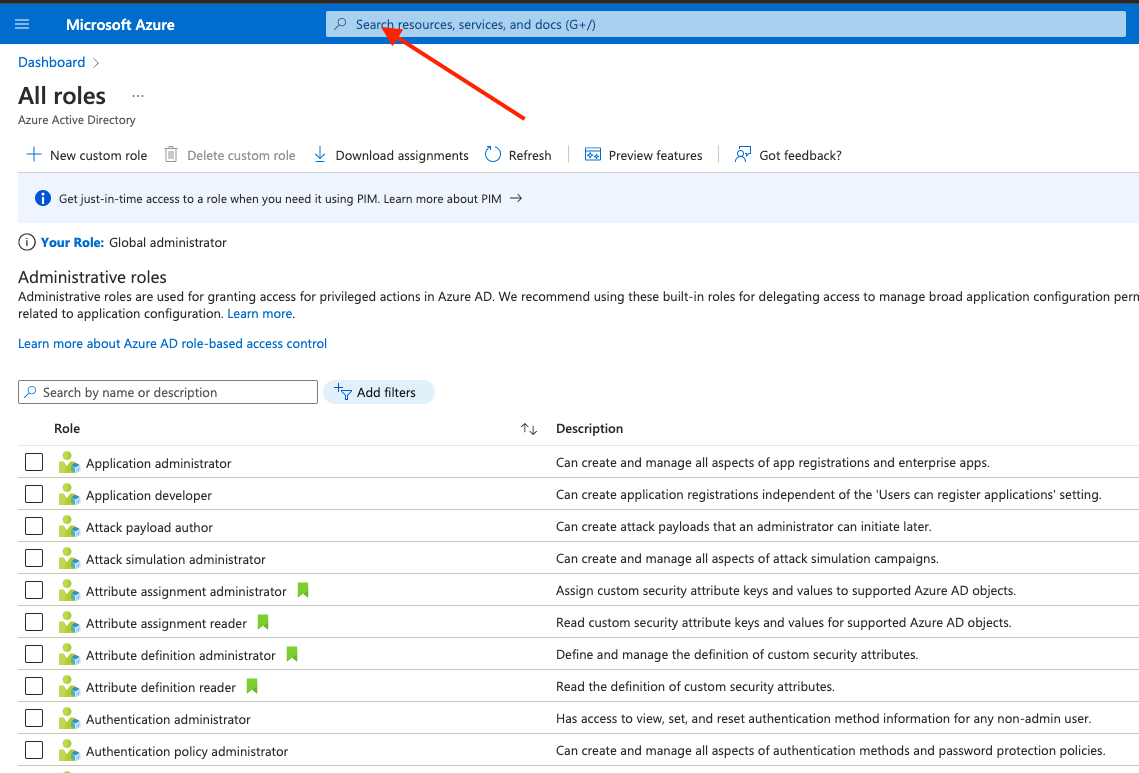
- In Search by Name or Description enter Exchange Administrator
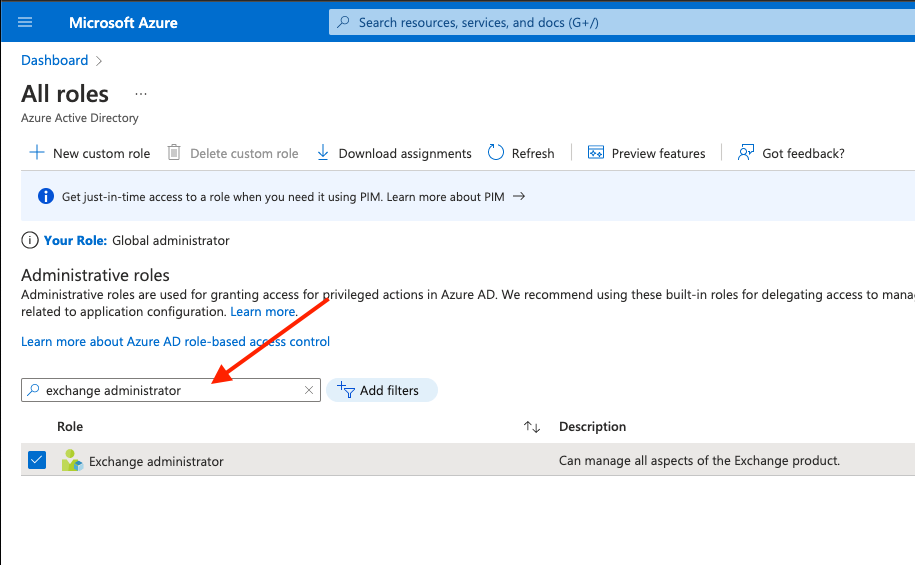
- Double Click on the Exchange Administrator Role and click on Add Assignments
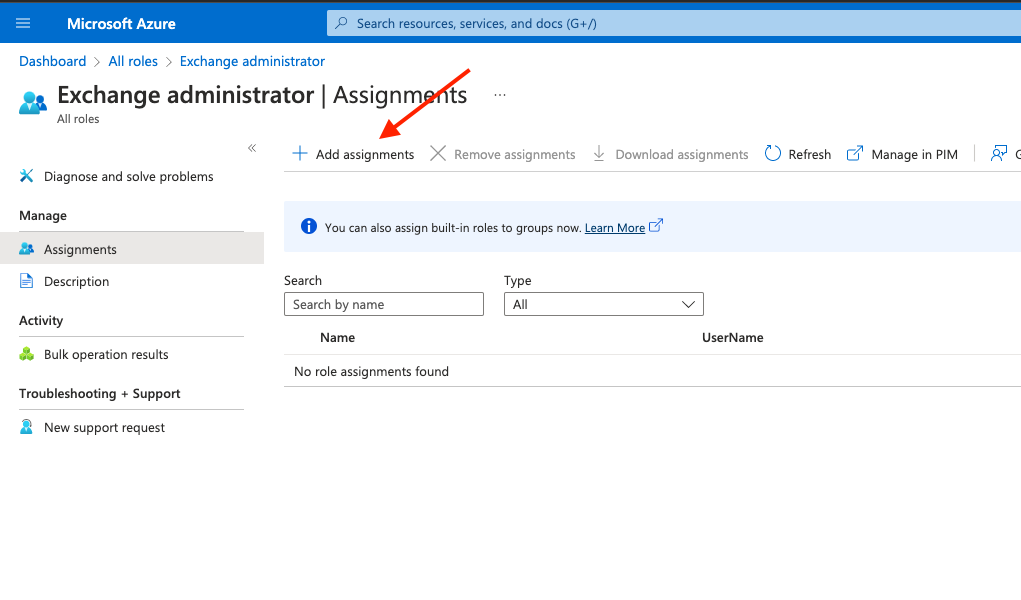
- Enter RapidIdentity in the Add Assignments Search and select the RapidIdentity Exchange Agent and click Add
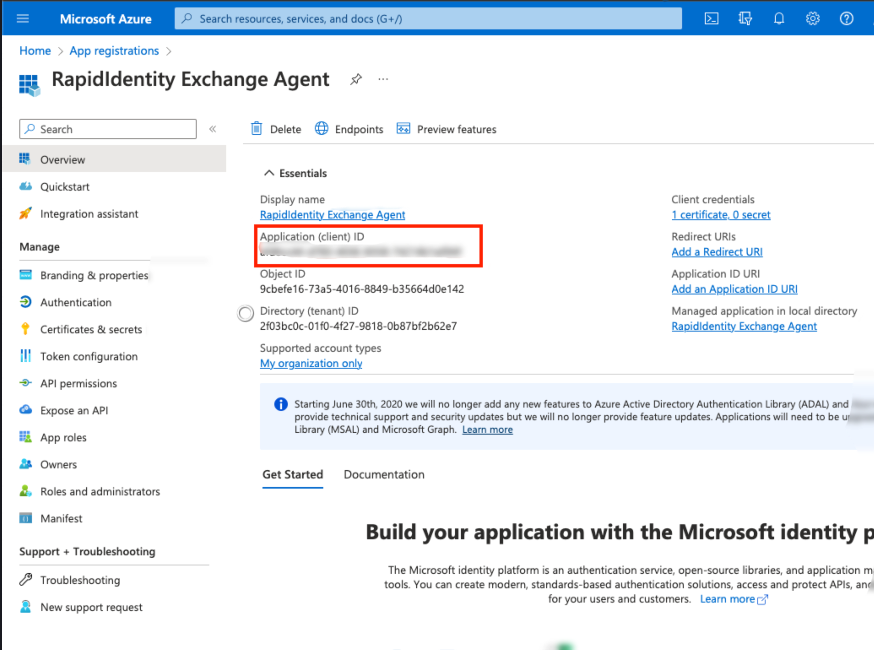
- You will need to locate and save the Application (Client ID) and Certificate Fingerprint for the Application you just set up for later. Please take note of these in a secure place.
Go Back to your On-Premise Exchange Agent Server
- Run PowerShell as an Administrator and execute Install-Module -Name ExchangeOnlineManagement
- Answer A to Install when prompted
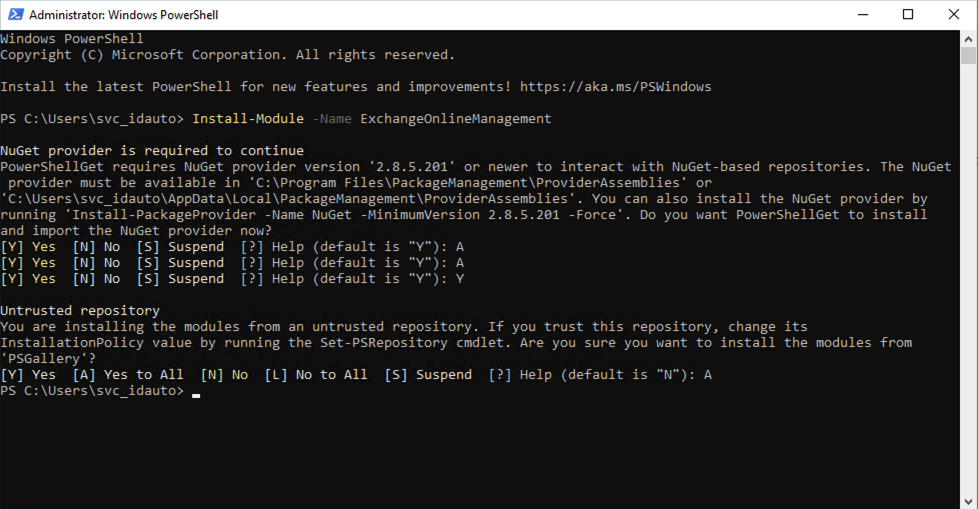
- Answer A to Install when prompted
- Uninstall the existing idautoExchangeAdminWS via Control Panel
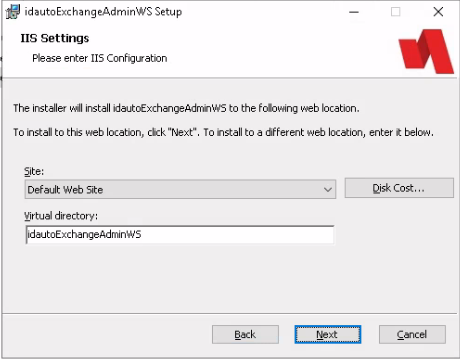
- Download the latest version of the Exchange Agent Installer and Install.
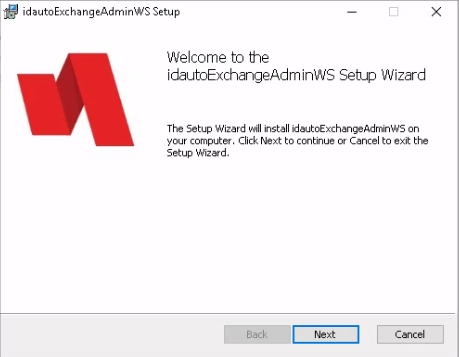
- Click Next.
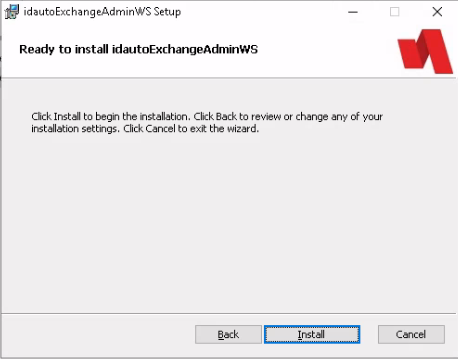
- Click Install.
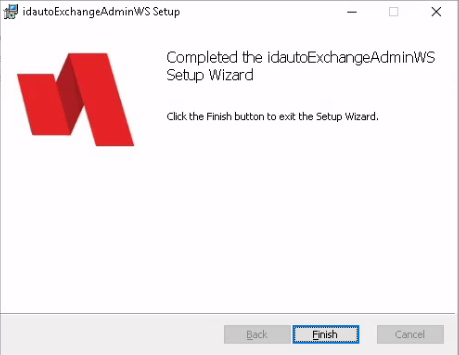
- Click Finish.
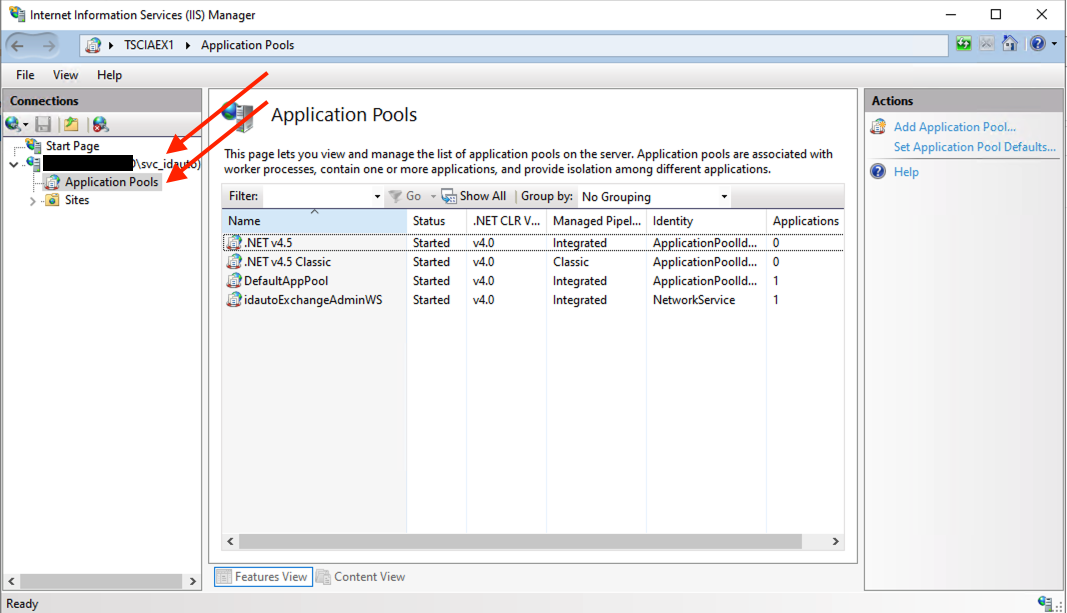
- Open Internet Information Service (IIS) Manager to configure the Agent. Select the server and Application Pools
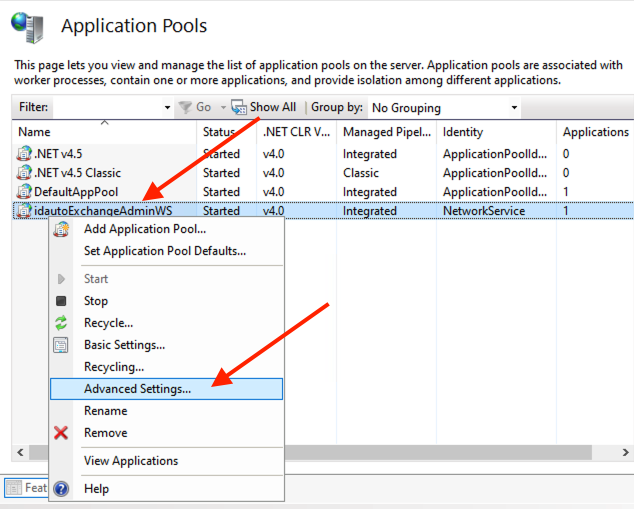
- Right-click on the idautoExchangeAgentAdminWS and select Advanced Settings.
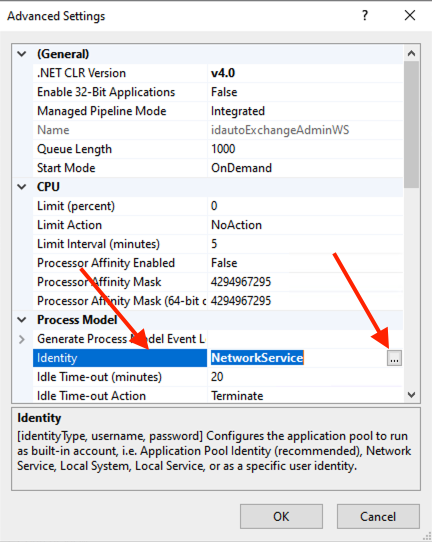
- Click on Identity under Process Model and click the icon that pops up on the right.
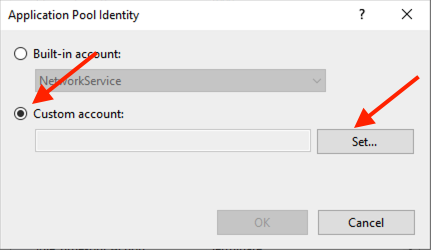
- Click Custom Account and Set to put in the credentials for the Identity Automation Exchange Administrator Service Account and click OK twice to close Advanced Settings
- Exit out of Advanced Settings.
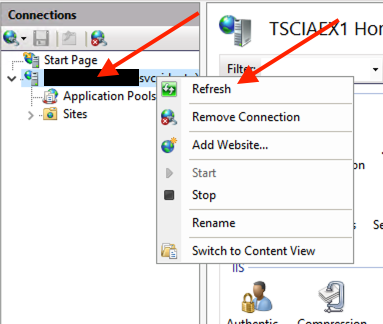
- Right-click on the server and select Refresh.
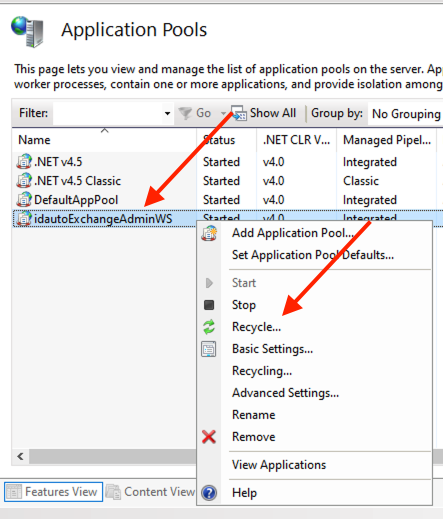
- Right-click on the idautoExchangeAdminWS application pool and select Recycle.
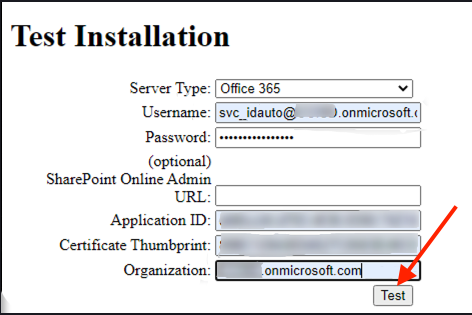
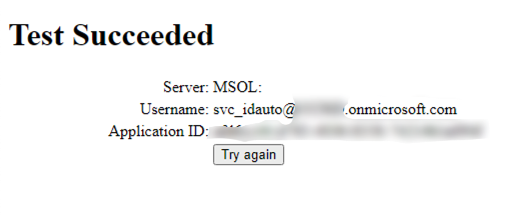
- Test the Exchange Agent by opening a Web Browser on the Exchange Agent Server and navigate to http://[localhost]/idautoExchangeAdminWS/test
- Enter the username/password for the Azure AD Portal
- Enter the AppID (Client ID) and Certificate Thumbprint from Azure AD that you captured earlier
- Enter the Azure Organization
- Click Test