Sync RapidIdentity Cloud Users with AD for the Windows Authentication Client
This document describes a way to sync RapidIdentity Cloud users with AD Domain controller for the RapidIdentity Windows Authentication Client.
Reference link to documentation on RapidIdentity Connect : RapidIdentity Connect
-
Install the Connect Active Directory Password Filter Adapter, which extends the Active Directory schema to capture password changes in AD.
- Reference link :Install the Active Directory Password Filter
-
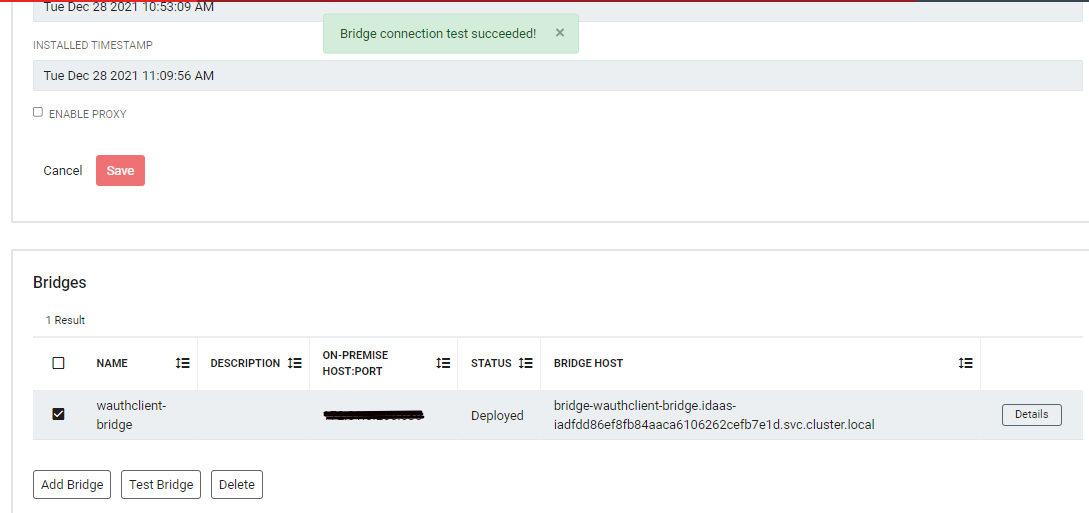
Make a successful Identity Bridge connection in RapidID tenant with Domain controller.
- Download RapidIdentityToAD and FnHasRecordChanged action set (both files linked below) to local PC.
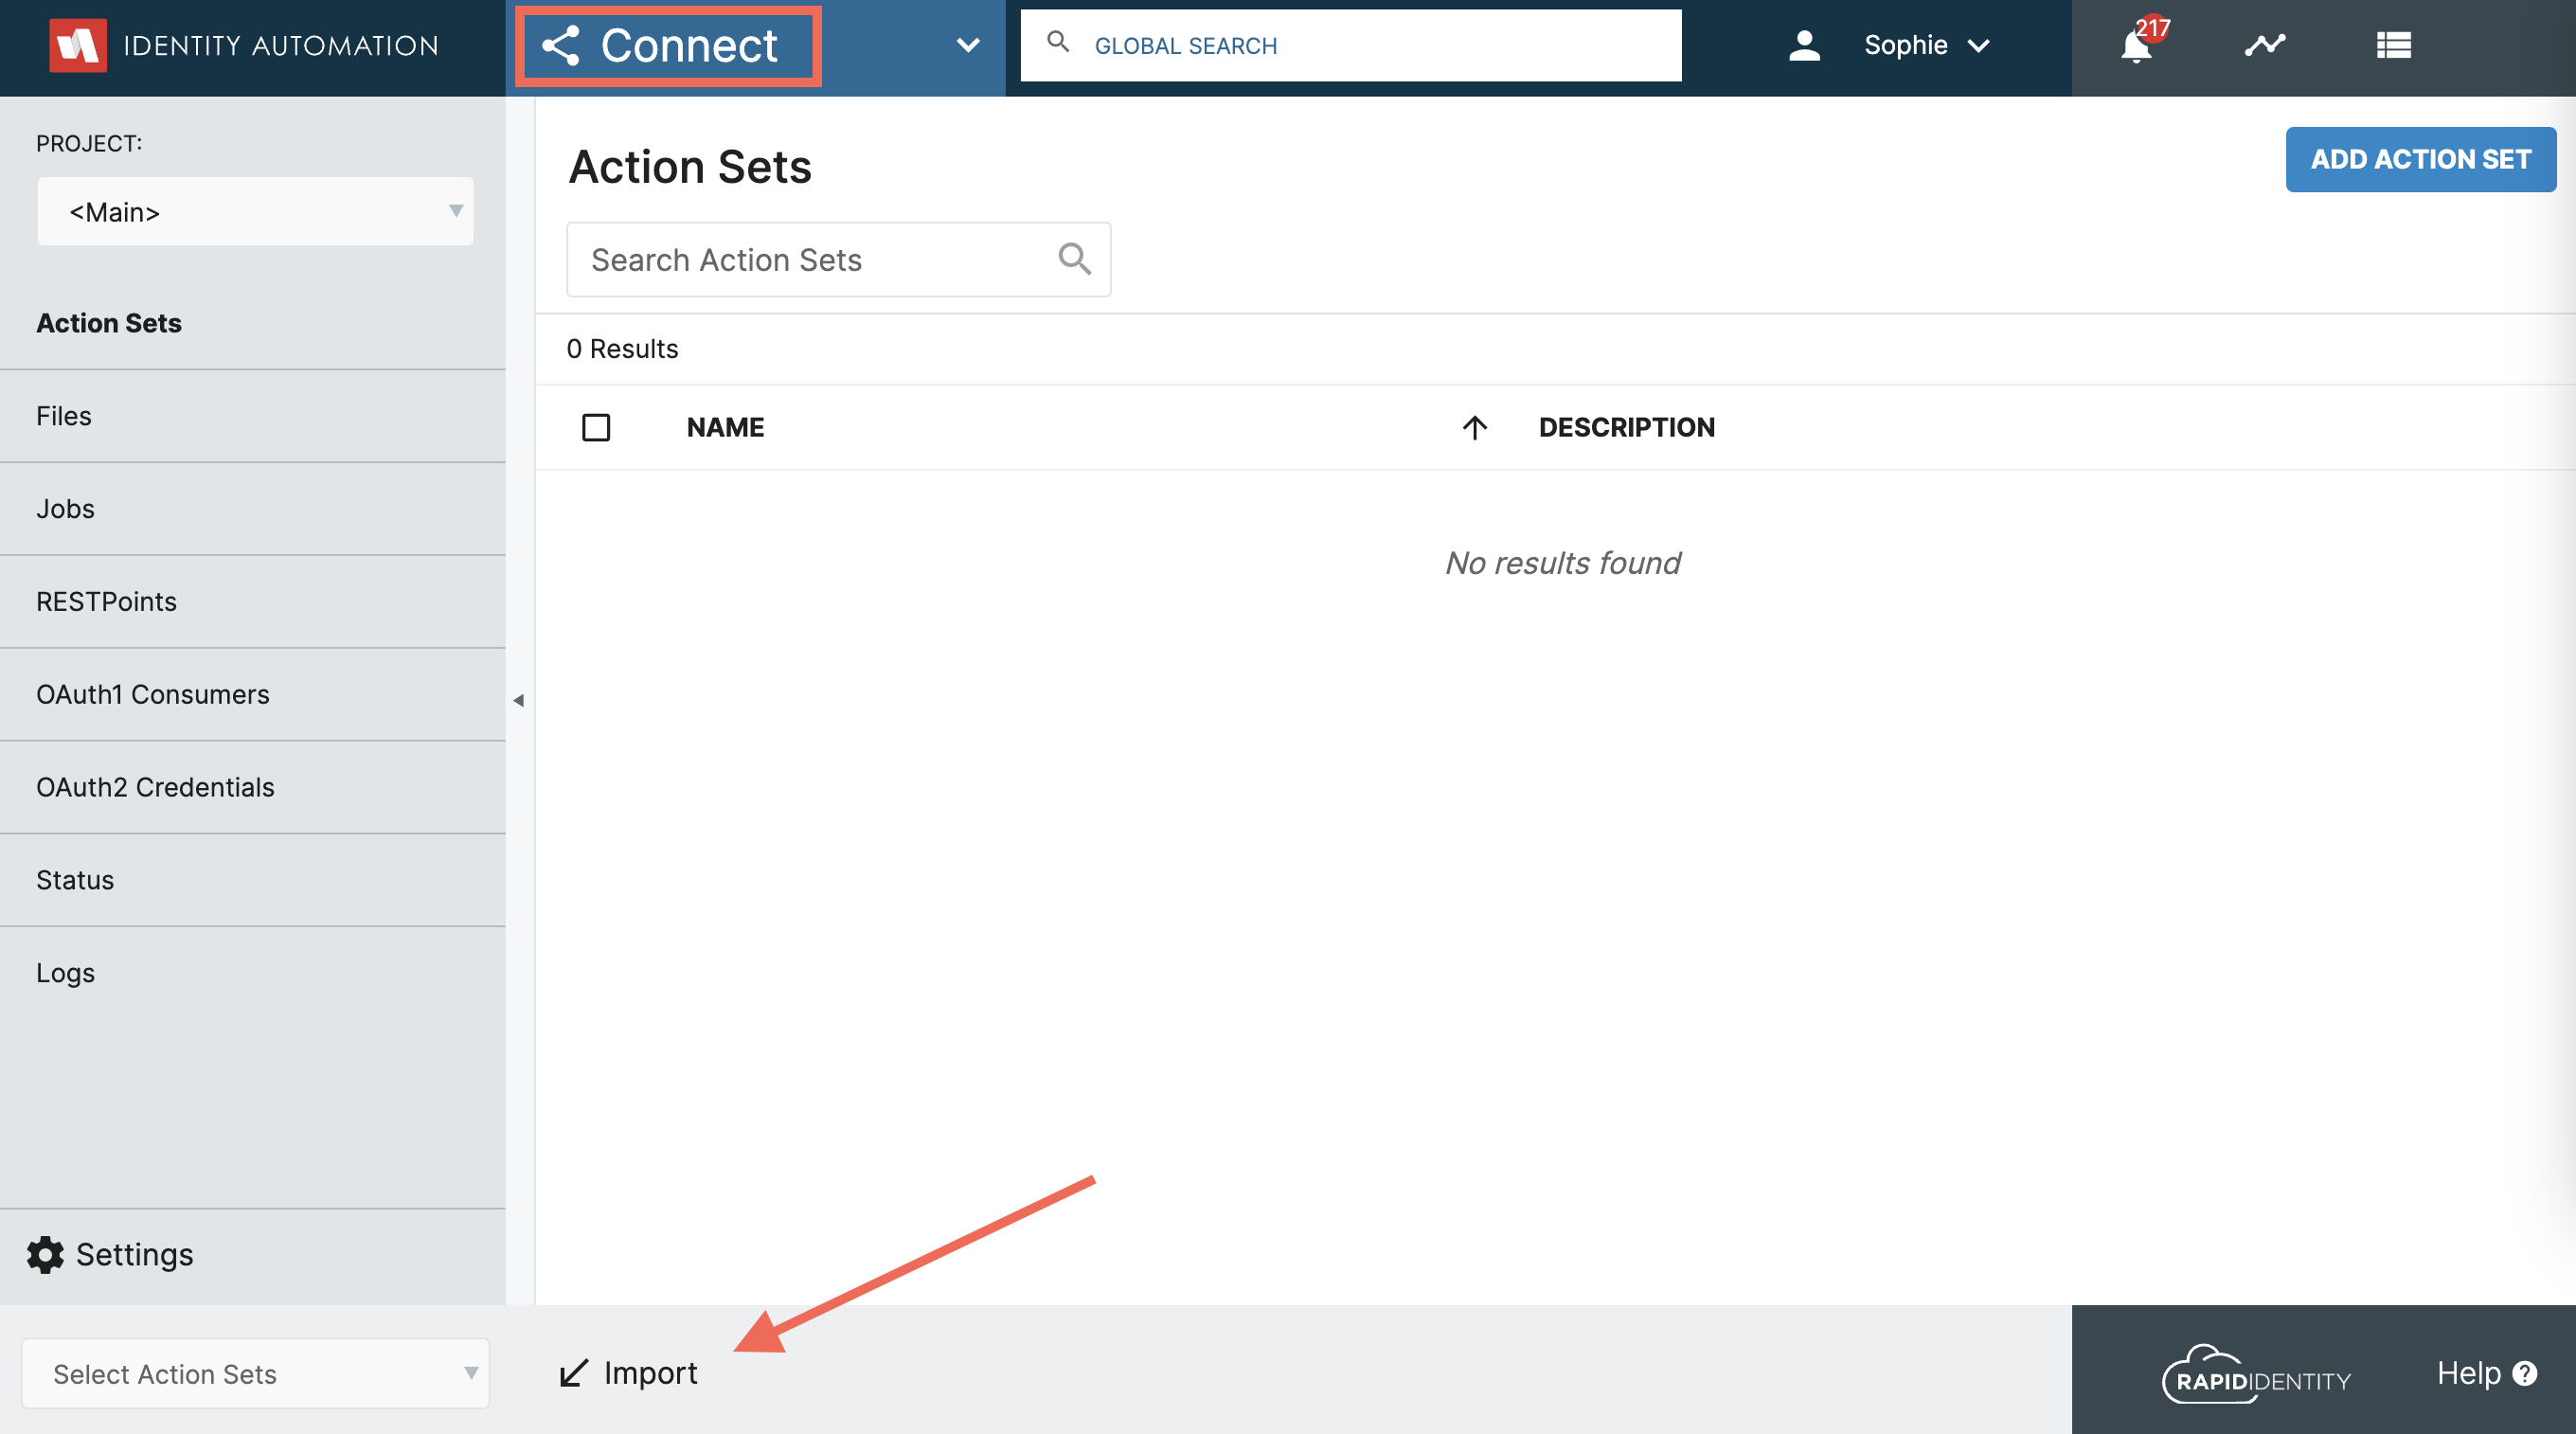
- In the Connect Module, use the Import option in the bottom navigation bar to upload the downloaded Action Sets.
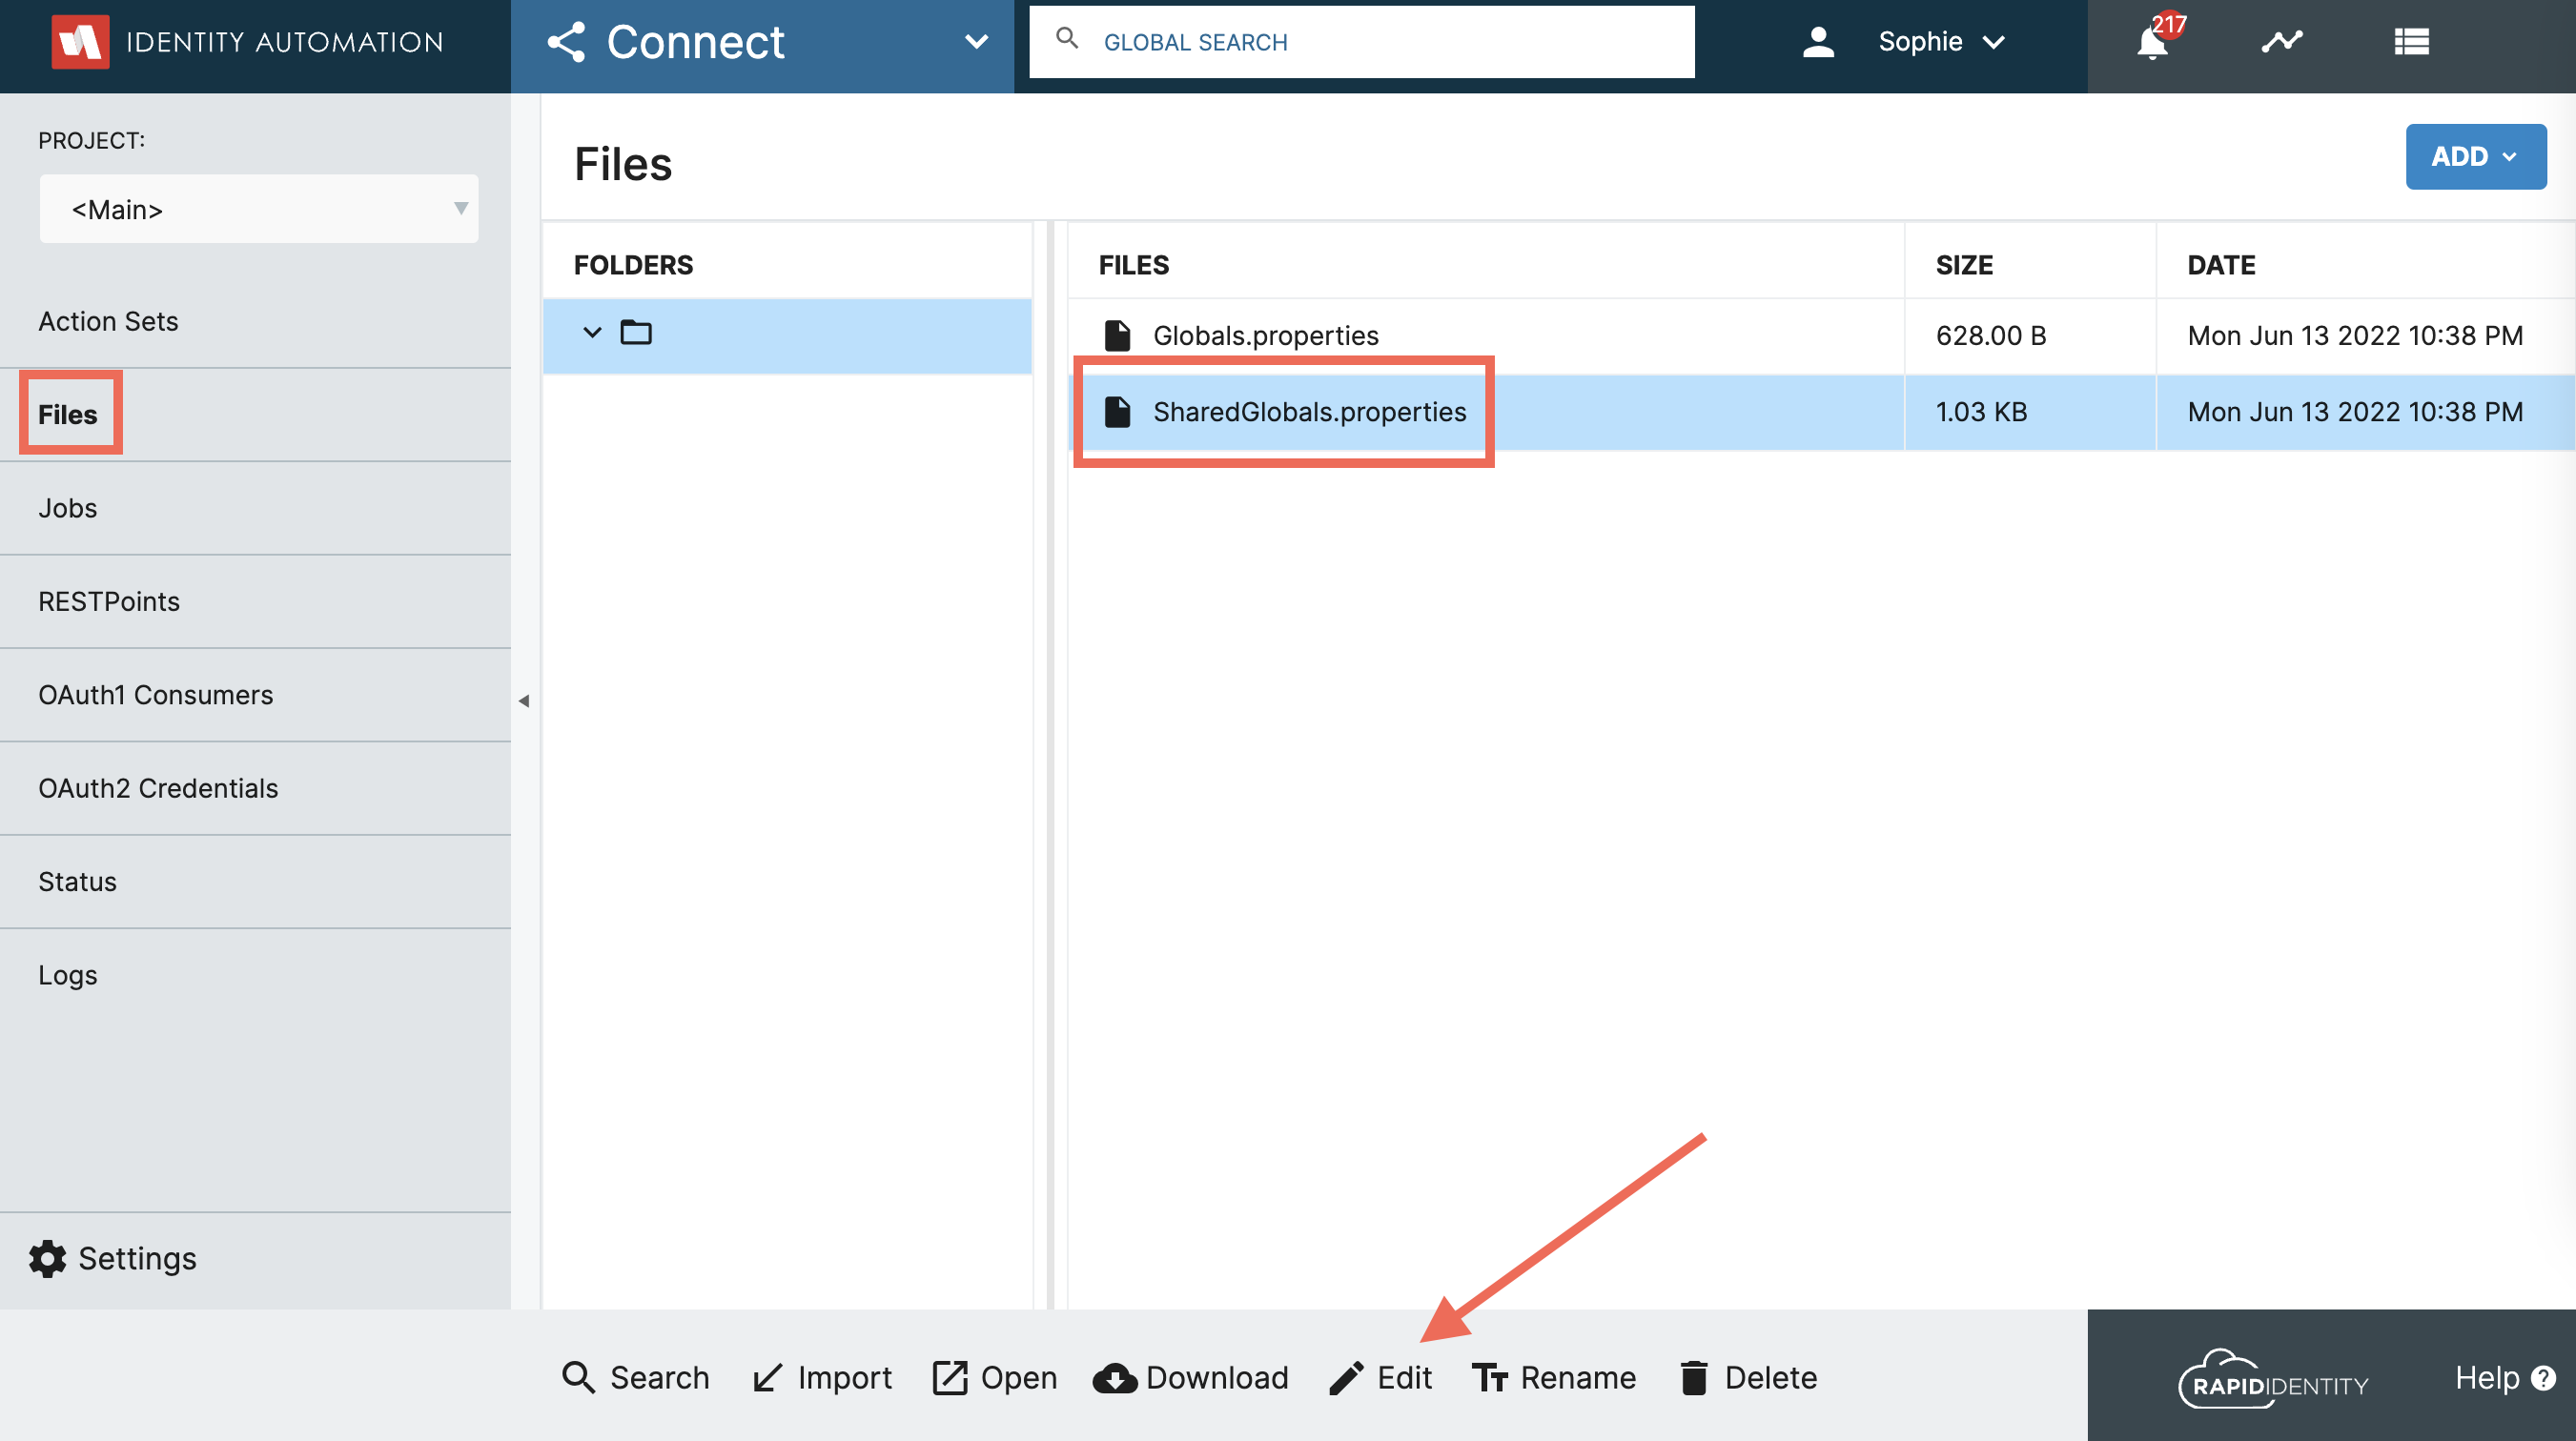
- Once the imports are complete, navigate to the Files tab and click on the SharedGlobals.properties File in the list that appears. Once it is highlighted, click on Edit in the bottom navigation bar.
- Copy the codeblock pasted below, and be sure to customize all fields in the block to reflect your specific environment.
adHost=bridge-<bridgename>.idaas-<idaas tenant url exclude .com>.svc.cluster.local
adUser=Domaincontroller Account user <USername>@<Domaincontroller>
adPwd=decrypt password of adUser (given decryption is for - idAuto#123)
adPort= Port number on which your identity bridge is connected.
adSSL = true
adBaseDN=DN=<domainprefix>,DC=<domainsufix>
adDNSDomain=<DomainName>
If Domain Name is authclient.idautoengineering.net then write for adBaseDN adBaseDN=DC=authclient,DC=idautoengineering,DC=net
-
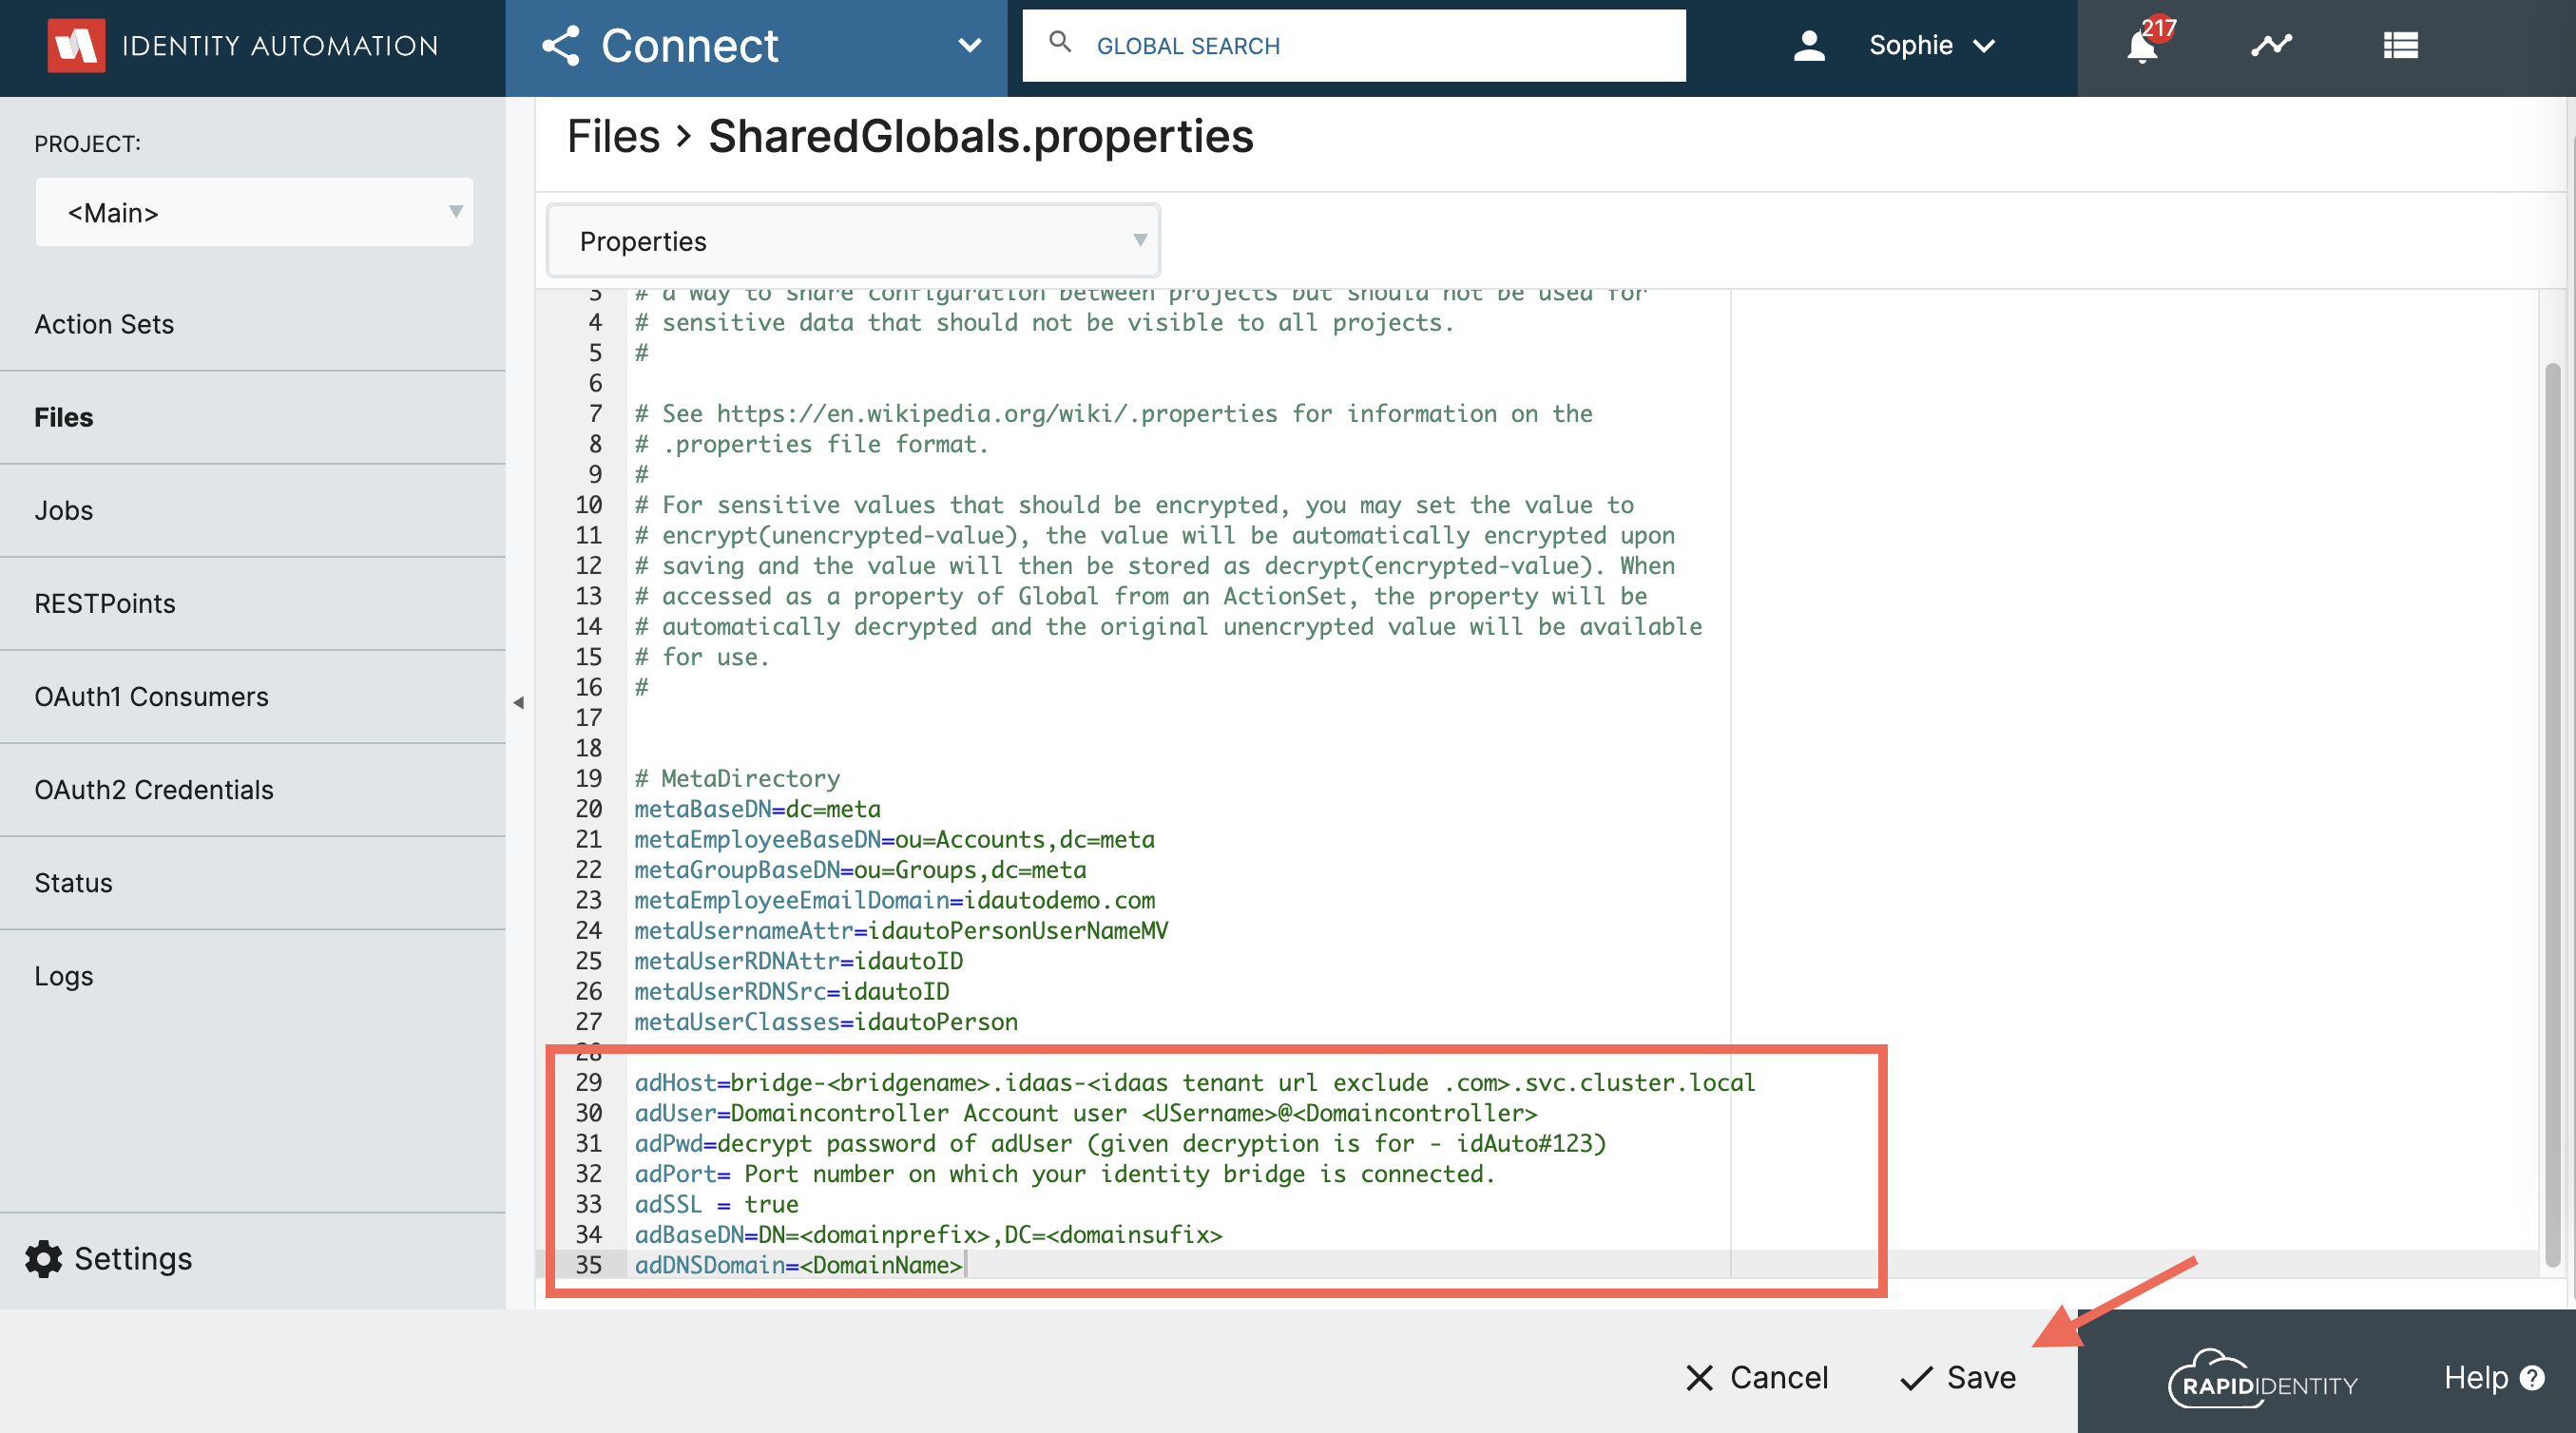
Once the custom fields have been updated, paste this codeblock at the bottom of the Properties code as seen in the image below. Click Save in the bottom navigation bar to save your changes.
-
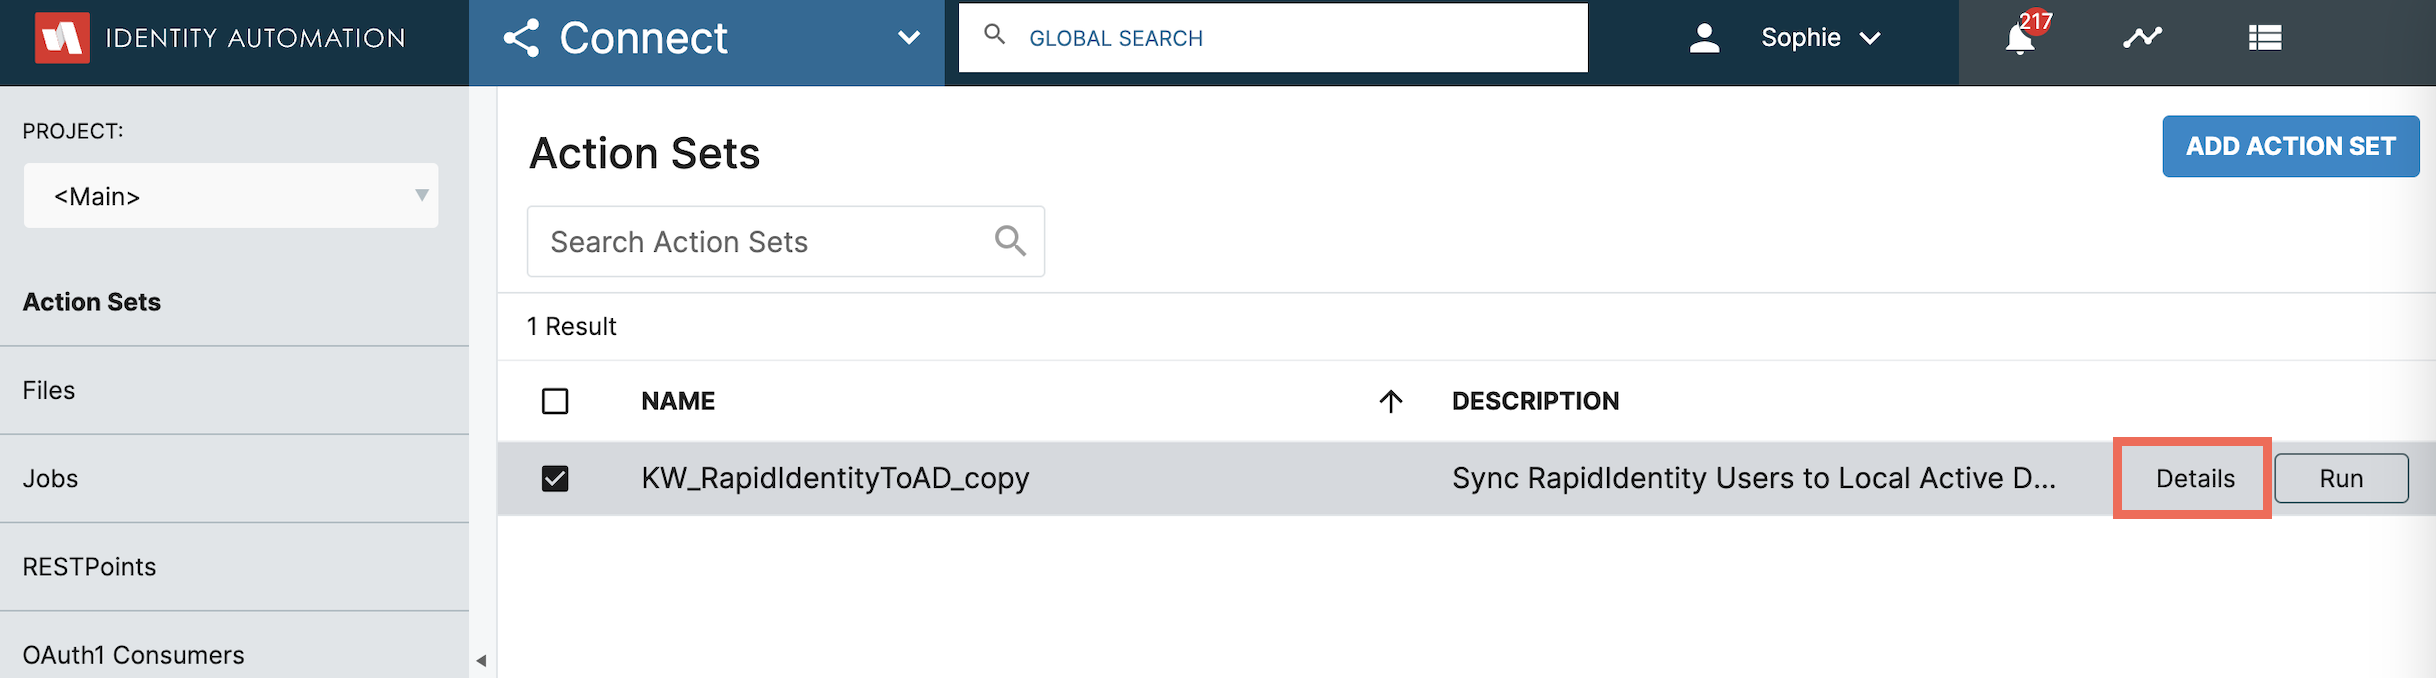
Navigate back to Action Sets via the tab seen in the left navigation bar. Highlight the Action Set titled 'KW_RapidIdentityToAD_copy' by checking the checkbox, and click on the Details button.
-
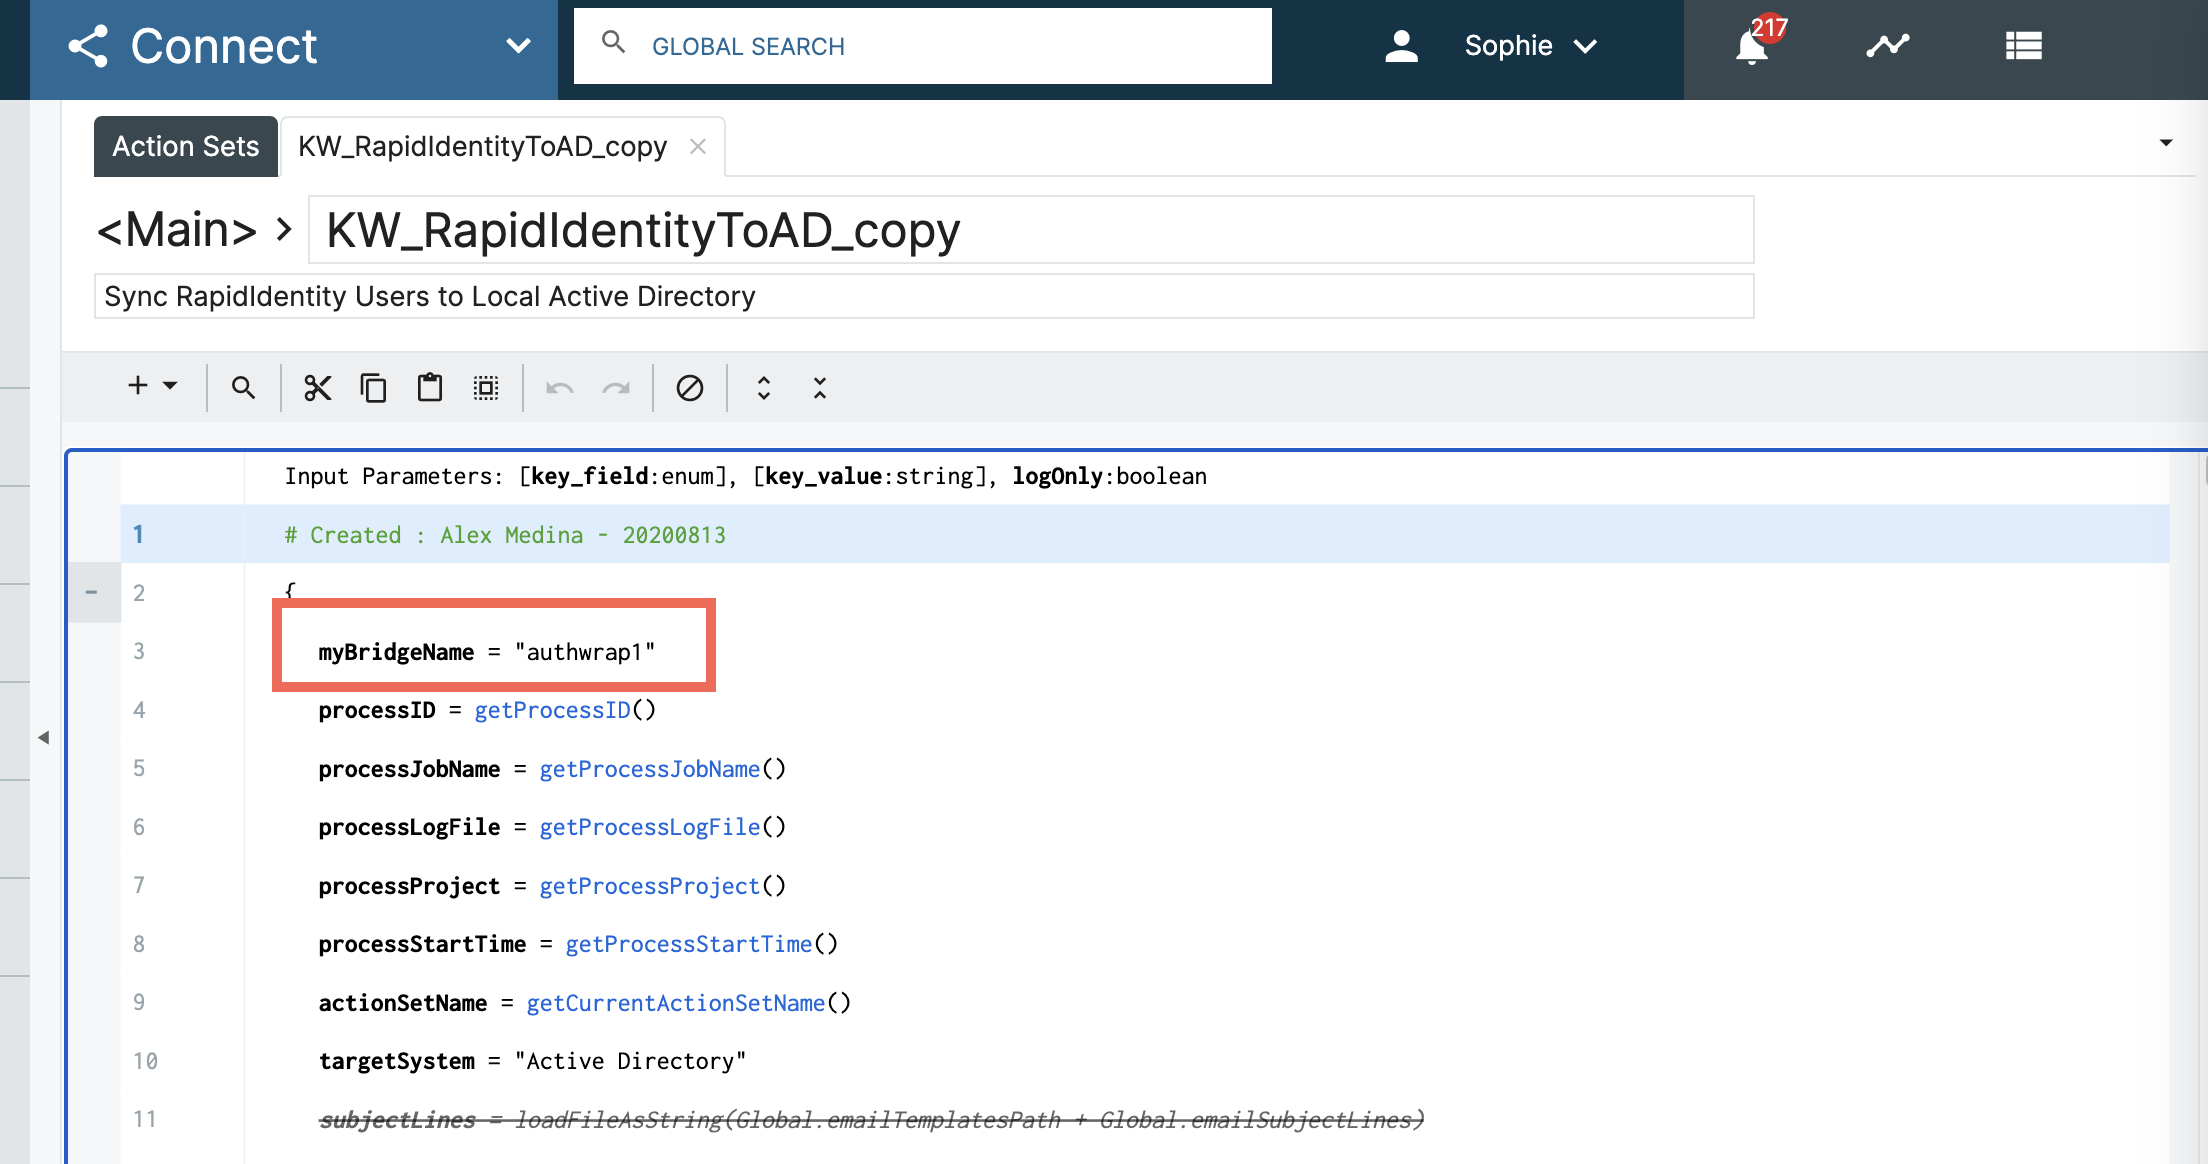
Once the Details are open, rename the myBridgeName property by entering your Identity Bridge name in it.
-
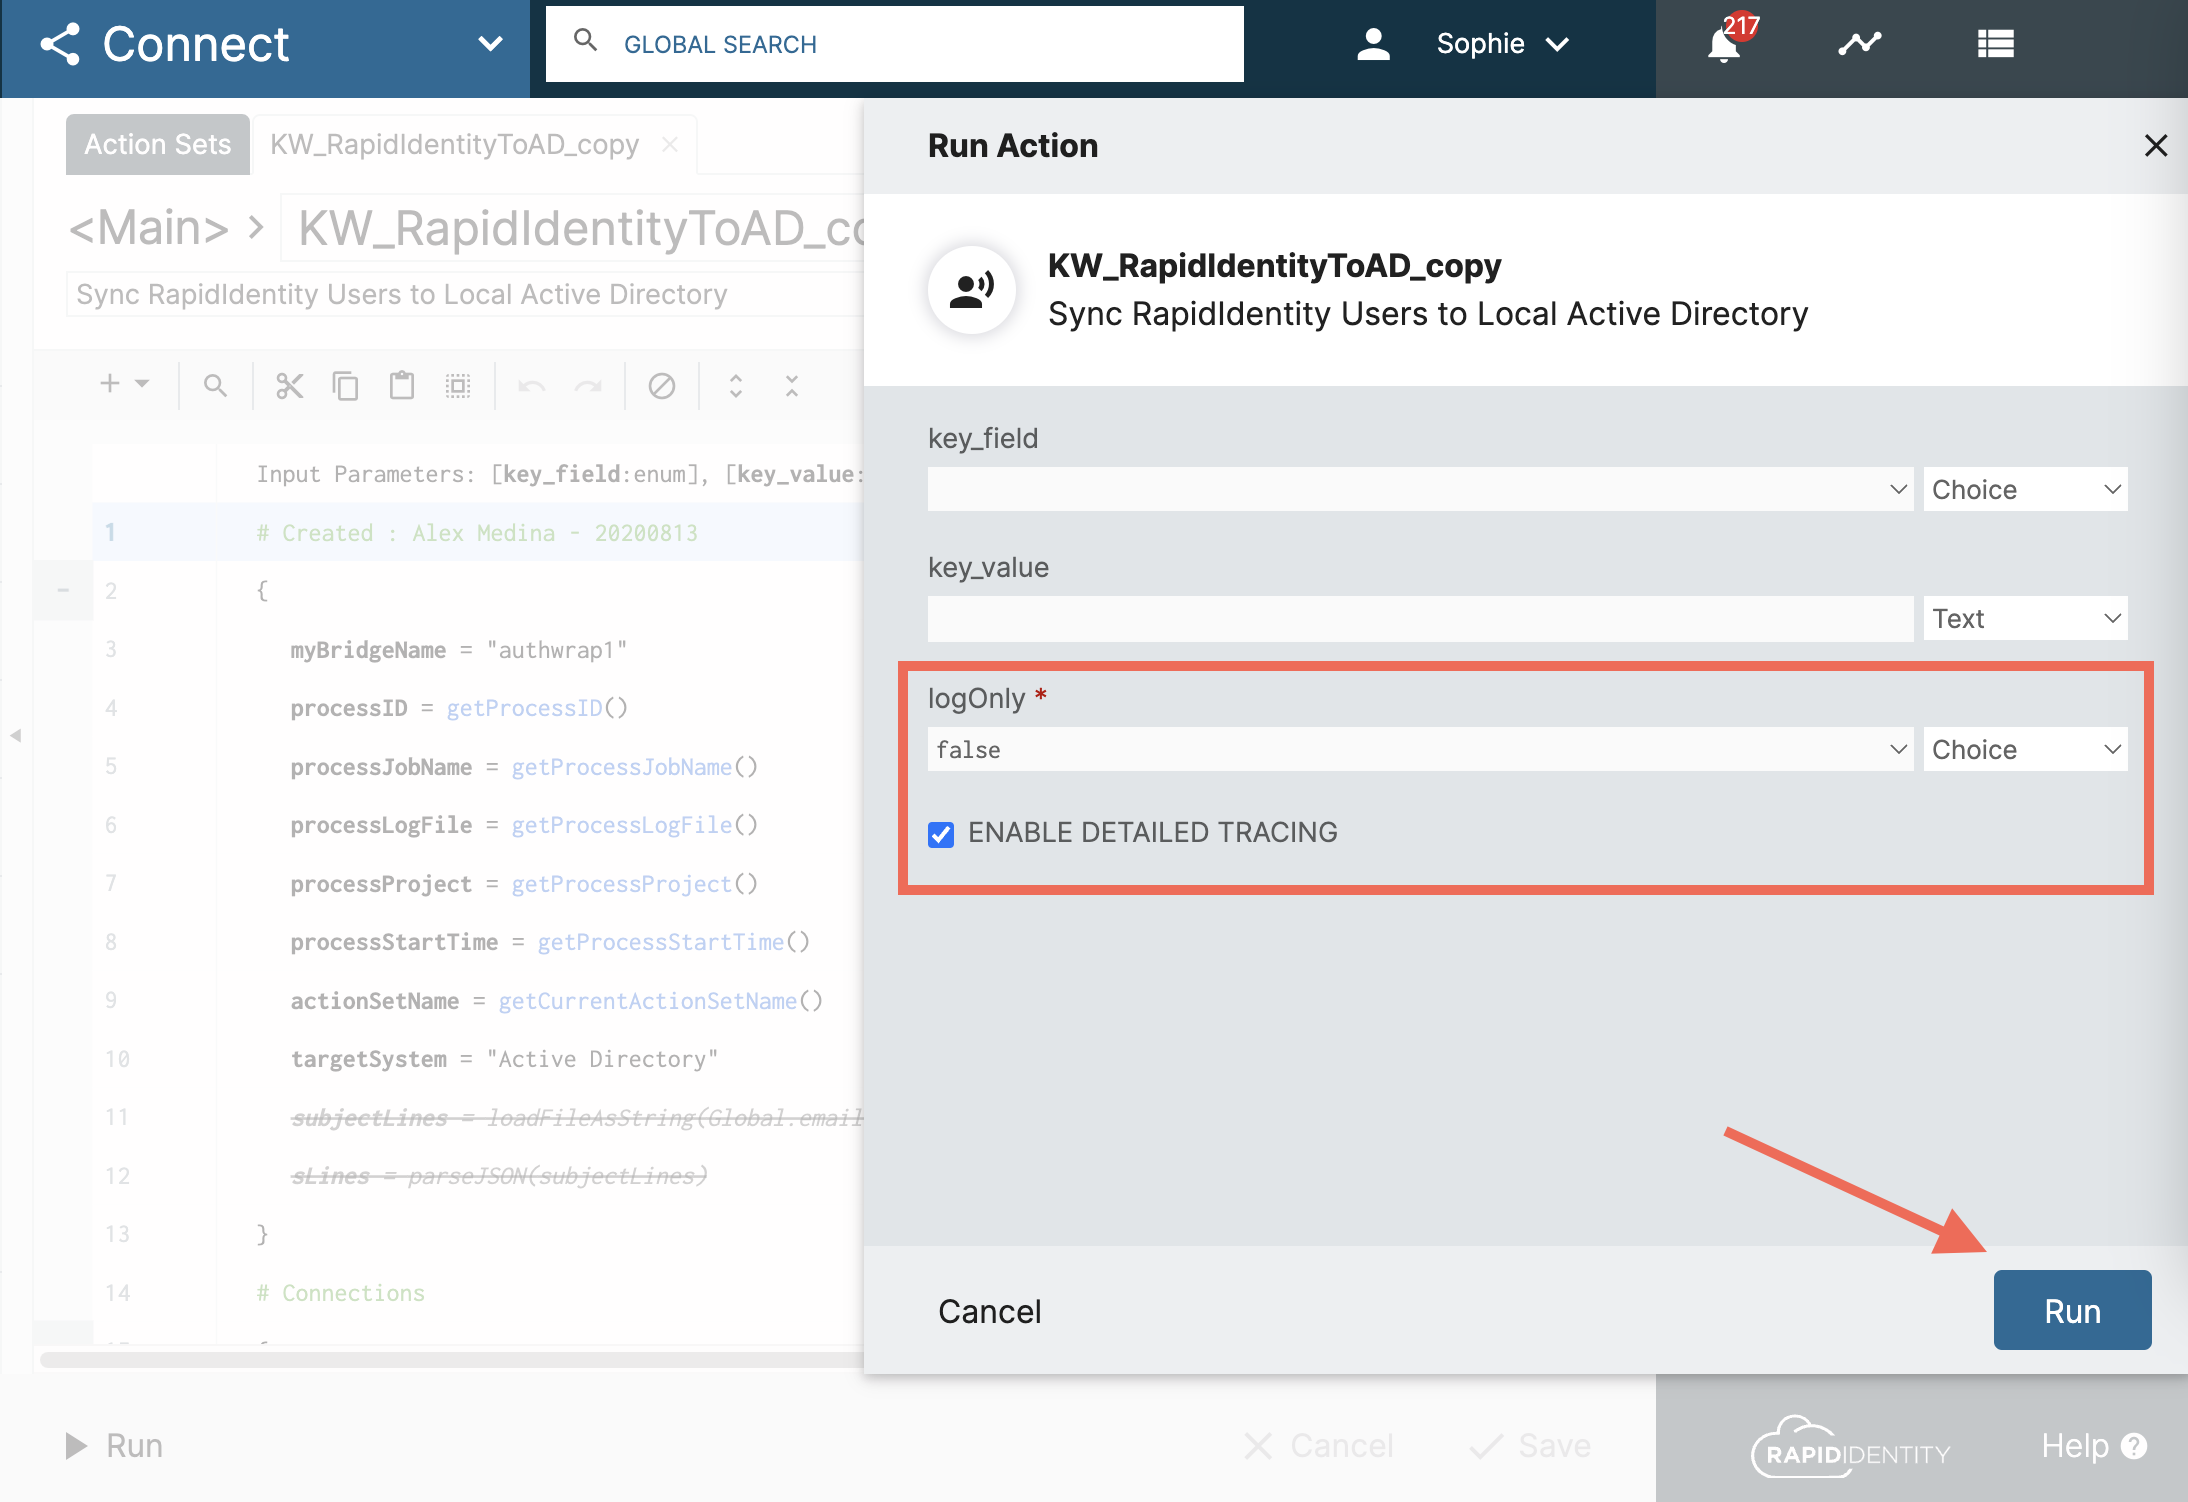
In the botton navigation bar, click the Run option. A right side menu will appear that shows the settings for this Run Action. Set the logOnly field to false and check the box for Enabled Detailed Tracing. Once the settings match the image below, click the Run button to run the Action set for all users.
A log of the Action Set run will appear in a new tab when the process is complete.