Twitter Authentication
- 08 Jun 2022
- 1 Minute to read
- Print
- DarkLight
Twitter Authentication
- Updated on 08 Jun 2022
- 1 Minute to read
- Print
- DarkLight
Article Summary
Share feedback
Thanks for sharing your feedback!
Follow these steps to configure Twitter social authentication.
- Navigate to the Twitter Developer page, and, if necessary, create an account.
- Follow the Twitter instructions to Create an App. This will be a web app.
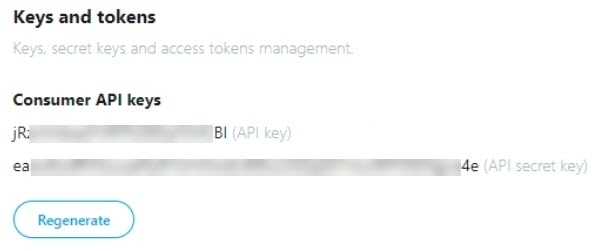
Note: Ensure the Organizational Site URL is always presented in the following format: https://. Also, Ensure the Valid Oath redirect URI for your organization is presented in the following format: https://. - Once the app is created, navigate to Keys and tokens to capture the Consumer API key and API secret key.
- Click Keys and Access Tokens to access the Consumer Key and Consumer Secret.
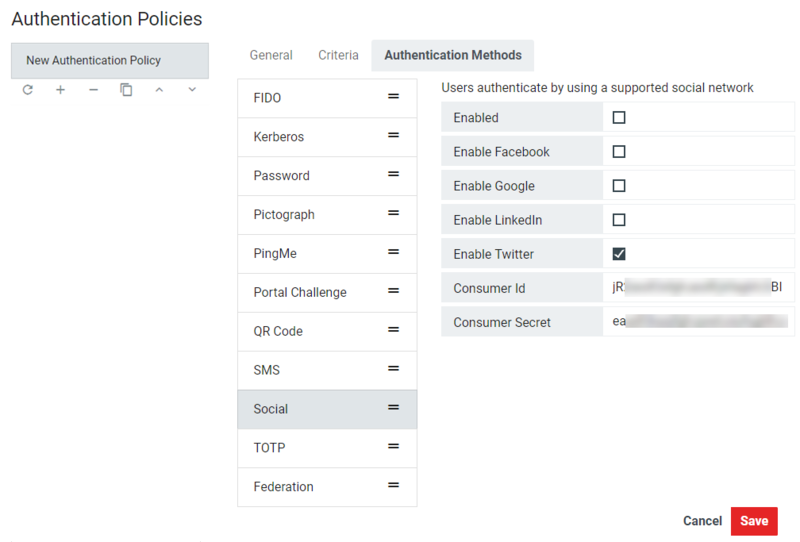
- Back in RapidIdentity, navigate to Configuration > Authentication Policies > [Authentication Policy] > Social > Twitter. Enter the Consumer ID and Consumer Secret from the Methods fields. Click the checkboxes next to Enabled and Enable Twitter. Click Save.
- Once the user tries to lock back in, they will be prompted to authenticate their Twitter account to their RapidIdentity account. After entering their username, the user will be prompted to use Twitter Authentication.
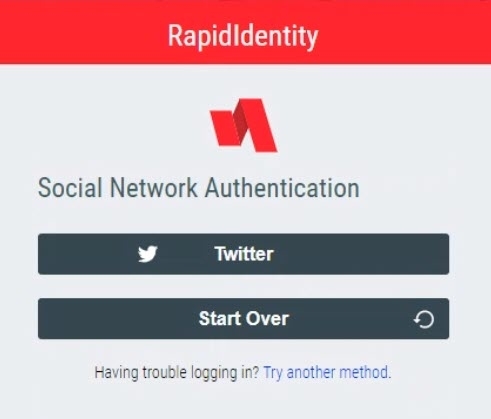
- The first time the user logs in, they will be redirected to the Twitter authentication website to confirm their credentials. At this point, they need to enter their Twitter credentials into the authorization window to authorize RapidIdentity.

- Once the user has signed into their Twitter account, they can return to RapidIdentity to continue logging in.
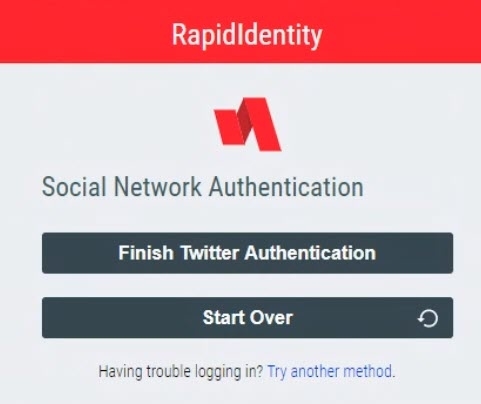
- RapidIdentity will now allow login to complete.


Subsequent Logins
Note: Each time an existing user logs in using Twitter Social Media Authentication, they must be logged in to Twitter before they attempt to log in to RapidIdentity; otherwise, they will be sent through the Twitter authentication loop again.
Was this article helpful?