Form Fill Authentication (via Plugin)
The Form Fill Authentication (via Plugin) Type allows administrators to configure an application to use the RapidIdentity Browser Plug-in.
This configuration is available when administrators select Form Fill Authentication (via Plugin) as the Type in the SSO tab of the Add Application menu.
The exact steps necessary to configure the authentication vary based on how the service provider has its authentication process configured.
- End users will need to download the appropriate plug-in for their browser.
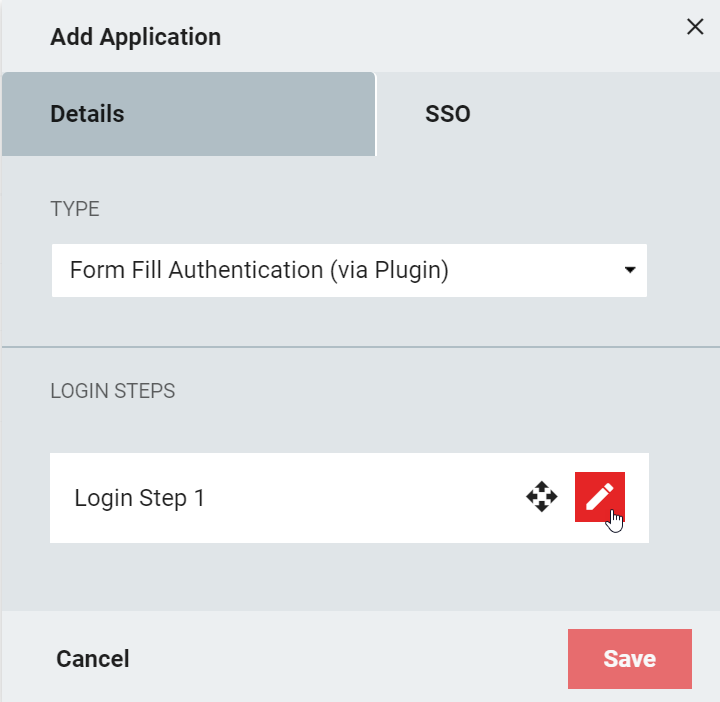
- Complete the required fields in the Details tab. In the SSO tab, select Form Fill Authentication (via Plugin) as the Type. The next action here will be to edit Login Step 1 by clicking the pencil icon.
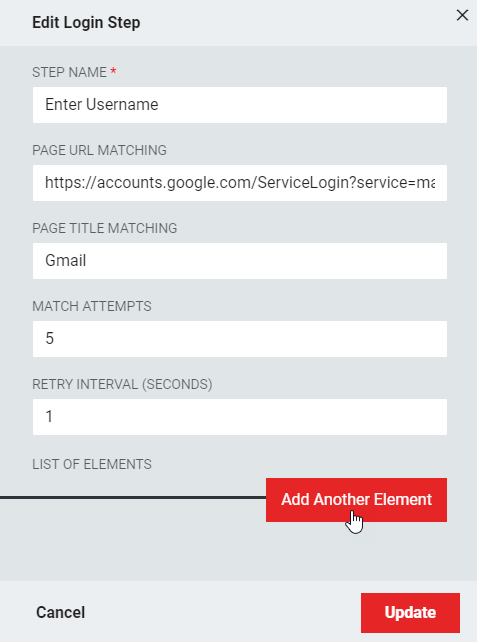
- Some login processes require two steps: first, enter the Email address on the first page and then the password on the next page. The main information should be entered in the Edit Login Step menu, then each of the granular configuration menus will start with defining an Element. Enter a Step Name for the step, the expected Page Title (for verification purposes), as well as Match Attempts and Retry Interval in Seconds. Then click to Add Another Element.
Form Fill Authentication (via Plugin) Fields
Field Name | Description |
Step Name | A name for the step (e.g., Enter Username) |
Page URL Matching | The URL for which information will be form-filled in the step. Wildcard (*) URLs are supported (e.g. https://www.example.com/*) |
Page Title Matching | The title that appears in the browser tab for the URL provided (e.g. Gmail). This field supports asterisks as wildcards. |
Match Attempts | The number of attempts the browser plugin should attempt to complete the form. |
Retry Interval (seconds) | The time interval for the browser to "wait" before attempting to match the Page Elements for each Match Attempt. |
- Each step will contain the configuration details required to describe each action the browser is to take. This requires configuring multiple Steps, their Elements, and the Actions performed within. Defining this element will instruct the browser on the steps to enter the email address.
Note: The element being defined must be unique on the page in order for the browser to find it successfully.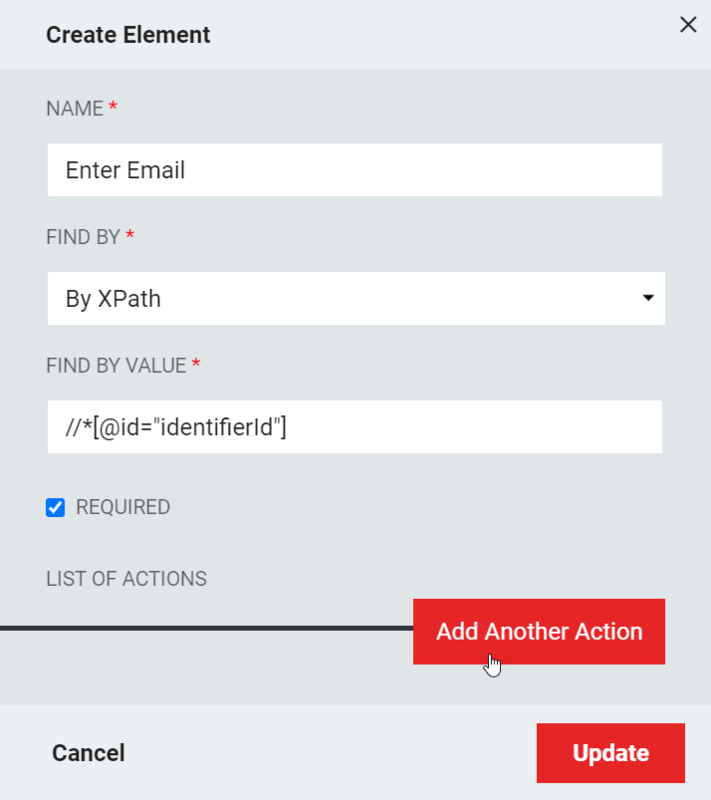
Create Element Fields
Field | Description |
Name | Provide a brief name for the element that will be part of this step. |
Find By | Use the drop-down list to determine which element to locate on the page on which to perform the next action. The choices are as follows:
|
Find by Value | Enter the exact value or a code string to represent the item chosen from the Find By drop-down list. |
Required | Clicking this checkbox ensures that the browser will not continue with the steps until this element has been met. |
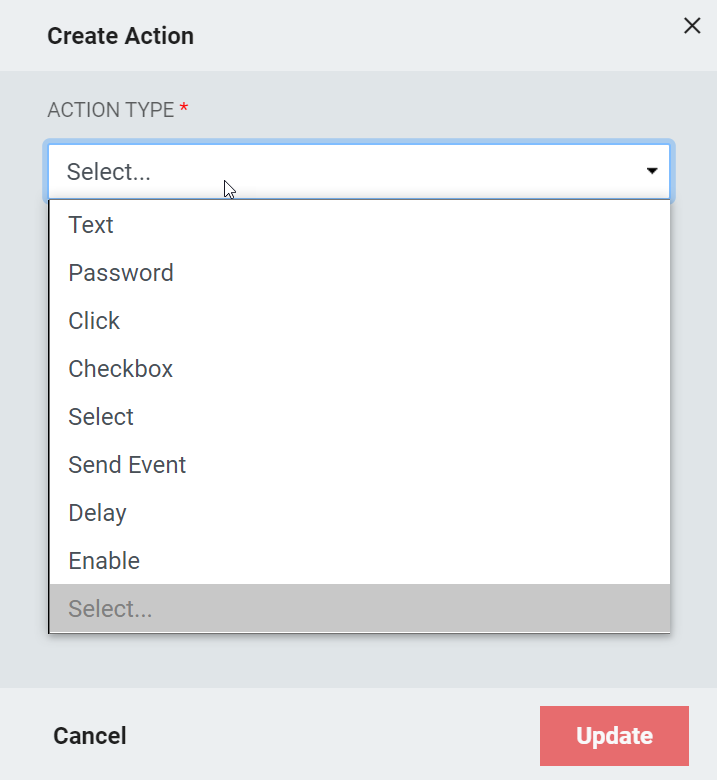
- To create an Action for the browser to perform on the selected Element, click Add Another Action.
Add Another Action Menu Fields
Field | Expected Value(s) |
Text | The text that should be entered into the chosen Element. This text should be entered as an expression (may contain interpolation expressions, or tokens) |
Password | The password that should be given to the chosen element. Note: This password can be entered as tokens (e.g. %session.password% or %password. Plaintext attributes can be used but are NOT recommended. Another option is to use a static password for all users accessing this app via this definition. That value would be encrypted by RapidIdentity. |
Click | Click the chosen element |
Checkbox | Determine whether the item should be selected as a checkbox |
Select | Choose a value from a drop-down option. The option will need to be defined |
Send Event | Send a JavaScript event to an element on the web page. RapidIdentity supports the common Change, Focus, and Blur events, and provides an Other type with the opportunity to define any type of arbitrary event that can be sent to the element this action is defined for |
Delay | Introduce a delay in milliseconds before moving to the next action |
Enable | Enable the chosen element |
- Click Update until you return to the main menu, then click Save to return to the Catalog. The application is now ready to use.