Creating a Connect Job to generate a CSV
Connect Action Set for generating the CSV
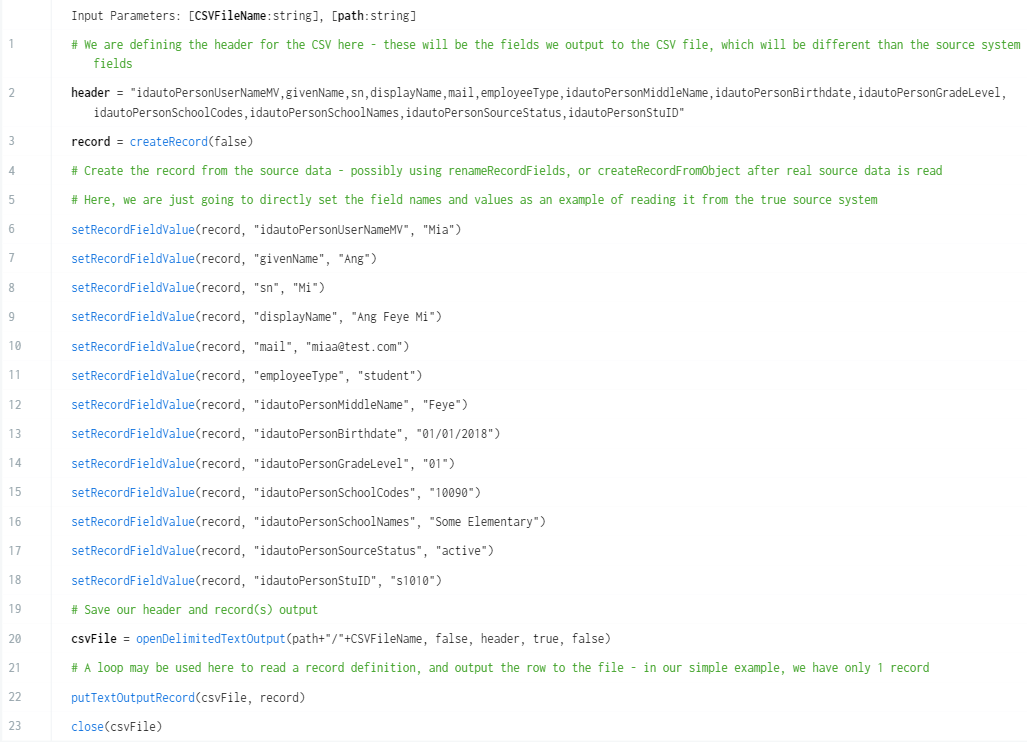
In order to transfer arbitrary source data from a system that is accessible via connect, create a connect action set that is capable of connecting to the source database or service that has the data and query/iterate over the source system to build a record set. Output this record set as a CSV file. The CSV File may contain the following header that details all RapidIdentity attributes the adapter can consume.
idautoPersonUserNameMV,givenName,sn,displayName,mail,idautoPersonEmailAddresses,idautoPersonHomeEmail,idautoPersonPhotoURL,idautoPersonEndDate,employeeType,idautoRequestAssociations,idautoPersonClaimCode,idautoPersonClaimFlag,l,st,postalCode,idautoPersonMiddleName,idautoPersonOfficePhone,idautoPersonPhoneExtension,idautoPersonHomePhone,idautoPersonBirthdate,idautoPersonTermDate,idautoPersonEmployeeTypes,idautoPersonDeptCodes,idautoPersonDeptCode,idautoPersonDeptDescrs,idautoPersonDeptDescr,idautoPersonLocCodes,idautoPersonLocCode,idautoPersonLocNames,idautoPersonLocName,idautoPersonJobCodes,idautoPersonJobCode,idautoPersonJobTitles,idautoPersonJobTitle,idautoPersonTeachers,idautoPersonStudents,idautoPersonGradeLevel,idautoPersonSchoolCodes,idautoPersonSchoolNames,idautoPersonStatusOverride,idautoPersonRenameUsername,idautoPersonRenameFlagDate,idautoPersonActivationDate,idautoPersonSourceStatus,idautoPersonToSystem1,idautoPersonToSystem2,idautoPersonToSystem3,idautoPersonToSystem4,idautoPersonToSystem5,idautoPersonHRID,idautoPersonStuID,idautoPersonPayrollID,idautoPersonPreferredLanguage,idautoPersonPreferredLastName,idautoPersonPreferredName,idautoPersonSystem1ID,idautoPersonSystem2ID,idautoPersonSystem3ID,idautoPersonSystem4ID,idautoPersonSystem5ID,idautoPersonStateID,idautoPersonDistrictID,idautoPersonSchoolID,idautoPersonSAMAccountName,idautoPersonPrevSAMAccountName,idautoPersonExt1,idautoPersonExt2,idautoPersonExt3,idautoPersonExt4,idautoPersonExt5,idautoPersonExt6,idautoPersonExt7,idautoPersonExt8,idautoPersonExt9,idautoPersonExt10,idautoPersonExt11,idautoPersonExt12,idautoPersonExt13,idautoPersonExt14,idautoPersonExt15,idautoPersonExt16,idautoPersonExt17,idautoPersonExt18,idautoPersonExt19,idautoPersonExt20,idautoPersonExtBool1,idautoPersonExtBool2,idautoPersonExtBool3,idautoPersonExtBool4,idautoPersonExtBool5,idautoPersonAppRoles1,idautoPersonAppRoles2,idautoPersonAppRoles3,idautoPersonAppRoles4,idautoPersonAppRoles5,idautoPersonAppRoles6,idautoPersonAppRoles7,idautoPersonAppRoles8,idautoPersonAppRoles9,idautoPersonAppRoles10
As an additional reference, see the RapidIdentity Cloud Directory Schema document for the names of the attributes if a particular attribute is not shown above.
Depending on the mappings configured for the RapidIdentity Connect Source, individual columns can be eliminated if data is not expected to be provided for a given column.
A more reasonable header might be the following - ensure the mappings specified include only the values that have been specified in the header.
idautoPersonUserNameMV,givenName,sn,displayName,mail,employeeType,idautoPersonMiddleName,idautoPersonBirthdate,idautoPersonGradeLevel,idautoPersonSchoolCodes,idautoPersonSchoolNames,idautoPersonSourceStatus,idautoPersonStuID
Connect Example Action Set for generating the CSV
Here, our example would be “test.csv” and “.” for the parameters respectively - this will create the test.csv in the root folder of the current project. This action set has been named createCSVConnectRecord.
Connect Job for generating the CSV on a schedule
Create a connect job and set a schedule so that a source import periodically updates the CSV file. The job should execute the CVS source import action set that will create or update/overwrite the configured CSV file.
As an example - here is an action that defines the filename and output path for the CSV generation above, which has been named runCSVSourceImport that calls the action to create the source data in the specified filename and path.

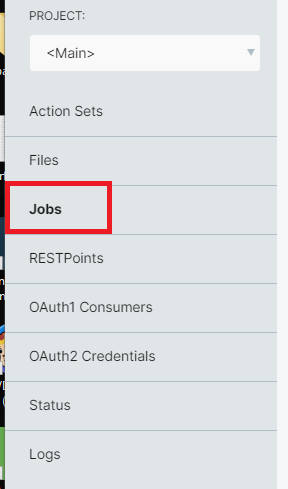
From the connect Jobs sidebar menu, create a schedule to run this action set:
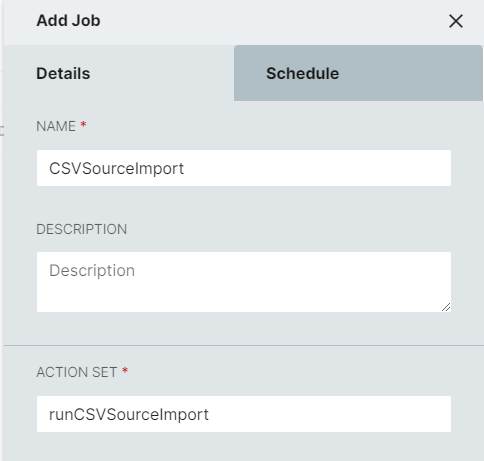
Click the ADD JOB button in the upper right of the Jobs screen.
On the sidebar that opens, fill in the Name and select the action set to run. A meaningful description may also be added, possibly identifying the source that this scheduled job is importing from.
Next, click on the Schedule tab to define how often this job will execute to generate a CSV file from the source system. This schedule should run before the schedule defined for the ID Hub RapidIdentity Connect source import schedule. An example schedule that runs daily at 12:00am Central time might look like this:
.png)
Click the Save button to confirm the Job details and schedule settings: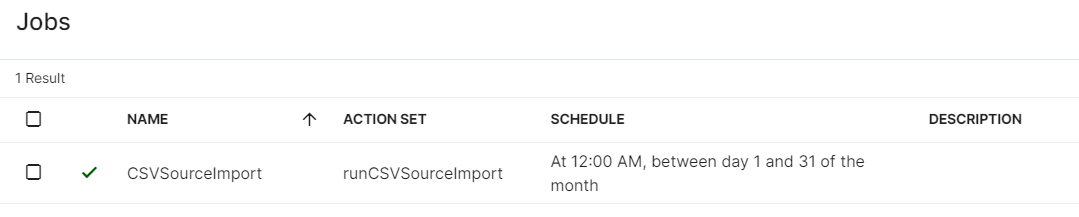
Where to place the CSV
Any project or folder path may be used. It might be appropriate to create a Project called ID Hub Connect source, or, alternately, create a folder IDHubSources in which to place the output of Connect job imports from various source systems. Whatever the case, note where the output file will be so that you have a reference when configuring the RapidIdentiy Connect Source Adapter in Identity Hub setup.
The examples in this document will just use the <Main> project and the root folder in connect.
Where to find the CSV in the Connect Files Module
The CSV can be found in a project and folder within the Connect file system. It is possible to create a new project module, or create sub-folders to place the CSV output in, and this will have already been done during the configuration of the the Connect source action set and job import tasks. The examples in this document will just use the <Main> project and the root folder in Connect.
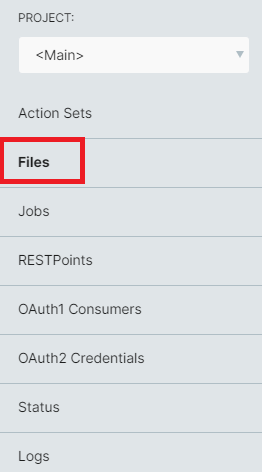
From the Left Sidebar, under PROJECT: select the project name from the drop down corresponding to the output configuration of the connect action set.
Click the Files menu option in the left pane to view the Files section.
Example Action Set or Project export for learning
Attached is the action set displayed above. It can be imported into your connect project as an example.
Setting up a Connect Source in ID Hub
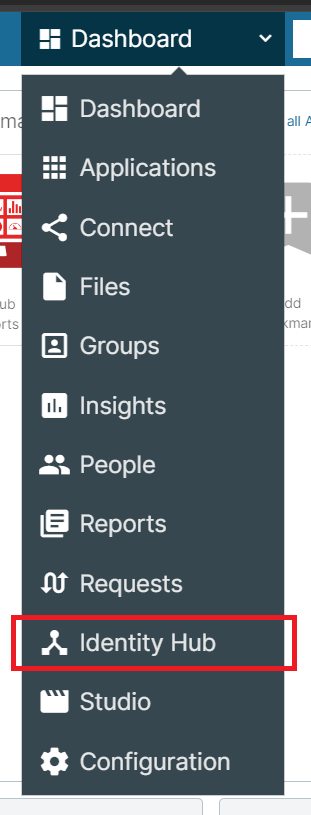
Navigate to the ID Hub Module by selecting Identity Hub from the modules selection drop down at the top of the page.
From the ID Hub Dashboard, your current sources and targets are displayed. Click the + ADD SOURCE button

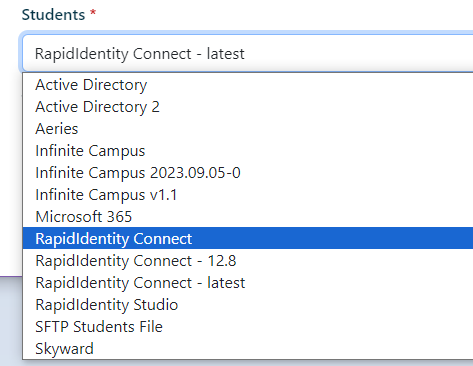
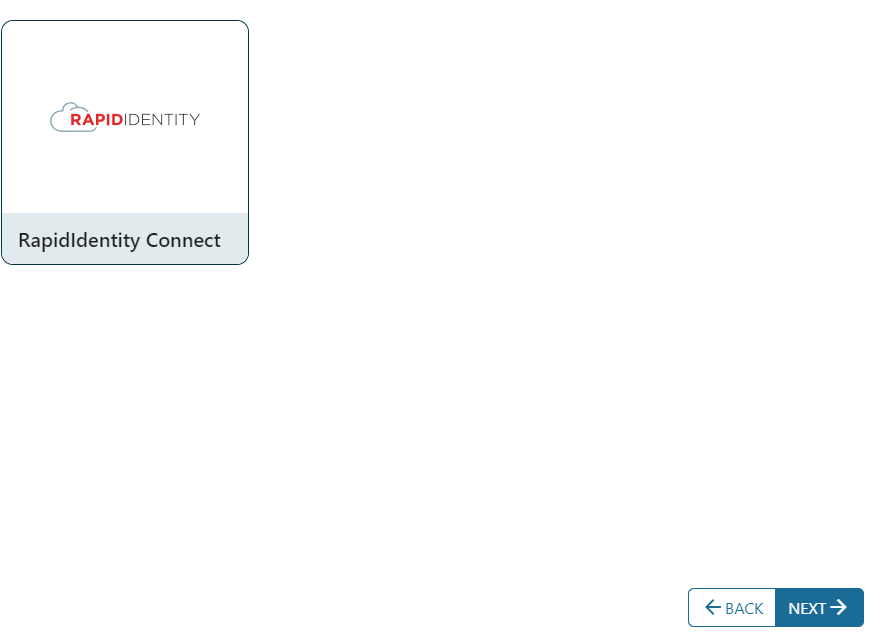
From the list of sources presented, click the RapidIdentity Connect tile to select this as a source, then click the NEXT -> button to begin the source configuration wizard.
Connection page
Specify the path and filename of the CSV file – since the file is in the root folder, just specifying the filename is sufficient test.csv
Specify the project name – since we are using the <main> project a forward slash is sufficient.

Once these are filled in, click the NEXT -> button
Credentials page
Because the source of the data is RapidIdentity, you do not need to provide any credentials to the source adapter. During the wizard flow to add the adapter, this page will be blank. Just click the NEXT -> button.
Mapping pages
The default mappings account for every RapidIdentity attribute available. If the CSV provided does not specify all of these fields, the default mappings will need to be removed for those attributes not provided.
To remove a mapping, click the trashcan icon to the right of the attribute to be removed.
For Example:


After removing all of the attributes that are not present in the CSV file, click the SAVE button at the bottom right of the page, just above the NEXT -> button.
Make any adjustments to the mappings as needed.
If the source data (CSV file) contains only a single type of person (student, teacher), and does not specify a employeeType attribute/column -- manually update the mapping of employeeType -> role as follows:
Click the arrow -> button to bring up the advanced editor and enter the specific type of person, either “student” or “staff” as a quoted string.

Choose an attribute to use as the identifier key for this file, something like idautoPersonStuId, or idautoPersonUserNameMV or mail that will be unique in the data being imported. Set the key file by clicking on the KEY icon.
Toggle the Is key? toggle button in the pop-up to enable this field as a key field.

Click the SAVE button to confirm changes to the mappings.
Click the NEXT -> Button.
Source Filter
In the wizard flow, choose to import all data, or to filter data. This guide will assume that all data will be imported, so click the NEXT -> button to continue. Source filters can later be updated by selecting the Source Filter tab on the configuration screen of the Source Adapter.
Source filtering is disabled by default after choosing to import all data from RapidIdentity Connect, so all rows of the CSV will be processed. It is possible to enable a filter on the “Source Filter” tab if desired after the wizard completes. Filtering will depend on the source data, for instance if the source includes both students and teachers/staff, and the employeeType column has been appropriately populated (values are specified as "staff", "teacher" or "student) , you can configured a filter to only pull in the “student” records , or only pull in the “staff” records from this file using filters. Since employeeType maps to Role, a filter to import “student” records would be specified as follows:

How to schedule a source import
In the wizard flow, the final page allows the user to enable and configure a schedule.
Click the FINISH button to complete the configuration of the source.
The schedule can be enabled at a later time by selecting the Schedule Tab of the Source Adapter configuration screen.
The Schedule tab is where you can specify how often to run the import job. It is also where you can run a manual import, or log only import to test the data from the source.
Setting up a Schedule
To configure a schedule, click the Enable Schedule toggle to begin configuration of a schedule.

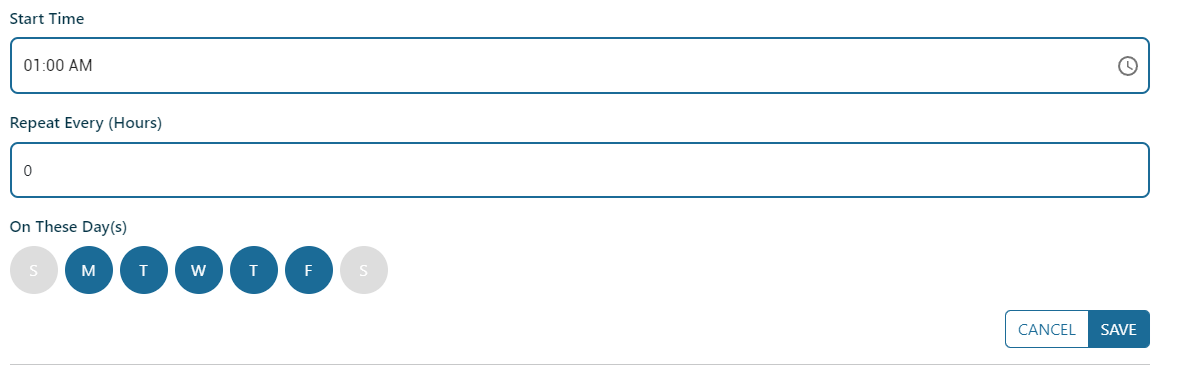
This will enable the entry fields to define the scheduled start time, and how often it runs. The minimum of 1 hour can be selected for recurring imports for the selected days. If a value of 0 is used, then the schedule is triggered only 1 time, at the specified Start Time on the selected Days.
Select the day(s) that the import should run by clicking on the initial of each day desired. In the below example, the schedule is configured to run on every day of the week only 1 time, staring at 1:00 AM (browser local time).
Click the SAVE button to confirm the scheduled days and times.
Performing a Manual Run
In order to validate the data can be successfully processed, it is recommended that log only, manual runs of the source be completed prior to enabling a schedule and fully automating the import process.
To perform a manual run for validation, navigate to the Schedule tab of the Rapid Identity Connect source adapter configuration screen.
At the bottom of the page, enable the Run with detailed logging toggle, and ensure the Run in log-only mode? toggle is also enabled.
Click the RUN NOW button.
Assuming all of the connection, mappings and source filter settings are in place, the job should run, and the logs can be reviewed to verify the import was successful.
How to view logs from a run and interpret the most useful information
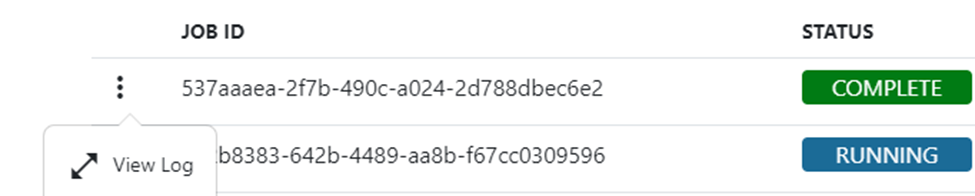
Once a job is running, clicking the Jobs tab will show the status of each run. The current job will display that it is running. The page will automatically query the status to display the progress of the job(s).

Once the job enters the “UNKNOWN”, “FAILED”, or “COMPLETE” stage, you can view the captured logs. To do so, click on the ellipse menu to the left of the Job ID and select view log.
This will open the log for the job.
Important information to look at is near the bottom of the page where source stats will be detailed – for instance, in the test file import from the completed job above, the result of the run would produce the following status:
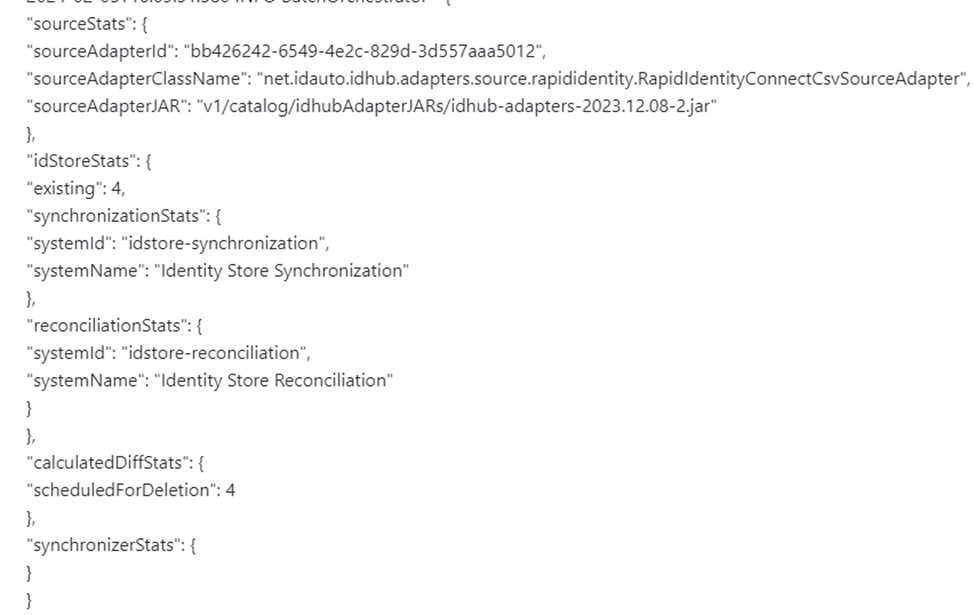
This indicates that there 4 existing users in the ID Store that are no longer present in the CSV file and they would be scheduled to be set to Deleted – in this case, that means they will be set to inactive.
If detailed logging is enabled, another section that can be examined is the source import information. Search for lines that have “Yielding record (index: #): and Loaded xx total records to validate the source records have been loaded as expected.
How to configure Source Priority
Configuring source priorities takes place on the Global Source Page.
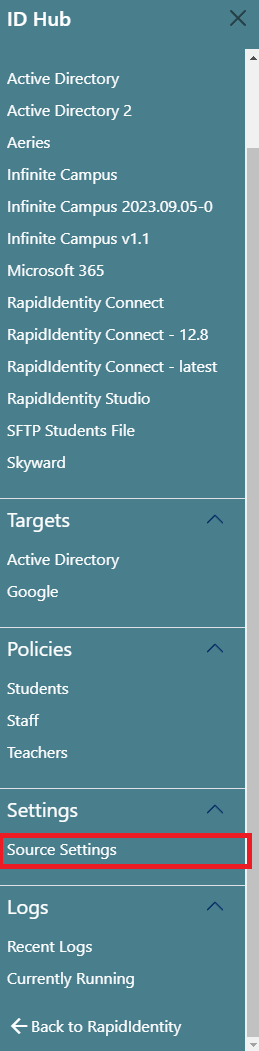
Select the hamburger menu at the top of the page to open the navigation sidebar. If necessary, scroll the menu to Settings, and choose Source Settings.
You will then be presented with a list of all of the sources defined for the implementation, and the order in which they will be processed.
Locate an appropriate source.
The bubble on the left shows the current priority number.

Using the grab bars to the right of the source, drag and drop the row to a new priority location.
The new priority will be reflected when the row is dropped in an appropriate location, and the new priority will be saved automatically.

How to configure source of authority
Select the hamburger menu at the top of the page to open the navigation sidebar. If necessary, scroll the menu to Settings, and choose Source Settings
Scroll to the bottom of the page to see Group Authoritative Sources.
This section details for each set of account Students, Teachers, Staff what the autorotative source of those accounts will be. Other sources can contribute to the data associated with the group of accounts, but the values set by the authoritative source will specify values that take precedence over all other sources.
From the drop down menu, select the source for the appropriate group. In our example, we are specifying RapidIdentity Connect is importing students, and will be the main source for the data for that group of users.