How to Manage Locked or Disabled Users Accounts
RapidIdentity Cloud user accounts can become locked when the maximum number of failed logins is exceeded and they can become disabled via an administrative or automated action.
When a user account is locked or disabled, the user is prohibited from accessing their account.
To gain visibility into which user accounts are locked or disabled and take corrective actions, a People module Delegation can be created. This delegation lists the users meeting specific criteria such as locked or disabled and provides actions to remediate, unlock or enable, them.
Follow these steps to create this delegation:
You must have administrative privilages such as Portal Administrator or Tenant Administrator to create and manage delegations
-
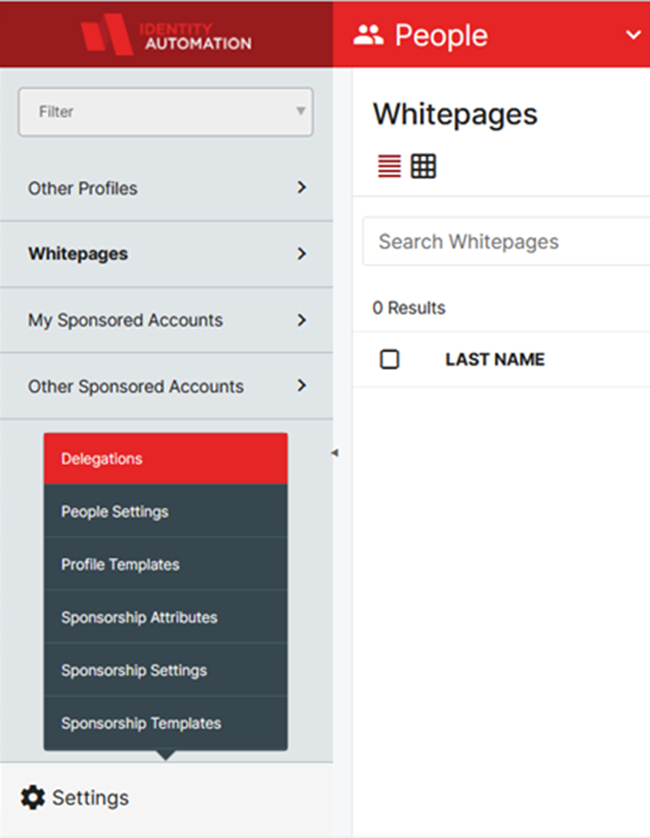
Clone and modify an existing delegation by navigating to People > Settings > Delegations
-
Select the checkbox for the Other Profiles delegation, or any delegation of your choice, and Clone it.
-
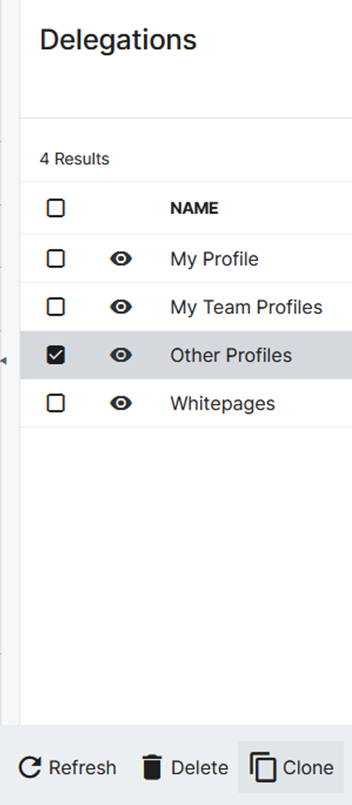
Locate the newly copied delegation and click Details to configure it.
-
Set the General tab settings to the following:
- Enabled: checked
- Name: Disabled or Locked User Accounts
- Description: User accounts which are disabled or locked and related actions.
- Preload All Results: checked
- Delegation Source: add or remove Appliance Roles as needed
- Delegation Target: (&(objectClass=idautoPerson)(|(pwdAccountLockedTime=*)(idautoDisabled=TRUE)))
-
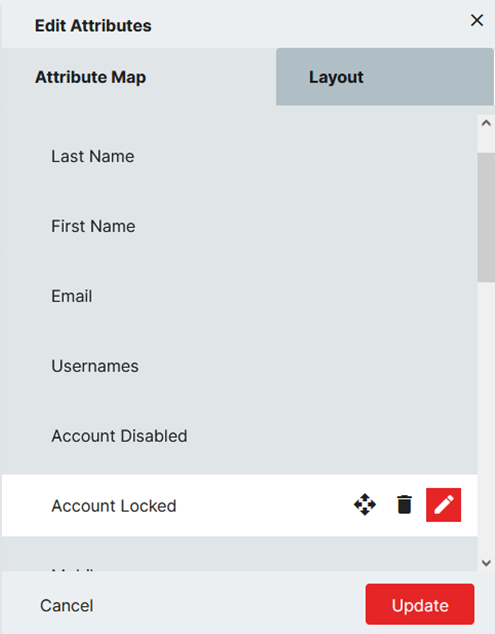
Click the Attributes button to edit attribute settings and display two relevant items:
- Locate and edit these attributes to Show In List:
- Account Disabled
- Account Locked
- Click Update button to apply the changes
Note:Feel free to add, remove or change other attributes as desired
- Locate and edit these attributes to Show In List:
-
Set the Actions tab to include the following actions: (other actions are optional)
- Change Password
- Enable
- Unlock
-
Save the changes to the Delegation
Follow these steps to use the new newly created delegation:
-
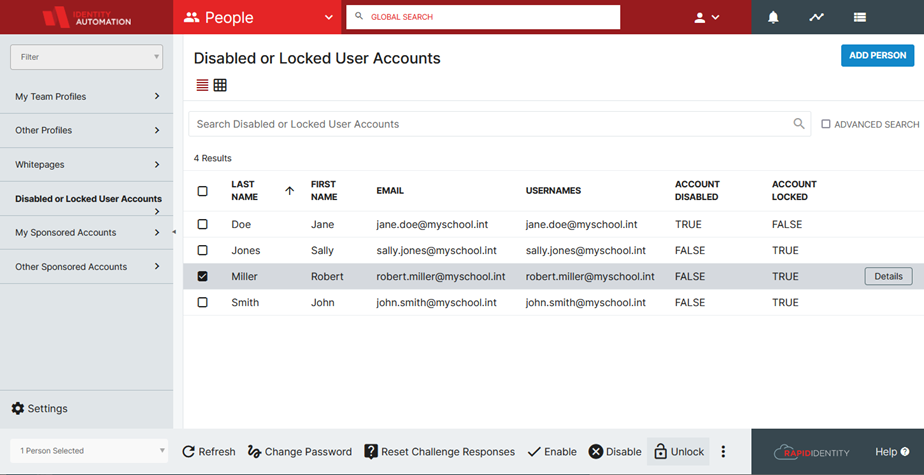
Locate the Delegation in the sidebar delegations list and select it.
Note:Users which are either locked and disabled will be listed with their status in the respective columns.
-
Check the box for the user(s) you want to take action on.
-
Click the appropriate action for the user account.
If only locked user accounts are of interest in the delegation:
-
Use this Delegation Target value instead: (&(objectClass=idautoPerson)(pwdAccountLockedTime=*))
-
Do not Show In List the Account Disabled attribute