Identity Automation has created a plugin and data provider combination that allows school districts using PowerSchool to pull rostering data into RapidIdentity Studio for extract, transform, and load capabilities.
The plugin entity is installed locally on the PowerSchool instance, and allows for the use of specified data and endpoints defined within. These endpoints were developed using PowerSchool's PowerQuery mechanism, which is an augmented version of the SQL query language, used specifically for their systems. By triggering one of these endpoints, the PowerQuery denoted within it is executed and the data is returned through REST as a JSON object.
Prerequisites
- A RapidIdentity tenant licensed to operate the Studio module
- A RapidIdentity tenant that is at version 2022.4.5 or higher
- Access to a PowerSchool system through its Admin Console
- Access the most recent version of the Plugin
Installing the Plugin
-
Log in to your PowerSchool system through the Admin Console.
-
Usually, this falls to
/admin. You will be presented with the landing page pictured. -
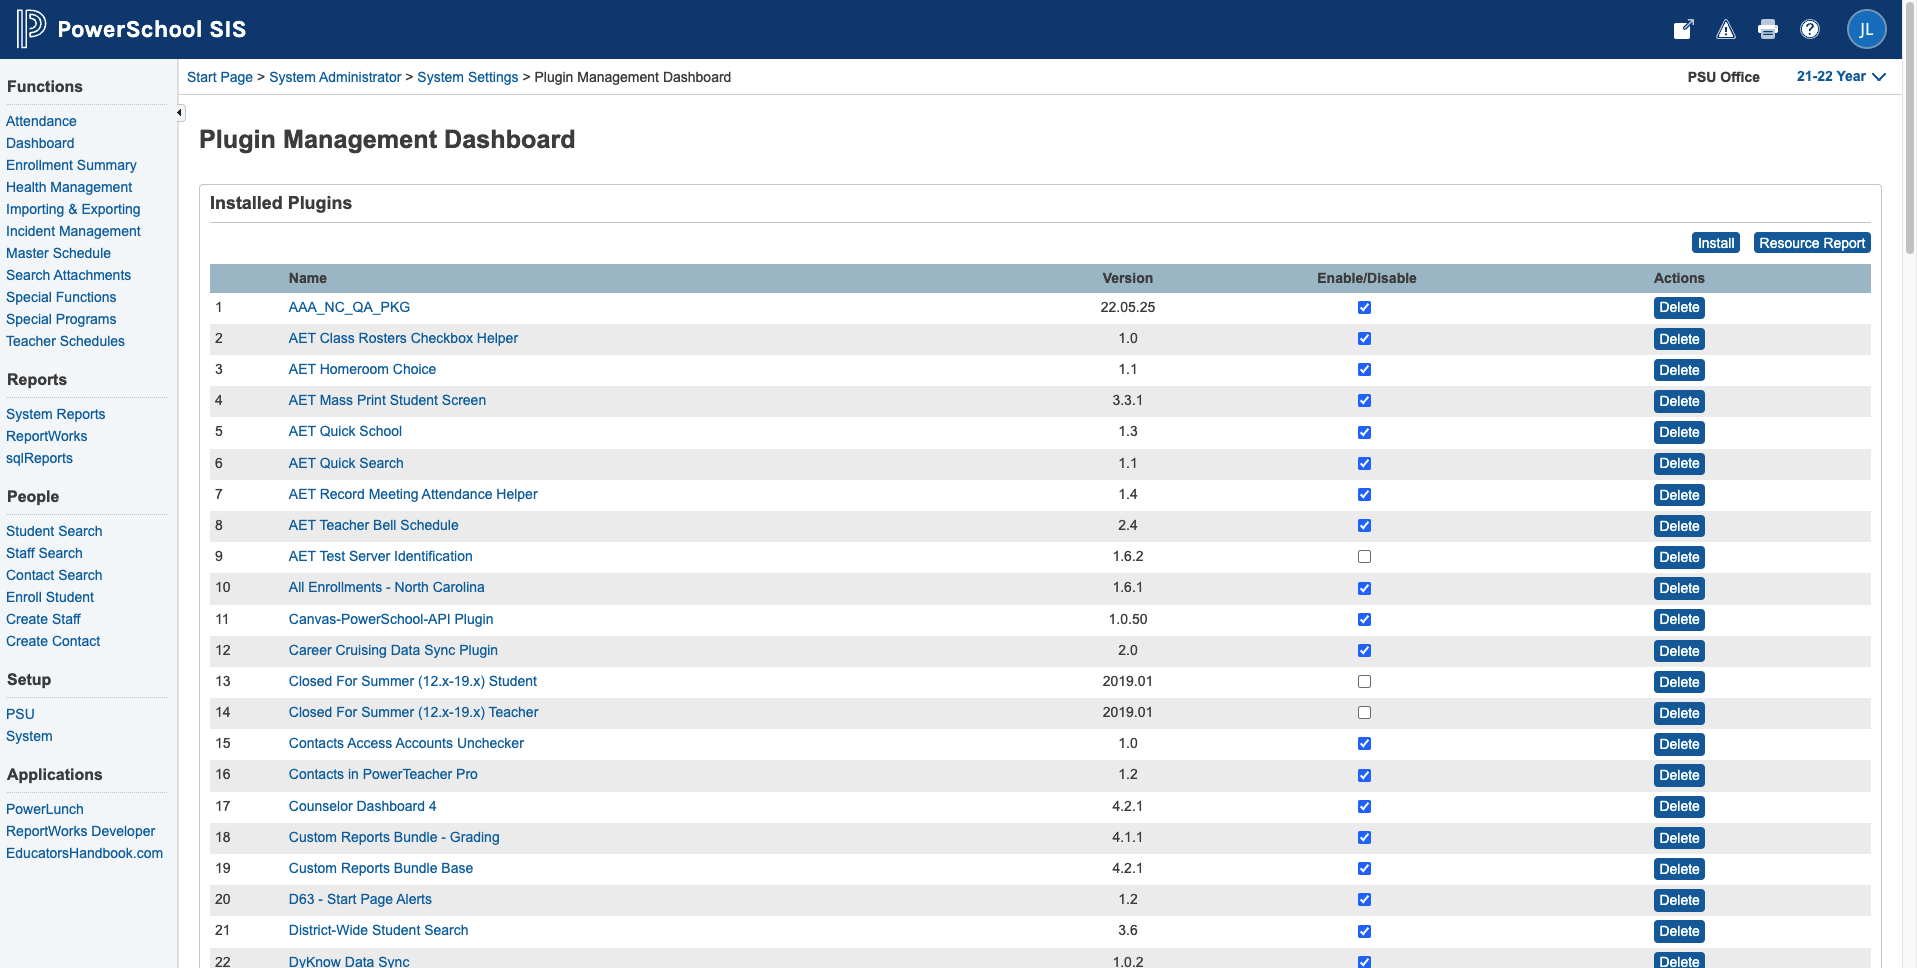
Navigate to the Plugin Management Dashboard.
- Start Page > System Administrator > System Settings > Plugin Management Dashboard
-
To Install and select the plugin.zip file from the data provider + plugin files.
-
If you are prompted, select to Enable the plugin. Otherwise, enable it by selecting it from the list of plugins on the dashboard.
-
Select the RapidIdentity Rostering Plugin from the list of plugins, then select Data Provider Settings.
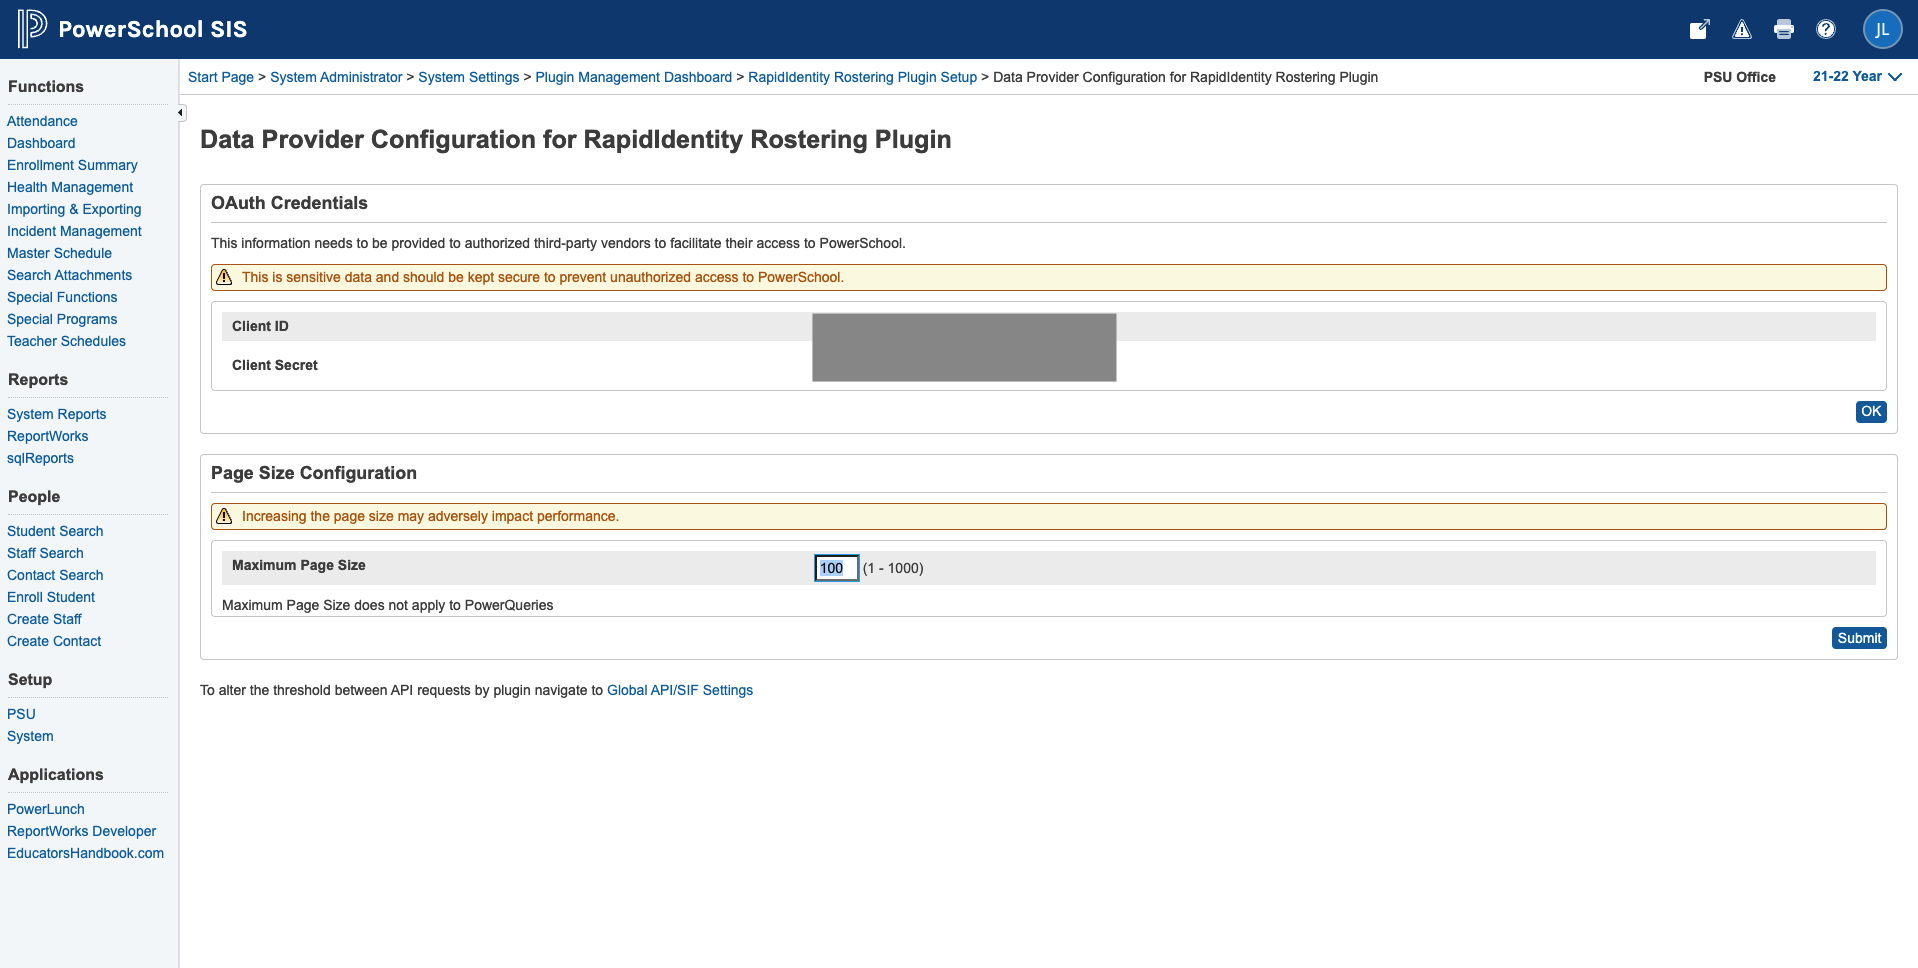
- Take note of the Client ID and Secret, as these will be used to configure the Provider Application in Studio.
-
Installing and Configuring the Data Provider
-
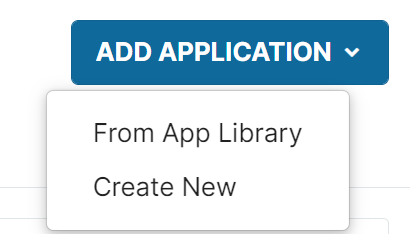
Log in to your RapidIdentity tenant and navigate to the Studio module. Click the Add Application button in the top right corner and select From App Library to begin
-
Search for "powerschool" and click thePowerSchool (Power Query) provider application that appears.
-
A dialog menu will open on the right.

-
Click Install to begin the installation process.
-
Each application in the Studio module is assigned a unique prefix in the system. This prefix is automatically selected for you. You can choose to change the prefix if you want, however it must be unique, from 1 to 16 characters long, begin with letters and capitalized.

-
Click Install when ready.
-
-
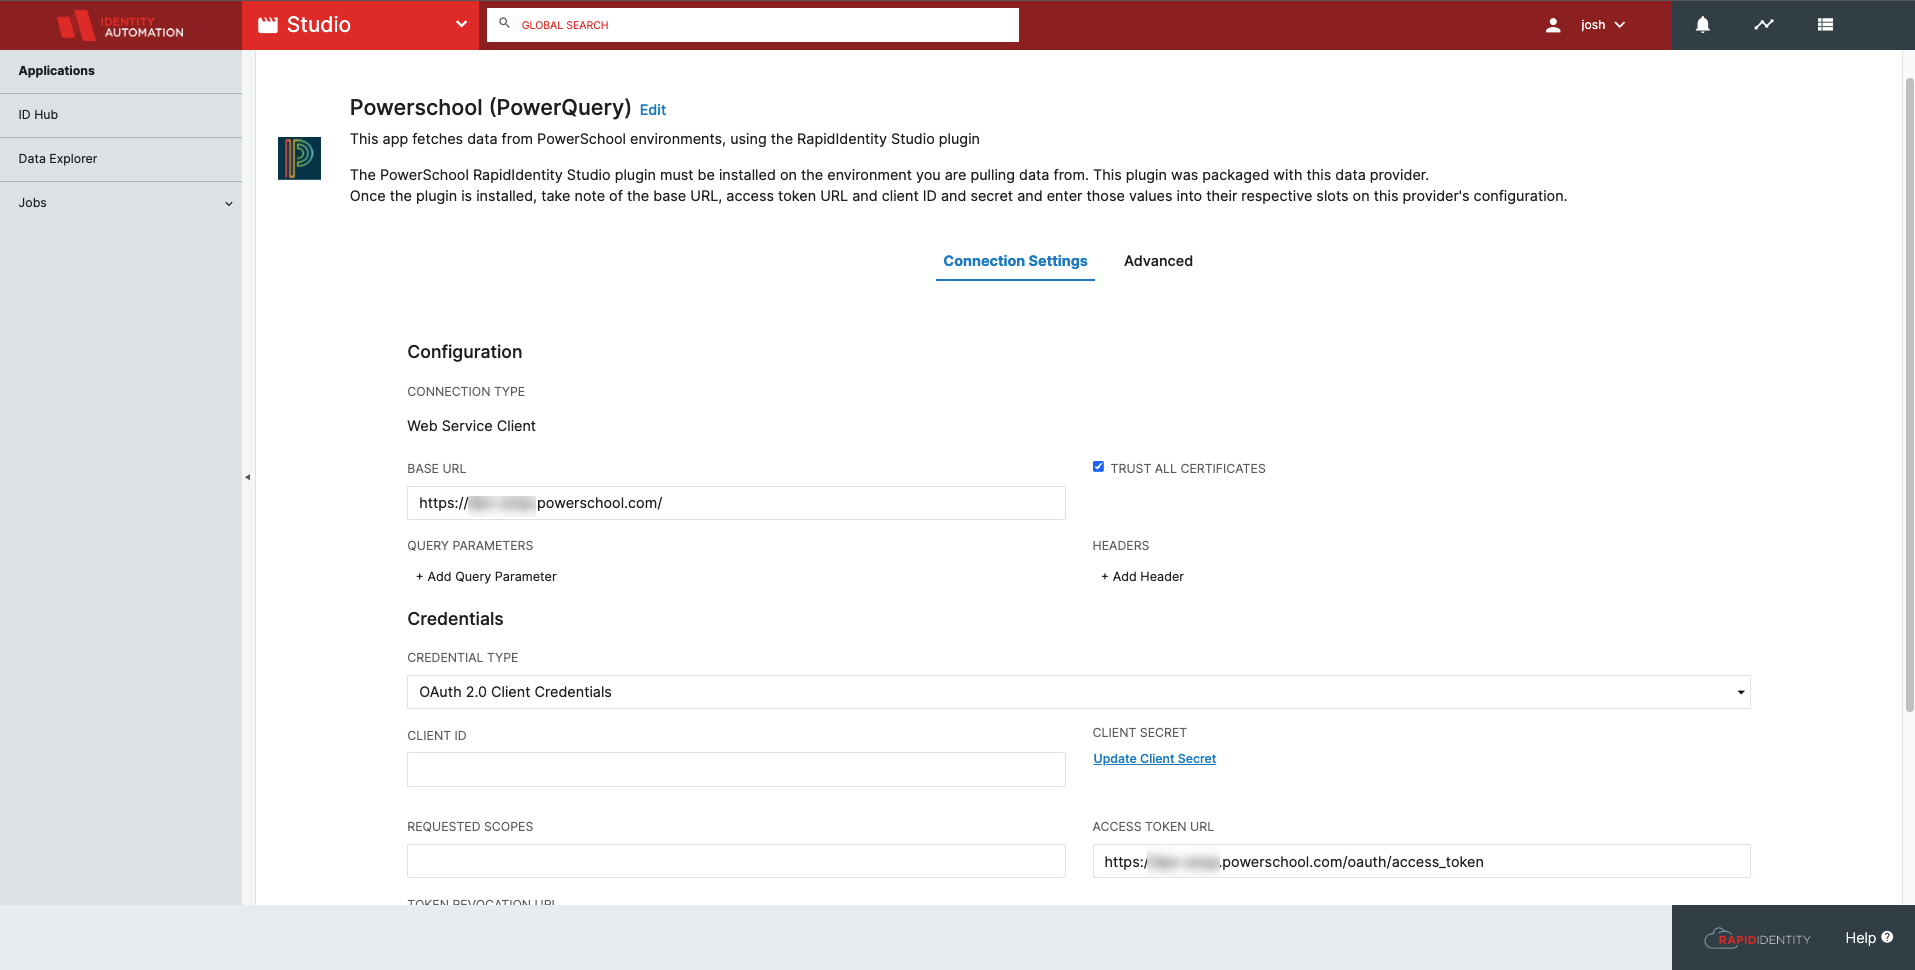
Enter the Connection Settings for the PowerSchool plugin
-
Substitute in your values for Base URL, Client ID, Client Secret, and Access Token URL, then click Save.
Note:The connection setting information comes from the PowerSchool plugin
-
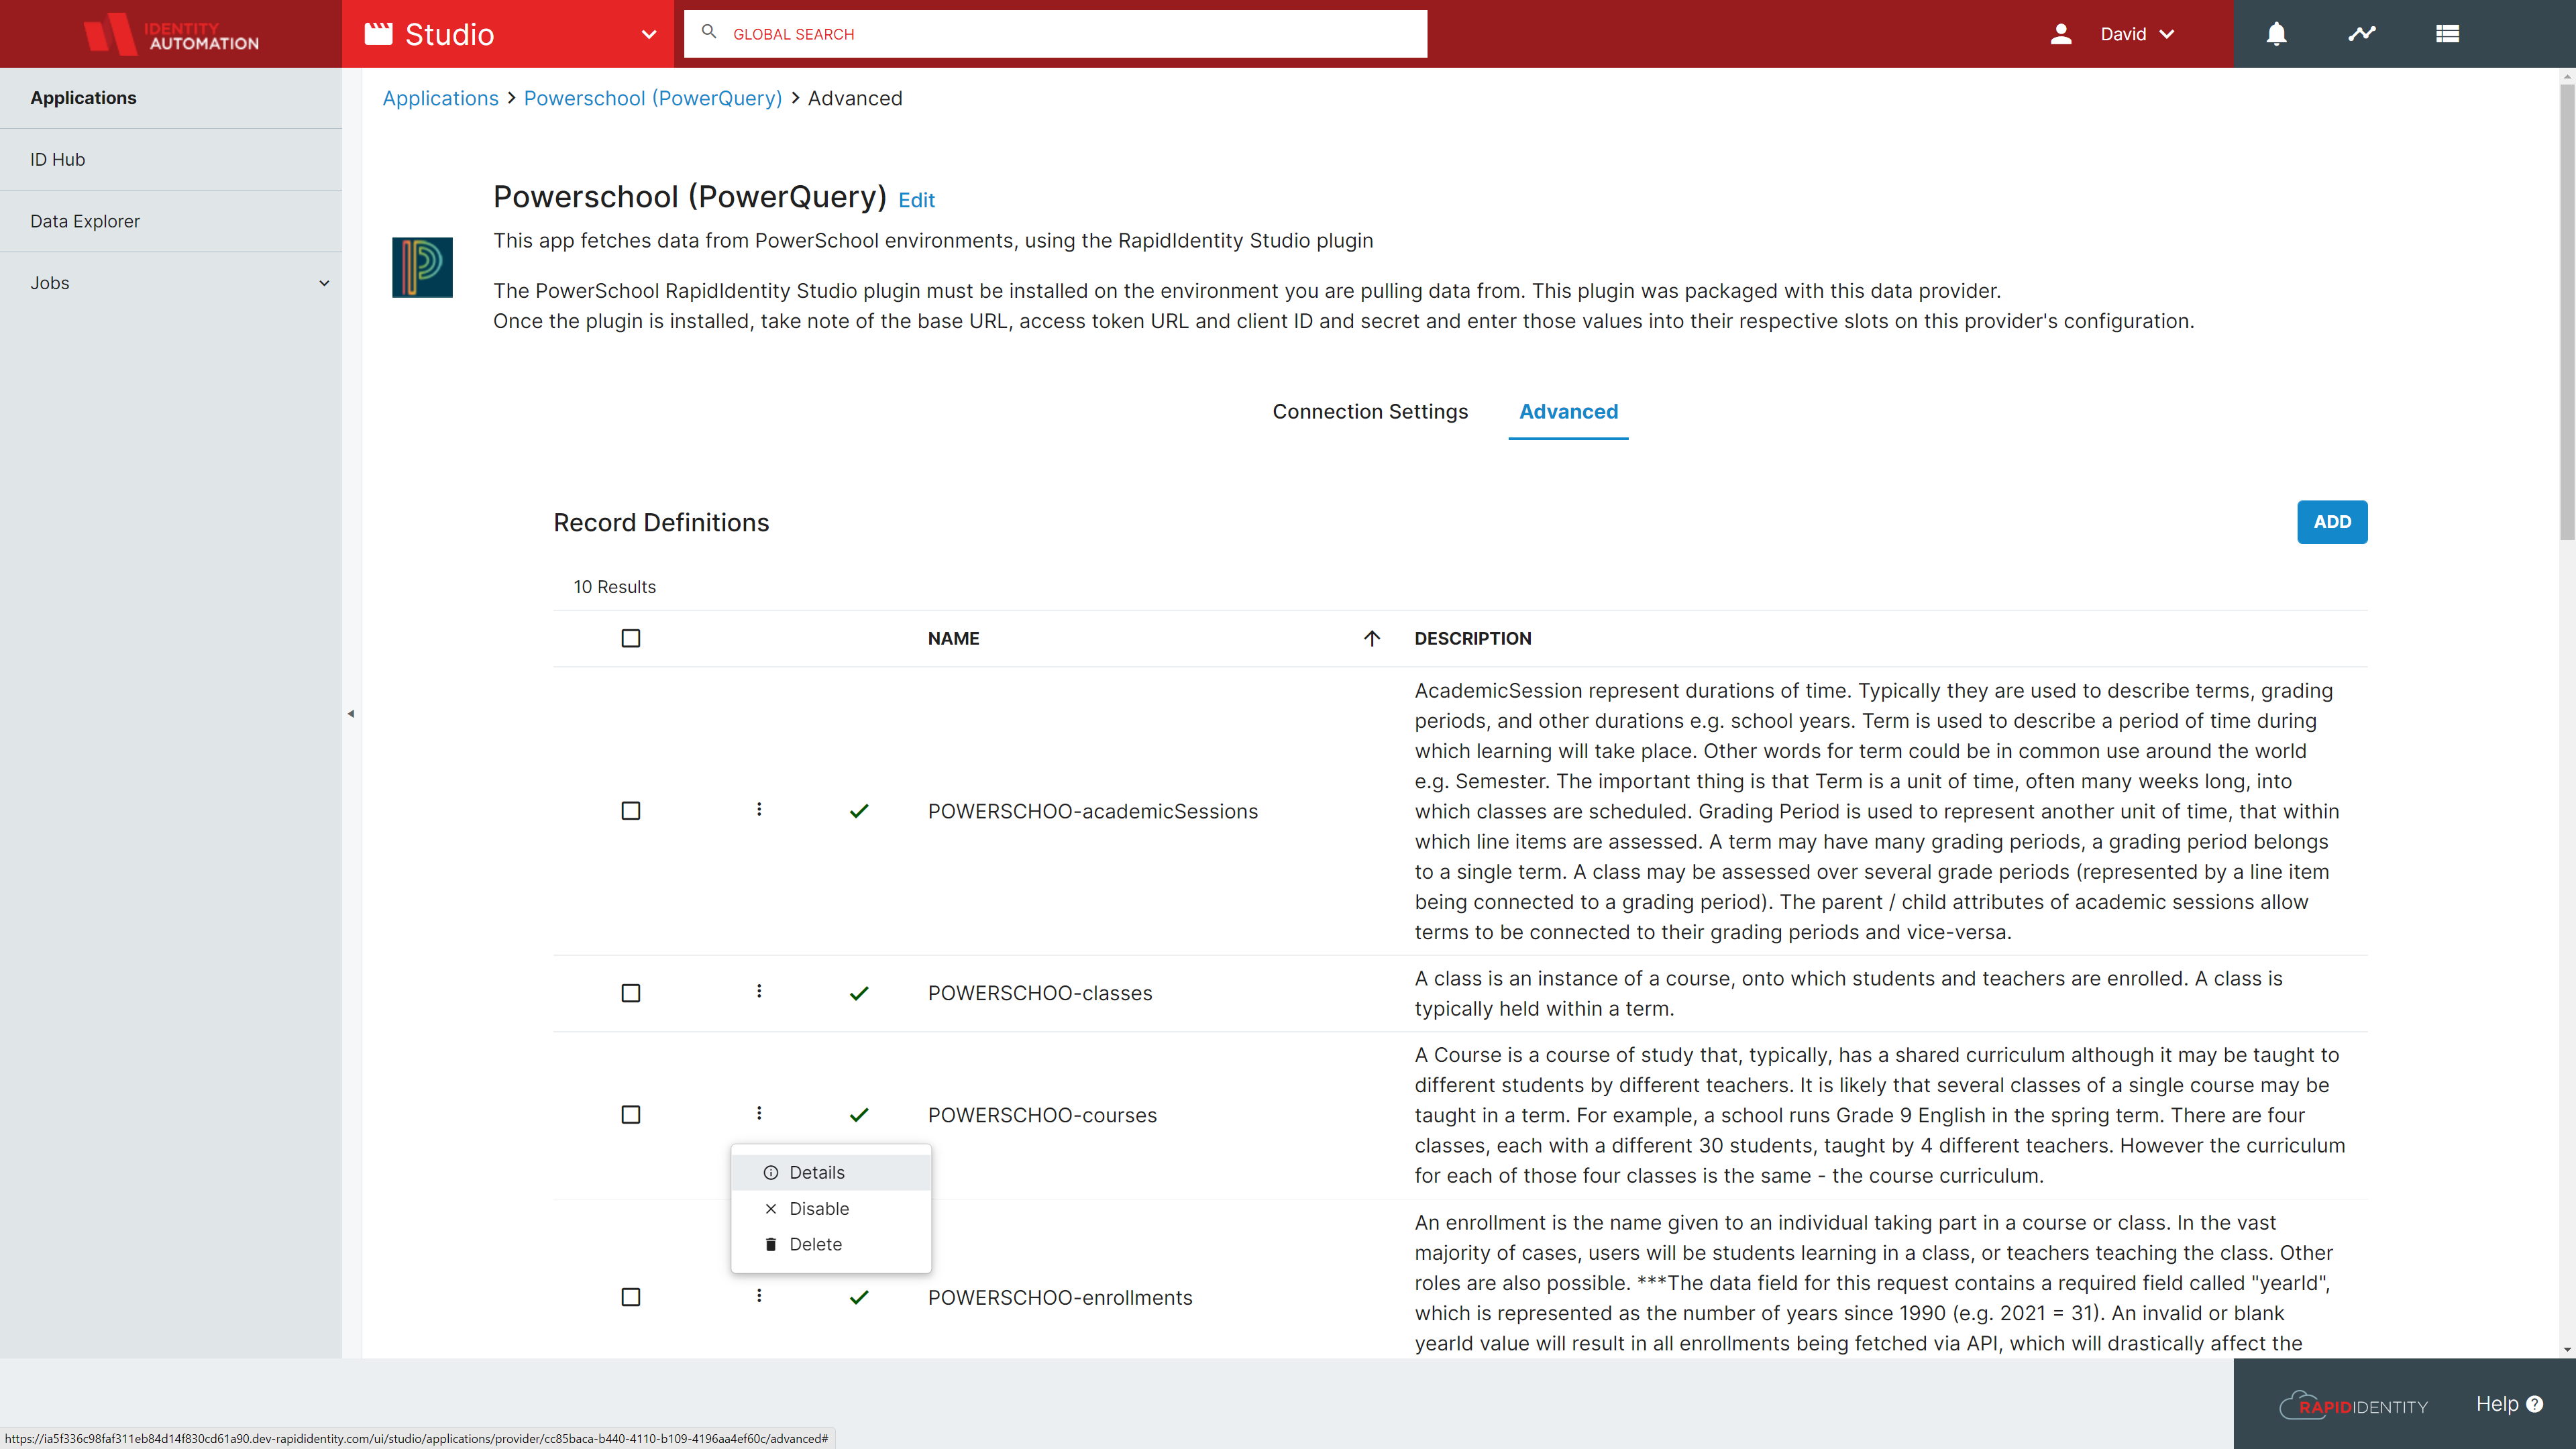
The enrollments record definition requires a specific input to fetch the proper school year. To set the school year on the enrollments record:
-
Click Advanced to open the advanced settings section of the PowerSchool Provider application
-
Click the kebab menu to the left of the POWERSCHOO-enrollments record and select Details
-
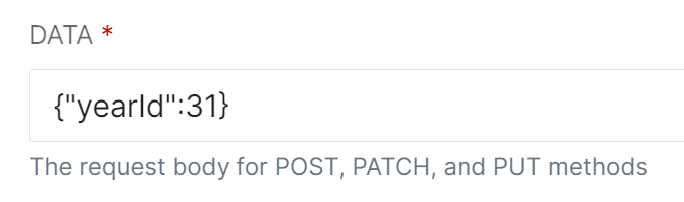
PowerSchool uses a 2 digit numeric to represent the current school year. For example, 32 is the value for the 2022/2023 school year. To set the 2022/2023 school year on the enrollment record, enter {"yearId":31} in the DATA field.
-
-
This is required for the Enrollments record. The year value must be entered in exactly the format as shown in the example above. This table shows what the yearId should be based on the school year start and end:
| School Year Start | School Year End | yearId |
|---|---|---|
| 2018 | 2019 | 28 |
| 2019 | 2020 | 29 |
| 2020 | 2021 | 30 |
| 2021 | 2022 | 31 |
| 2022 | 2023 | 32 |
| 2023 | 2024 | 33 |
| 2024 | 2025 | 34 |
| 2025 | 2026 | 35 |
| 2026 | 2027 | 36 |
| 2027 | 2028 | 37 |
| 2028 | 2029 | 38 |
| 2029 | 2030 | 39 |
4. Click Save when done.
- Navigate to the Jobs tab and configure the Powerschool (PowerQuery) import jobs to fit your processing needs.
- Scheduling jobs to run on a regular basis is ideal, but starting a run independent from the scheduler will allow for data access sooner.
Once the jobs have been run, you can use the Data Explorer tab to navigate through the individual data provider and ID Hub tables.