Create a studio Application
RapidIdentity Studio provides Extract, Transform, and Load (ETL) capabilities that allow users with the Studio Admin role to import information (e.g., rostering records), validate and organize the data, and make the resulting records available to another system for data consumption and ultimate usage.
The typical process flow is as follows:
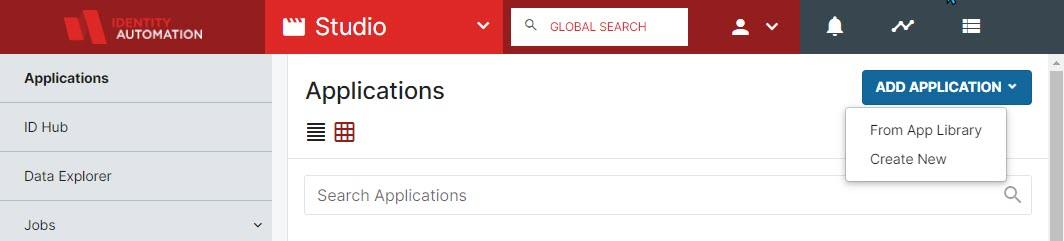
- An Administrator must first set up a Provider, which is the application that will be pulling in your source data for rostering to your Consumer roster applications. Import or Create a new Provider (source data) from Studio > Applications > Add Application. The drop-down menu will allow you to choose whether to import an application template from the Application Library or create a new one from scratch.
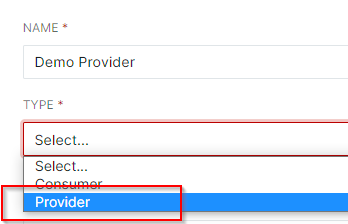
- If creating a New Provider from scratch, enter the name for the Provider application and be sure to select the "Type" Provider (the application is providing the data to Studio).
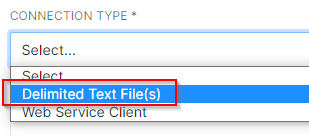
- Under "Connection Type" if there will be delimited text files being provided, select Delimited Text File(s).
- The Description field is not mandatory but can be used to leave a brief description of the application.

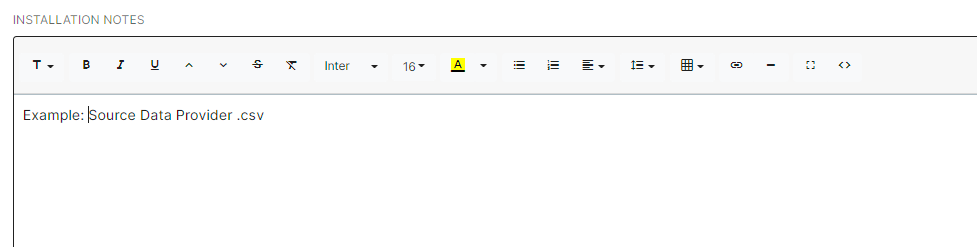
- Installation Notes can be used for notes to provide other Admins directions or any specific notes on this application. This field is not mandatory.
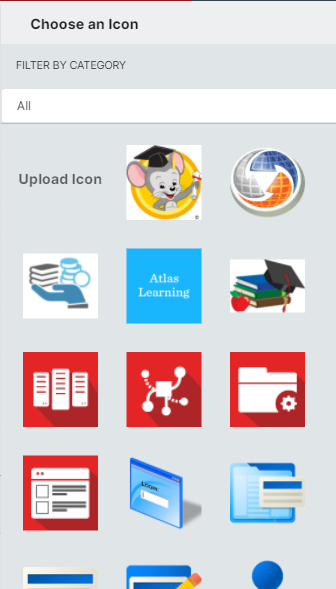
- You can upload your own icon for this new application or use any application icon already in the library by clicking on the edit icon button (shown below).
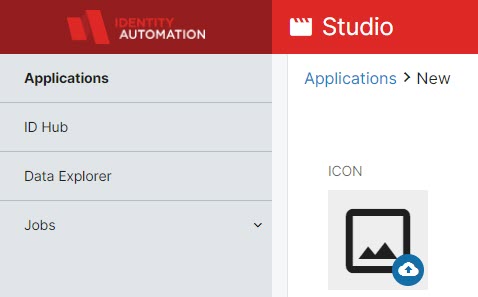
 Once the icon is selected and all required fields have been populated, click on Save.
- If creating a New Provider from scratch, enter the name for the Provider application and be sure to select the "Type" Provider (the application is providing the data to Studio).
- The configuration window Connection Settings will then be displayed.
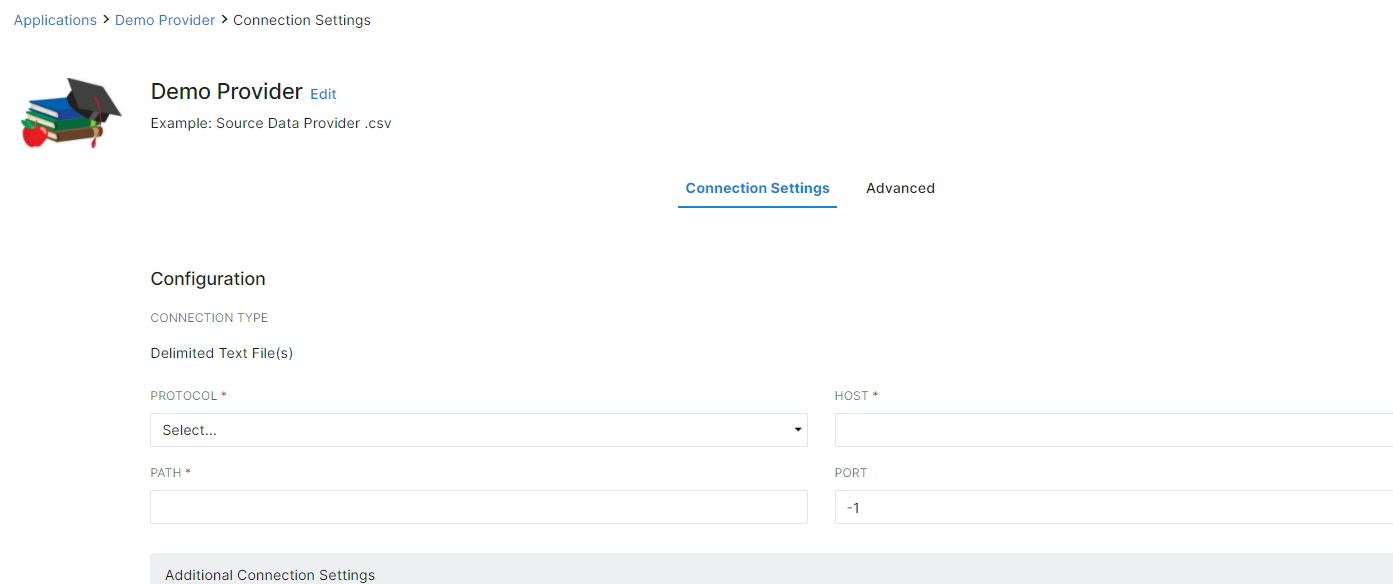
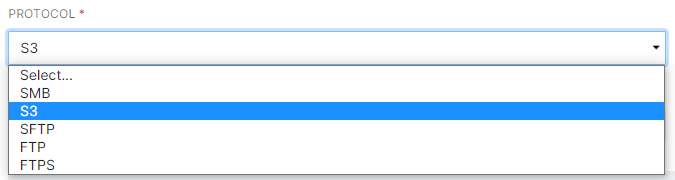
- In "Connection Settings" select the protocol. (For this example we will use "S3".)
- In the Bucket Name field, enter the path or Base URL. The leading forward slashes are not required.

- In the Path enter the path in which the files are located. (Note: The Path field is case-sensitive, and final directories should be surrounded by forward slashes as seen in the example below.) If the files are zipped, provide the filename here as well (Recommended for faster, more accurate loading).

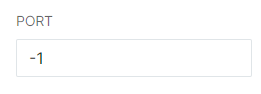
- Port defaults to -1, and it is safest to leave it that way unless you are certain it needs to be changed.
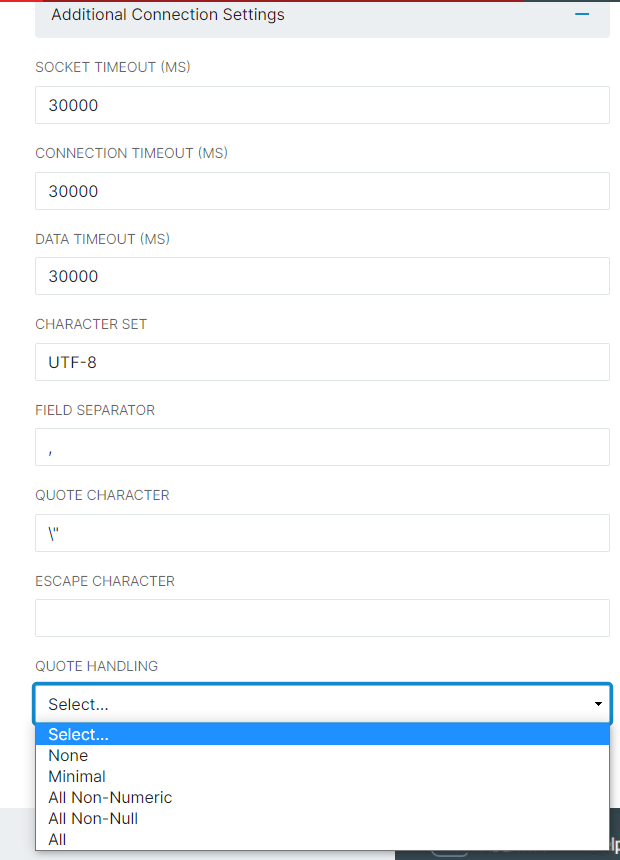
- The Additional Connection Settings can be left as all default, or changed to better represent your system setup.
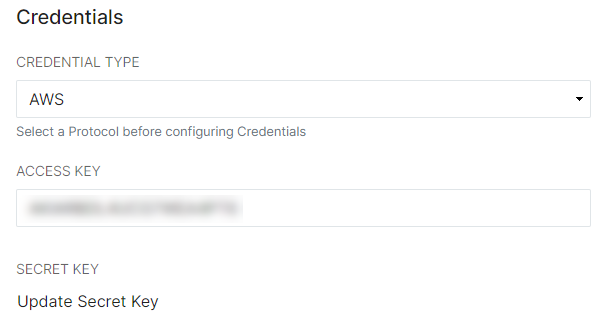
- In the Credentials menu, Set the Credential Type. This will be filtered by Protocol (there may only be one available) and depends directly on the Protocol chosen in the Configuration menu above. Enter the Access Key and Secret Key for that connection described above. For this example, we are using an AWS bucket. Click Update Secret Key to view the field to paste the Secret Key in - it will have a hide/unhide eye filter that can only be used upon creation.
- If you know for a fact that you need to set up an STS Role Arn to pass permissions, enter that data here.

- Click Save and navigate to the Advanced tab.
- In "Connection Settings" select the protocol. (For this example we will use "S3".)
- In the Advanced tab, set up and configure Record Definitions for each source associated with this provider. Record Definitions define the source information being pulled into RapidIdentity Studio so that it can be mapped and handled properly. This may be one or multiple files for CSV Providers or a URL for Web Service Providers, and each provider requires at least one Record Definition. Column headers must be listed even if none appear in the source data. If you have imported a template, some Record Definitions may already be set up.
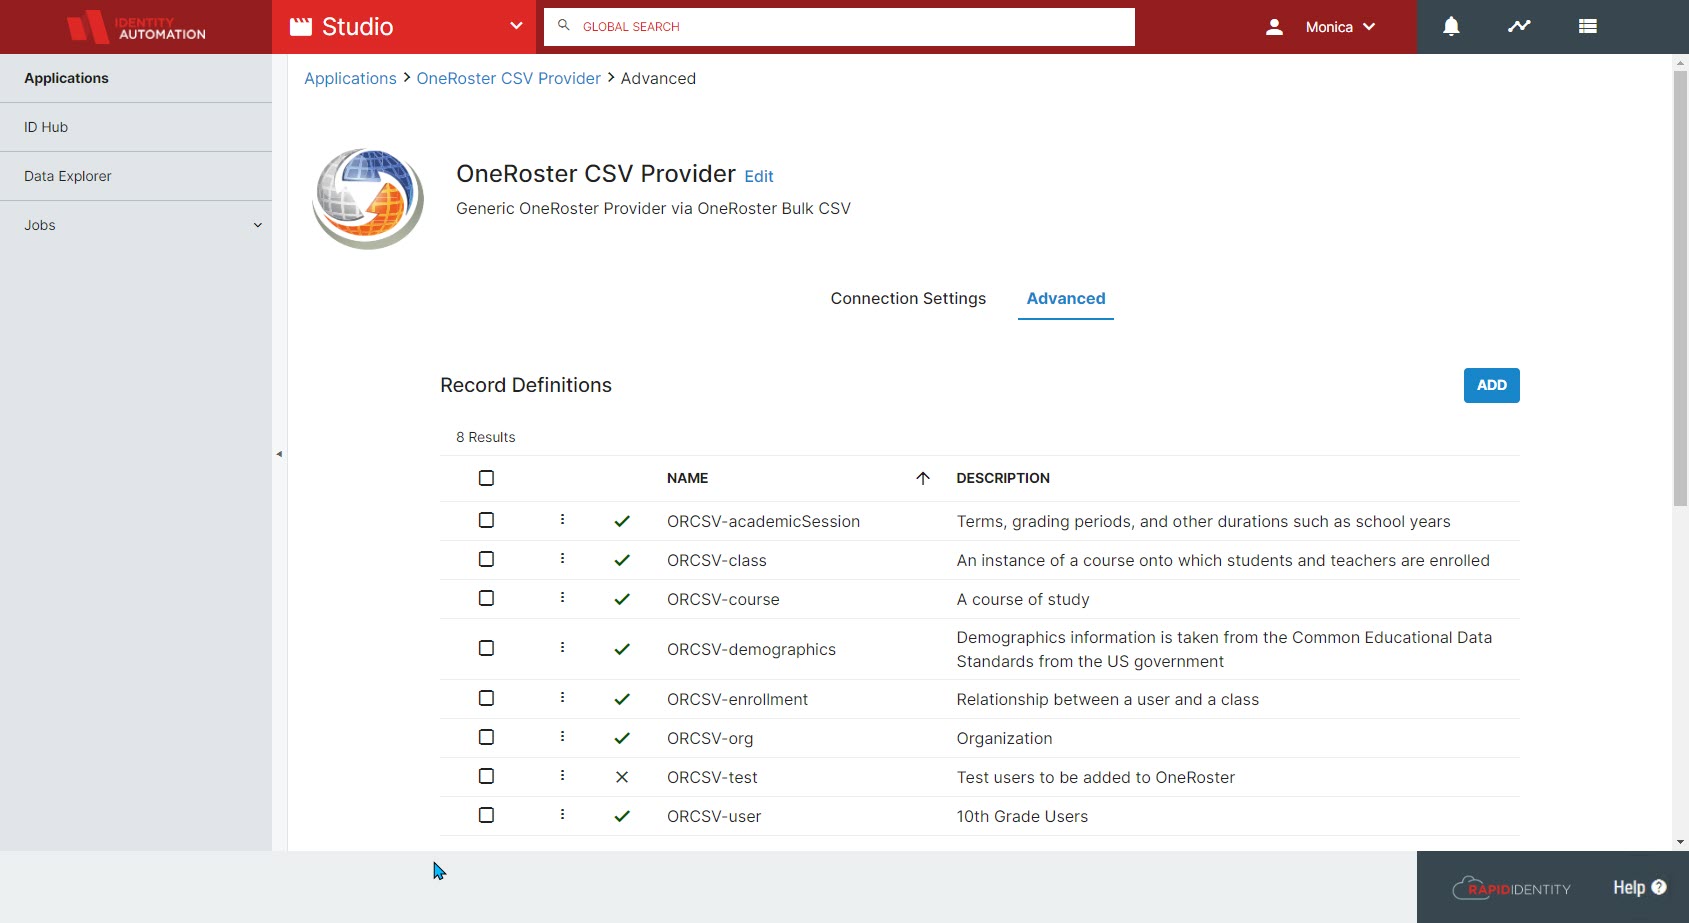
- When adding a new Record Definition, give the definition a name and an optional but recommended description. This description will help keep track of what that Record Definition is used for.
Note: The list must be in the exact order of columns in the source data.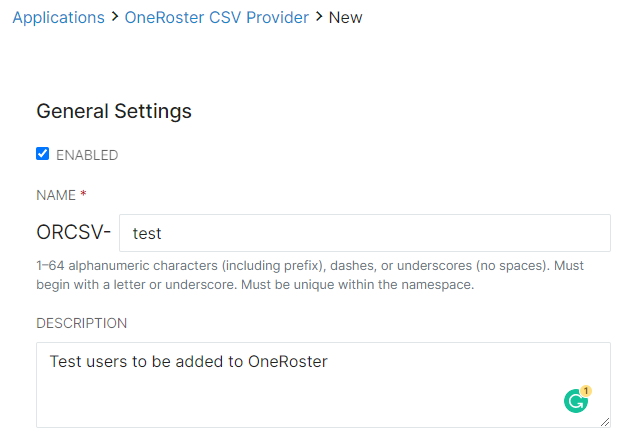
- For Delimited Text Providers, enter the filename and define each column in the spreadsheet. Date Format (if applicable) and Time Zone may also be altered, but it is critical that each column that exists in the spreadsheet is correctly represented in the Columns area.
Note: For Delimited Text Files, only Excel .csv-based files are compatible (not UTF-8).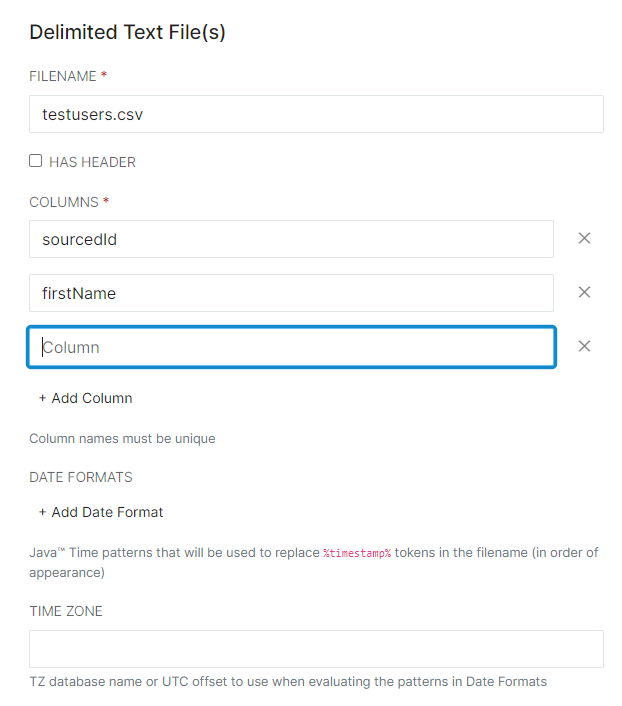
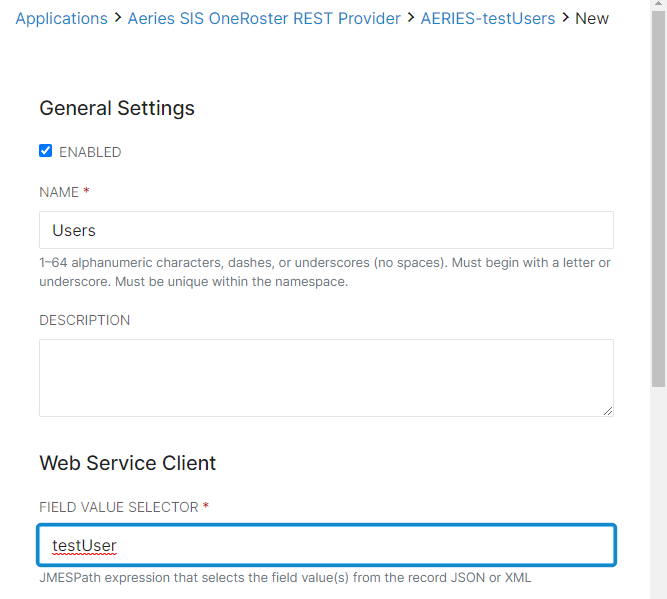
- For Web Service Providers, the critical data for Record Definitions is the Method of transmission (options are GET, POST, PUT, and PATCH, but for a Provider, GET is the most common) and the URL for the provider. The Records Selector should also be updated with the record set to be selected for this particular configuration.
If the API needs type-specific headers, the Headers area will be critical to populate as well. Otherwise, these are not necessary..png)
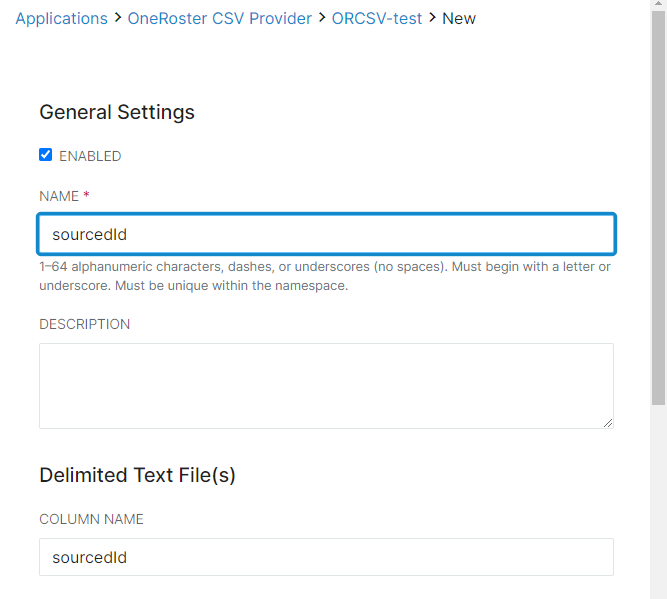
- For each Record Definition, also set up Field Definitions. Field Definitions are a part of mapping the data throughout Studio, and one Field Definition will need to be created for each column or category that appears within that record. Each field definition will represent a column (Delimited Text) or field value selector (Web Service) and must be entered exactly as it appears in either the spreadsheet or the Provider data import. These can be named anything, however, as long as the column name or field value selector is exact.
- Click Save to commit all changes. Now that the Record Definitions and Field Definitions have been set up, it's time to run our first job.
- When adding a new Record Definition, give the definition a name and an optional but recommended description. This description will help keep track of what that Record Definition is used for.
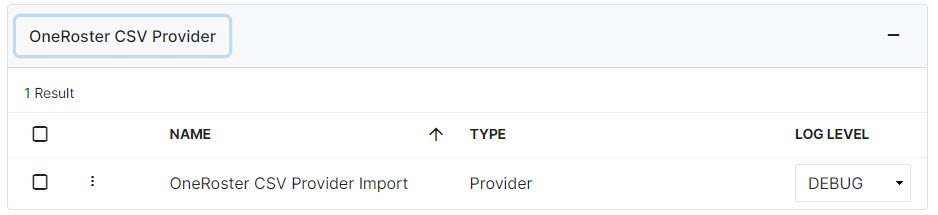
- Now, a Studio Administrator or a Studio Operator must navigate to the Jobs > All Jobs menu, then find the Provider that was just created and Run the Provider job. This can be done by clicking the line and clicking Run from the bottom menu, or single-click the Kebab menu next to the checkbox and select Run. The Log Level for the job may also be altered on this screen.
- Go to the History option in the Kebab menu to see that particular Job's history. Once the job has ended, the best practice is to check the logs for any errors through the Kebab menu on this screen. A Studio Administrator can address any errors and repeat the jobs as needed.
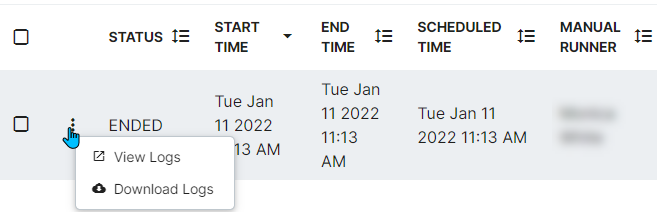
Job Statuses can be RUNNING, ENDED, FAILED, or PENDING_APPROVAL. If the job is pending approval, that approval can be given or the job can be canceled in the Running Jobs menu. The Kebab on the line item provides Approve and Cancel options (Along with Configure and View Logs), and these options are duplicated in the bottom menu. Approval or Cancel options can also be provided via the taskbar.
Note: If the job continues to fail because of missing resources, disable the Record Definitions for those items. RapidIdentity Studio will skip them on the next job run. Once the job has run successfully, go to the Studio Data Explorer to validate the processed records. Under the Provider data type, choose the items with the prefix of the Provider you just created or imported and click Search.
Filtering is available as well with the following operators and requirements.
*The basic unit is a comparison of the form <fieldName><op><value>. fieldName must start with a letter and may contain letters, digits, underscores, and hyphens.
Note: Ensure that passwords and other sensitive data are set to be Encrypted.
Use the filters (or leave that field blank) to validate the data from the applicable job.Operator Definition Example = Equals role = student != Does Not Equal role != teacher ~ or like Like course ~ %Spanish%
(If there are multiple Spanish levels for example, the string formatting must be present. If there are not, use the = operator.)> Greater Than grade > 7 < Less Than grade < 9 >= Greater Than or Equal To grade >= 1 <= Less Than or Equal To grade <= 12 & or and And role = student & status = active | or or Or title ~ %Spanish% | title = "Study Skills"
(Strings with whitespace must be entered in quotation marks)- In order to transfer the data into the ID Hub for alignment, the application will require Record Mappings and Field Mappings. Find these in the Provider's Advanced tab beneath the Record Definitions section. Record Mappings provide more granular control over how the data is processed within Studio, and Field Mappings work within Record Mappings to do the same.
Note: Record Mappings and Field Mappings are both case-sensitive.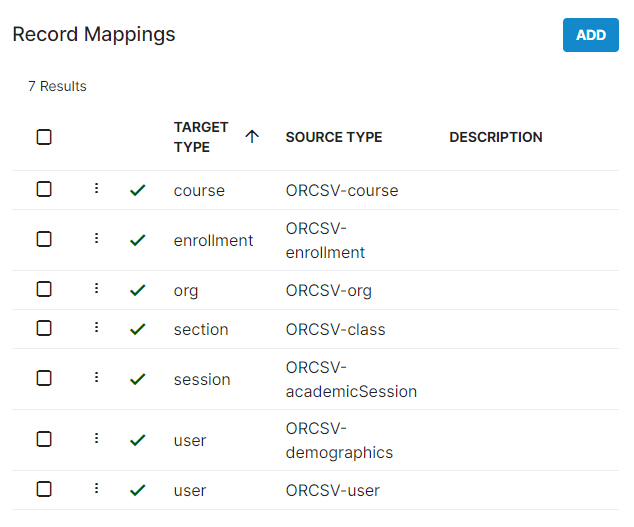
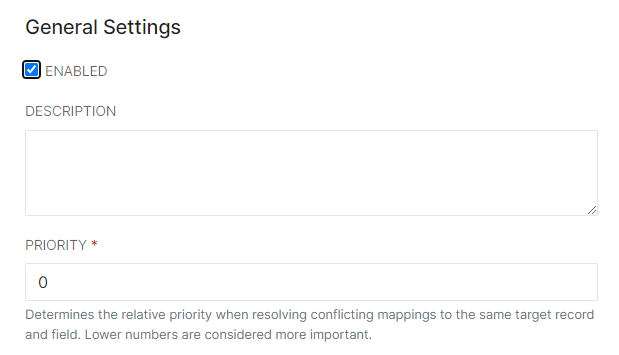
- For each Record Definition, create a Record Mapping to align the source data with Studio formats. First, provide a description (recommended) and a priority - the lower the number, the higher priority.
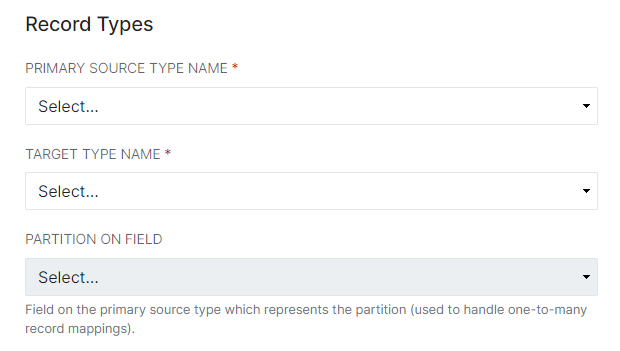
- In the Record Types section, set the source type as the Provider's Record Definition to be mapped, and the target type as the area in the ID Hub this data will be associated with. For example, ORCSV-org from the Provider records will map to org in the ID Hub. Later, we will map the ID Hub data to a Consumer application's Field Definitions, and the source/target will be reversed.
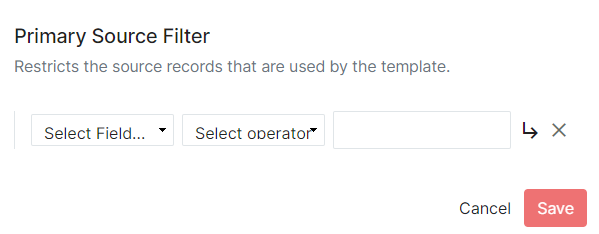
- The Primary Source Filter allows administrators to set which records will be brought from the ingested data into the ID Hub. This would be used, for example, to ensure that only a certain school's users are passed into the ID Hub from a source with multiple schools. This filter restricts the data that gets processed into Studio's ID Hub and ultimately passed to a Consumer.
- This menu also provides the opportunity to create Field Mappings. Field Mappings dictate which ID Hub format each source will follow and how the data will be aligned there.
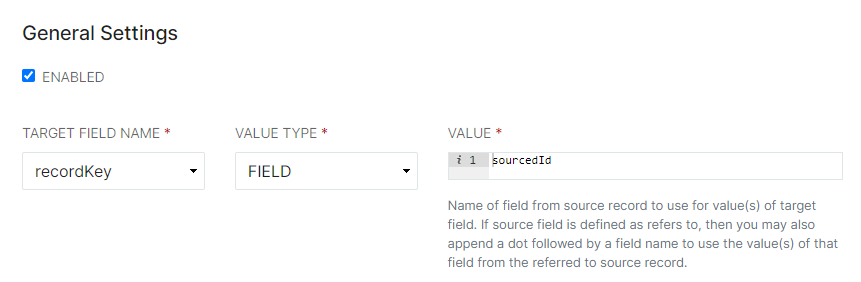
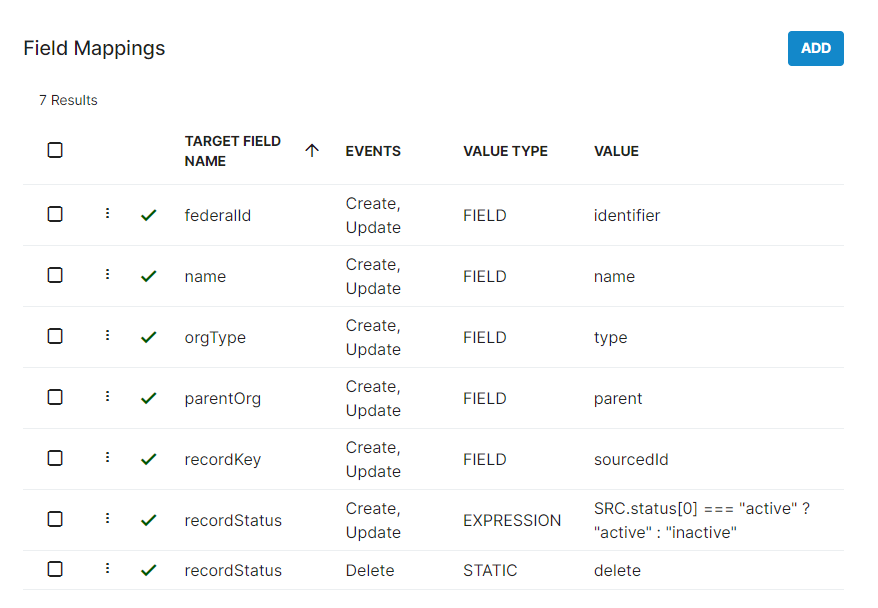 Note: For all new Providers, the value of the RecordKey Field Definition must be altered to represent a unique identifier for each data set. For example, if the User's ID is the unique identifier and it is in the sourcedID column or code block, the value for the Record Key Field Definition must be changed to sourcedID. RecordStatus sets the status of the records as they are processed, and can delete records from ID Hub if desired.
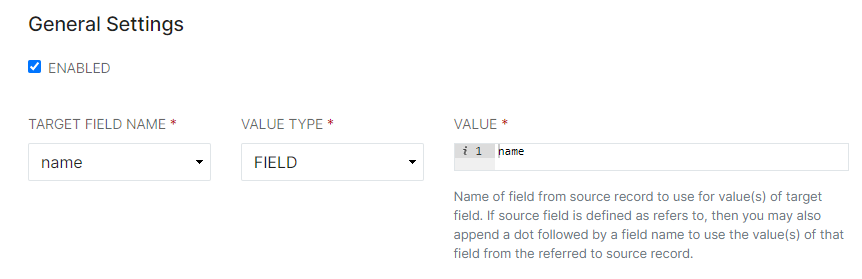
 - Choose a Target Field Name to represent the ID Hub field to map the values to. Ensure that the Value represents exactly the column header or source record name from the Provider data. Sometimes they may be similar, other times they may be completely different, depending on source data setup.
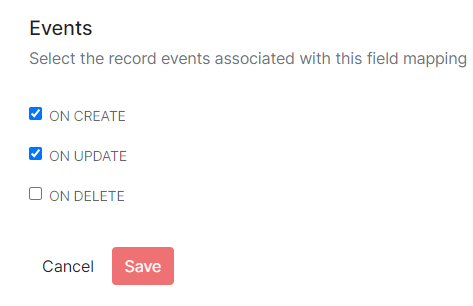
- Now, determine when these choices will take place in the Events section. For just pulling in data, you'd want On Create and On Update to define the data to be pulled; however, if you do not want to include certain records, you can determine here how to handle the records that are slated for deletion. On Delete can either delete the data from going into the ID Hub (STATIC delete) or preserved in the source records but set as Inactive (STATIC inactive). This is where RecordStatus would be used to define how to handle new or deleted records.
- Choose a Target Field Name to represent the ID Hub field to map the values to. Ensure that the Value represents exactly the column header or source record name from the Provider data. Sometimes they may be similar, other times they may be completely different, depending on source data setup.
- For each Record Definition, create a Record Mapping to align the source data with Studio formats. First, provide a description (recommended) and a priority - the lower the number, the higher priority.
- After all of the Definitions and Mappings have been configured, run the ID Hub Mapping Jobs that correlate to the Target Types selected in the Record Mappings. Multiple jobs can be run simultaneously. Also, check the job logs for each of these jobs to ensure success and verify the records in Data Explorer.
- Next, repeat steps 1-9 for a Consumer application. The Configuration Settings and Advanced menu are inherently similar to Provider applications, but Consumers have extra tabs to configure.
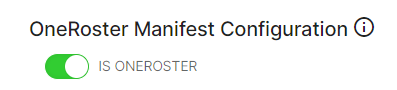
- Manifest CSV (For CSV Consumers Only) - If the Consumer is OneRoster, toggle the OneRoster Manifest Configuration to "on," or green toggle. Some OneRoster Consumer applications require a manifest.csv, and this configures that manifest to include, exclude, or measure the changes of a certain type of data.
Access Groups - If Unrestricted Access is toggled off, Access Groups can be created to compile a list of restriction filters for that specific group. Give the group a name and a start date. Start dates default to today, and having no end date listed will extend access indefinitely. There are also ways to limit the group even further with a Restriction Filter.
For example, for an Access Group called 12th Grade Students and Teachers, create filters with role = student | teacher + grade = 12, and when displayed in Data Explorer, the data will be limited to only 12th grade students and teachers. Only the filtered data will be accessed or received by the vendor.Linked Apps - Linking the Consumer to an SSO application makes it easier to navigate between the two. In the Applications module, clicking on Manage Access in the Kebab menu will send the user straight to that Consumer's Configuration screen where Linked Apps can be altered if necessary. This feature correlates a relationship between the Consumer and the SSO application for a more seamless user experience.
- Manifest CSV (For CSV Consumers Only) - If the Consumer is OneRoster, toggle the OneRoster Manifest Configuration to "on," or green toggle. Some OneRoster Consumer applications require a manifest.csv, and this configures that manifest to include, exclude, or measure the changes of a certain type of data.
Copying a similar process to Providers, configure Record and Field Definitions as well as Record and Field Mappings, then run the associated Mapping Jobs. Verify the data in Data Explorer, and when the data is ready, run the Consumer Job to push the data to the end step.
Note: REST API Consumers do not push, they simply provide access to the vendor whenever the vendor chooses to obtain the data. There are no Consumer Jobs for REST API Consumers, so this process ends at verifying the data in Data Explorer once the Consumer has been properly authenticated.That is the basic process from beginning to end of RapidIdentity's Rostering Solution.