Allow or Block IP Addresses in RapidIdentity
- 14 Nov 2023
- 1 Minute to read
- Print
- DarkLight
Allow or Block IP Addresses in RapidIdentity
- Updated on 14 Nov 2023
- 1 Minute to read
- Print
- DarkLight
Article Summary
Share feedback
Thanks for sharing your feedback!
How to Allow or Block an IP Range
To grant or deny access to RapidIdentity for a certain group of people, Tenant Administrators can do that through authentication policies.
- Navigate to Configuration > Policies > Authentication.

- You can add the allow or block functionality to existing policies. Note: If you add this feature against one IP, you must apply it to all applicable policies as well.
- Navigate to that policy's Criteria tab. In the Source Network section, add the IP address with CIDR Notation to the Matching Subnets field and click the + to add.
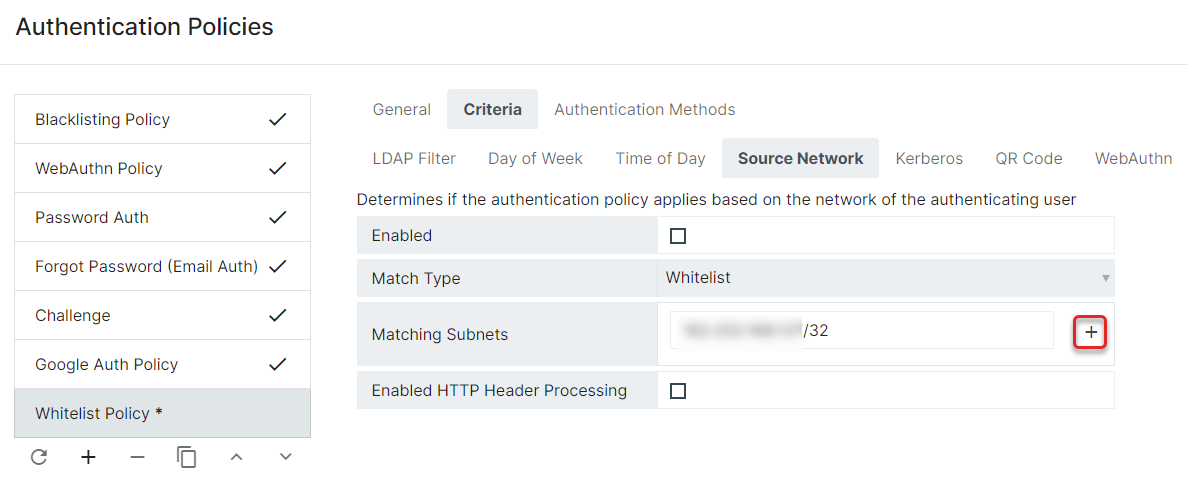
Note: these can be defined with the help of websites such as Subnet Calculator. - Once all subnets and notations have been added, click Save. (Policies will have an asterisk (*) next to them until they are saved.


Note
At this time, you may want to change the order of the policies so that the more focused policies are evaluated first. This will prevent other authentication policies from blocking the allowed IPs or allowing blocked IPs. Also ensure the Source Network information is updated in all applicable policies.
Was this article helpful?