Deploy MSI Installer for Windows Authentication with Windows Group Policy Object (GPO)
This article will walk you through how to deploy an MSI silently on multiple machines by using the Group Policy in Windows Server 2016.
The application must be in the format of a Microsoft installation file (.msi) only, and not an executable (.exe)
Step 1: Create a Security Group
- Start the Active Directory Users and Computers snap-in by clicking Start, pointing to Administrative Tools, and then clicking Active Directory Users and Computers.
- Expand Domain name and then right-click on Users > New > Group.

- Add a Group name as desired with the Group name as Global and Group Type as Security. Click OK.
- Right-click on the Security group and click Properties.
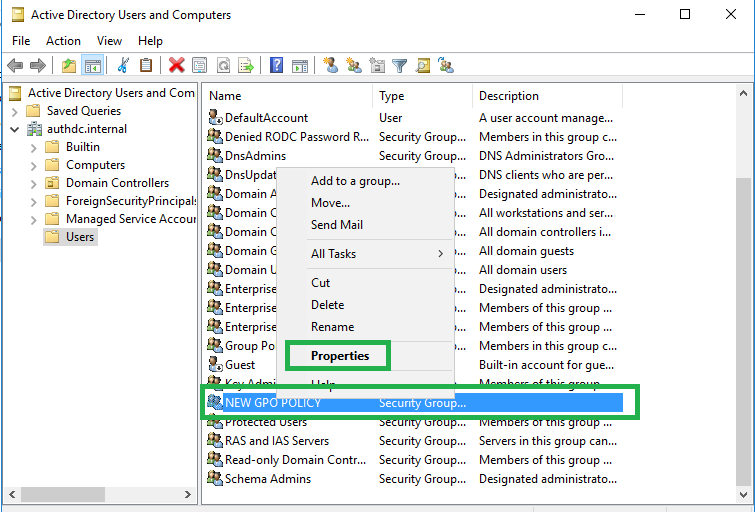
- In the new Security Group, navigate to Properties > Members > Add.
- The next window will open for Select Users, Contacts, Computers, Service Accounts, or Group where you will enter the object name to select as Workstation/Client Pc Name and Check Names then click OK.
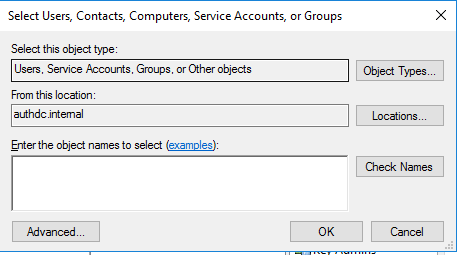
Note: In Object Types, select Computers if not selected by default.
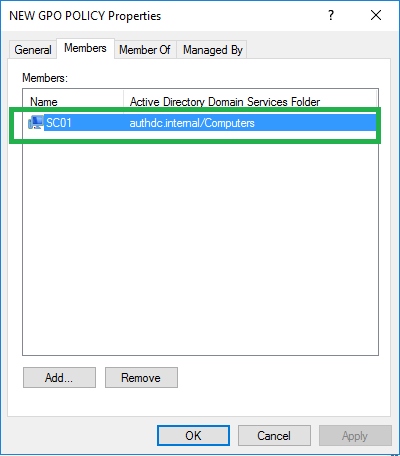
- Go to Security Group Properties > Members and a workstation is added. Click on Apply. Likewise, more workstations can be added.
Step 2: Create a distribution point
- Log on to the domain controller as an Administrator.
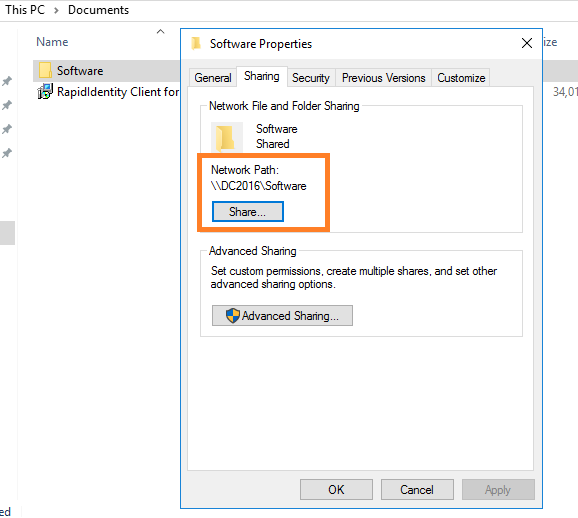
- Create a shared network folder (this folder will contain the MSI package).
- Right-click on Folder name > Properties > Sharing.
- In the advanced sharing dialog box, check Share this folder. Click Permissions for setting up permissions on this folder, and Add group or usernames to allow access to the distribution package.
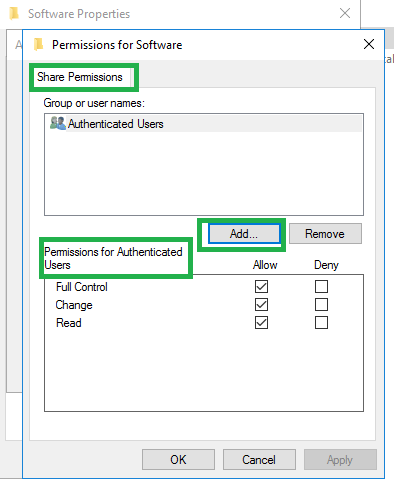
- The next window will open for Select Users, Contacts, Computers, Service Accounts, or Group where you would enter the object name to select Authenticated Users and Check Names. Exit out of the dialog boxes by clicking Apply, then OK on each until you finally click Close on the folder properties dialog box.
- Copy the MSI package into the shared folder.
- Right-click on Folder name > Properties > Security and click the Edit button.
- Click Add.
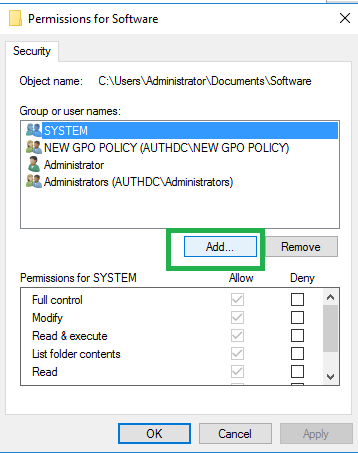
- The next window will open for Select Users, Contacts, Computers, Service Accounts, or Group where you will need to enter the object name. This is the Security group name that was created in Step 1. Click OK and then Apply.
Step 3: Create a Group Policy Object
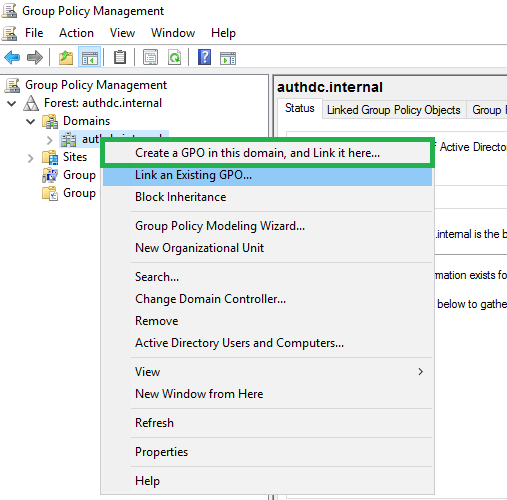
- Start the Group Policy Management snap-in by clicking Start, pointing to Administrative Tools, and then clicking Group Policy Management.
- Expand your domain, right-click the domain name, and then click Create a GPO in this domain, and Link it here.
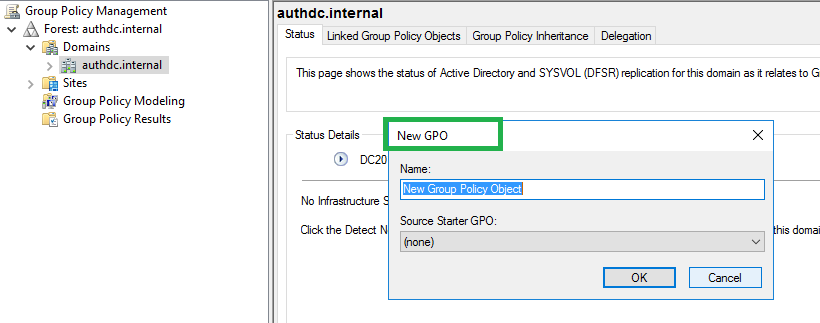
- Enter a name for this new policy, and then click OK
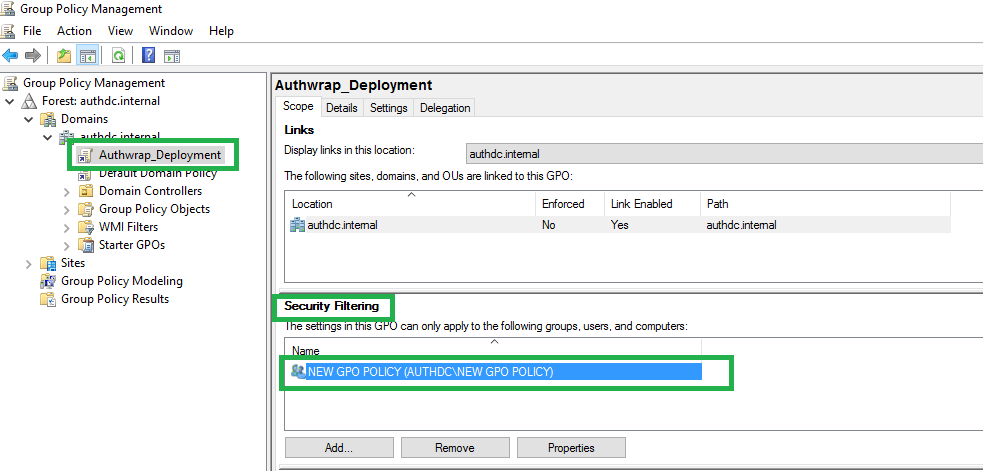
- Select the group policy. On the right side of the panel in the Security Filtering section, click Remove and then Add to add a security group that contains the client pc/Workstation.
- Next, a window will open for Select Users, Contacts, Computers, Service Accounts, or Group where you will enter the object name to select the security group that contains client pc/Workstation (created in Step 1) Workstation/Client Pc Name. Click OK.
Step 4: Assign a package
A package can be assigned per user or per machine. Also, if the package is assigned, it will automatically be installed silently. In order to assign a package, you can follow these steps:
- Start the Group Policy Management snap-in by clicking Start, pointing to Administrative Tools, and then clicking Group Policy Management.
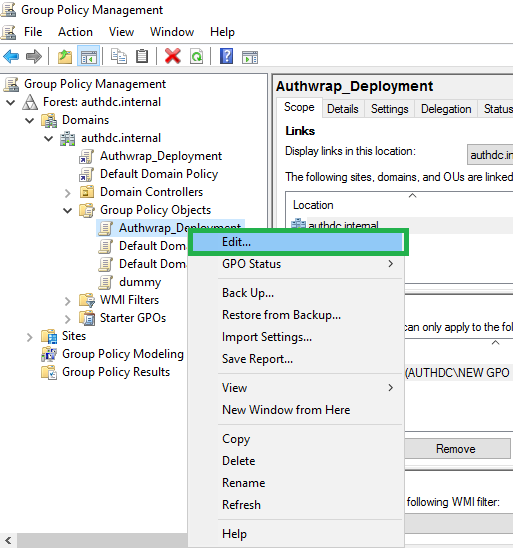
- Expand Group Policy Objects, right-click the policy that you want to assign a package, and then click Edit.
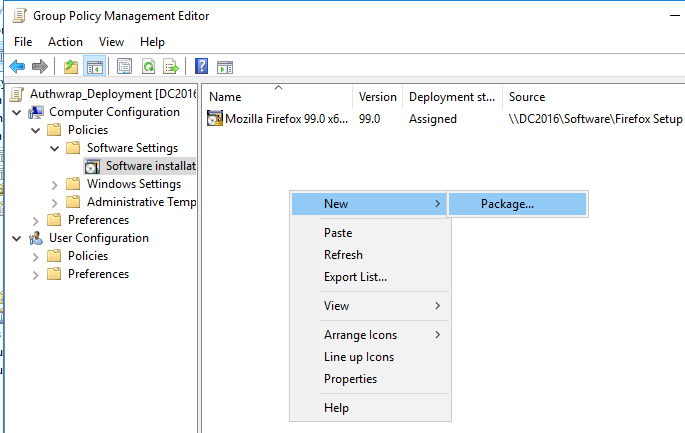
- New windows for Group Policy Management Editor will open. Under Computer Configuration, expand Software Settings.
- Right-click Software installation, point to New, and then click Package.
- In the Open dialog box, type the full Universal Naming Convention (UNC) path of the shared installer package that you want. For example, \\<server>\<file name>.msi
- Click Open.
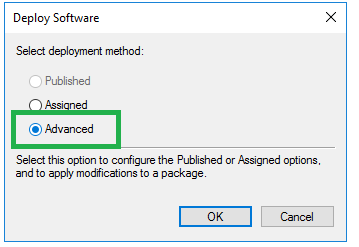
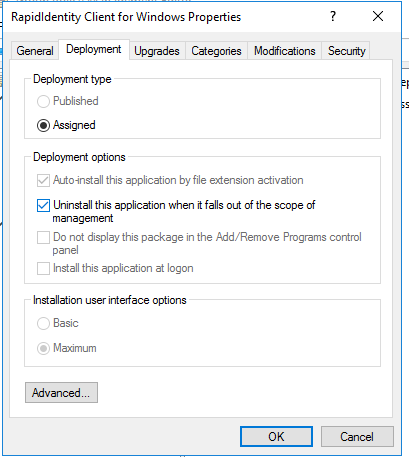
- Click Advanced, and then click OK.
- On the next page under the Deployment tab, check “Uninstall this application when it falls out of the scope of management”.
- Open the Modifications tab.
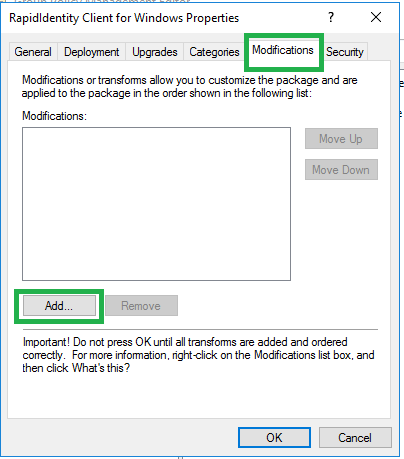
- Select your MST file (that customizes your installation) from the network share.
Note: Again, it is very important to use a UNC to the file (to the network share), rather than a local / network drive path.
Follow “Preparing for Deployment (Step 7)” below to create an MST file. - Click OK to complete the setup.
- Close the Group Policy snap-in, click OK
Step 5: Remove a package
To remove an assigned package, follow these steps:
- Start the Group Policy Management snap-in by clicking Start, pointing to Administrative Tools, and then clicking Group Policy Management.
- Expand Group Policy Objects, right-click the policy that you used to deploy the package, and then click Edit.
- New windows for Group Policy Management Editor will get open. Under Computer Configuration, expand Software Settings.
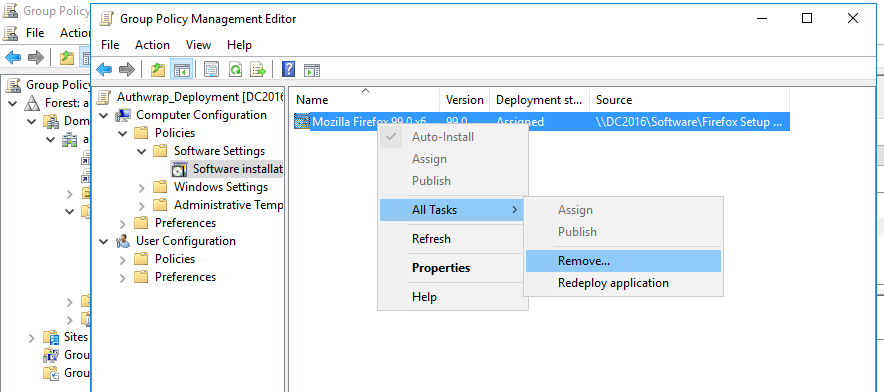
- Click the software installation container that contains the package.
- In the right pane of the Group Policy window, right-click the program, point to All Tasks, and then click Remove.
- Perform one of the following actions:
- Click Immediately uninstall the software from users and computers, and then click OK.
- Click Allow users to continue to use the software but prevent new installations, and then click OK.
- Close the Group Policy snap-in, click OK, and then close the Active Directory Users and Computers snap-in.
Step 6: Performing a test of the GPO
- While using a client machine, run Command Prompt as an Administrator.
- Run command “gpupdate /force “ and restart the client pc.

- The Group Policy will be updated and the MSI package will be silently installed on the client pc.
- Login again on the client computer and go to Control Panel > Programs > Programs and Features, you will see that the MSI package present in GPO policy has been installed.
Note: Once the policy is made, one should Run Command Prompt with command “gpupdate /force “ on domain controller also.
Step 7: Preparing for Deployment
It is not possible to pass Parameters to an MSI file deployed with a Group Policy.
However, you can use Transform file (MST) to install RI Client with Custom parameters through Group Policy by following the steps given below.
A: Create Transform (MST) file
Using the ORCA tool, a part of the Windows SDK Components for Windows Installer Developers, Edit the entries of MSI file and create Transform (MST) file.
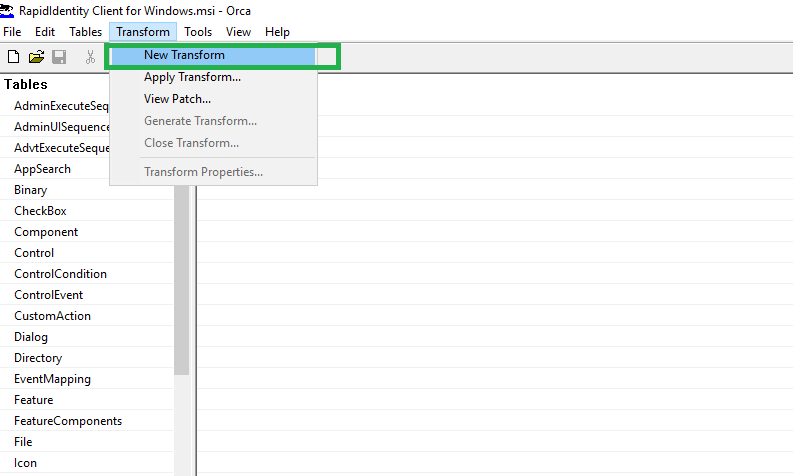
- To use ORCA, simply Drag the MSI file onto the program
- Select New Transform from the Transform Menu
- Apply all required changes and select Generate Transform.

- ORCA will then ask for the name of the new Transformation file.
- Save the file in the network shared folder.
Step 8: Manually Uninstall Packages Installed by Group Policy
If a package deployed by GPO to the client machine needs to be installed manually, follow the steps below.
- Go to the Start menu and click WIN + R.
- Type Regedit and click OK.
- Go to HKEY_LOCAL_MACHINE\SOFTWARE\Microsoft\Windows\CurrentVersion\Group Policy AppMgmt.
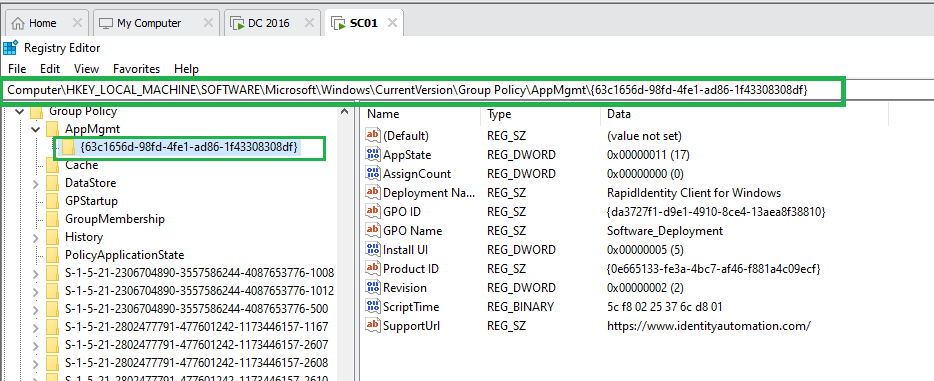
- Right-click on the desired GPO and click Delete.
- Go to Control Panel > Programs > Programs and Features and uninstall the RapidIdentity Client Installer.
- Now the desired RapidIdentity Client Installer can be installed.
This video demonstrates how to deploy an MSI package without making any modifications in the MSI file.