When users are granted multiple authentication policies, they may have a preferred option among those policy methods. These instructions describe how to give users the ability to make that preference known and apply it to their authentication experience.
Create a Metadirectory Field
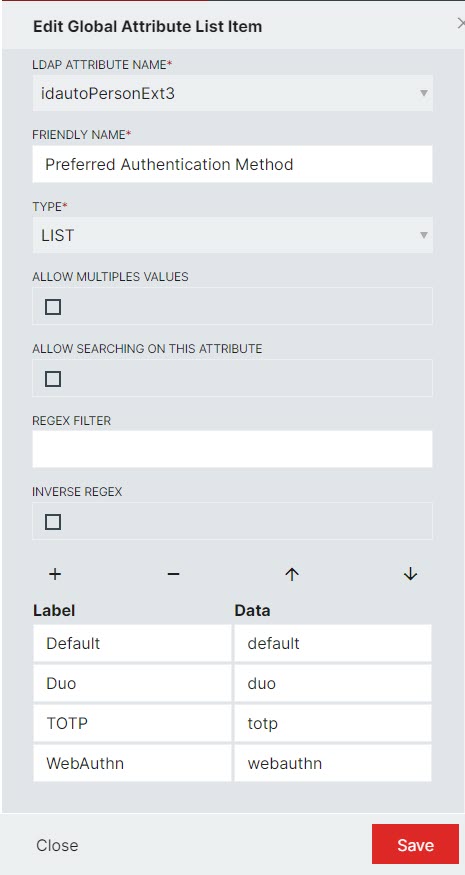
First, you will need to create a field in the Global Attribute List that contains the different options that the user can choose between.
-
Navigate to Configuration > Systems > Metadirectory.

-
Click Add Attribute in the top right.

-
Find an LDAP attribute that is not currently in use. Note: You will have to know if this field is used in any action sets as well.
-
Give it a Friendly Name such as "Preferred Authentication Method" or any other verbiage that your users will recognize for this function.
-
Define the item as follows:
a. Type: List
b. Label: This is the language users will see, so add language they will recognize (e.g., instead of TOTP, use Authentication App or something more recognizeable)
c. Data: This is the value used in Authentication Policies > Criteria > LDAP Filter field. End users will not see this value.
Note: Always create a value called Default, which will be assigned to the default authentication policy in the next step.
Define Authentication Policies
Next, you will need to set up the LDAP filters in the criteria tab to define the attributes in the Data field for use.
-
Navigate to Configuration > Authentication > Authentication Policies.
-
Define one policy for every value in the new Metadirectory attribute that was just defined.
-
On the Criteria tab, add an LDAP filter using that field name with the associated value in the Data column.
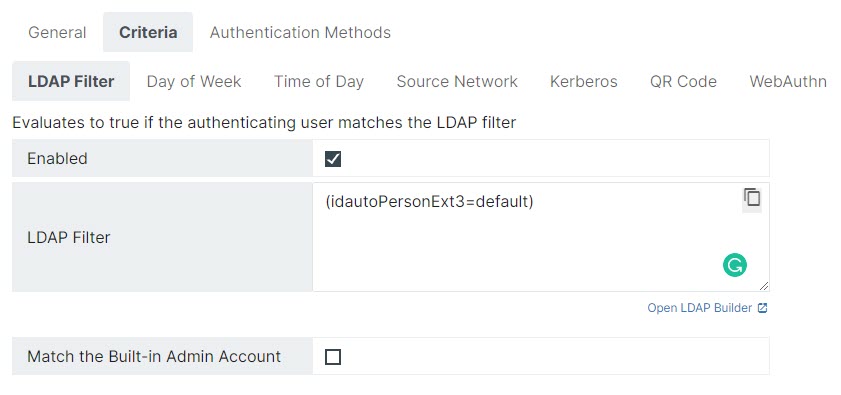
Example: (idautoPersonExt3=default), (idautoPersonExt3=duo), (idautoPersonExt3=totp), or (idautoPersonExt3=webauthn).
Add Field to Profile for Target Audience
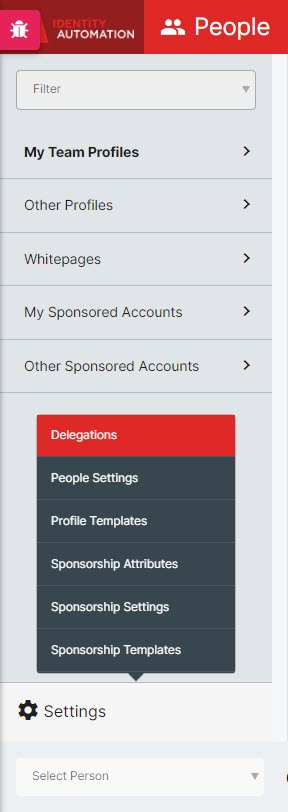
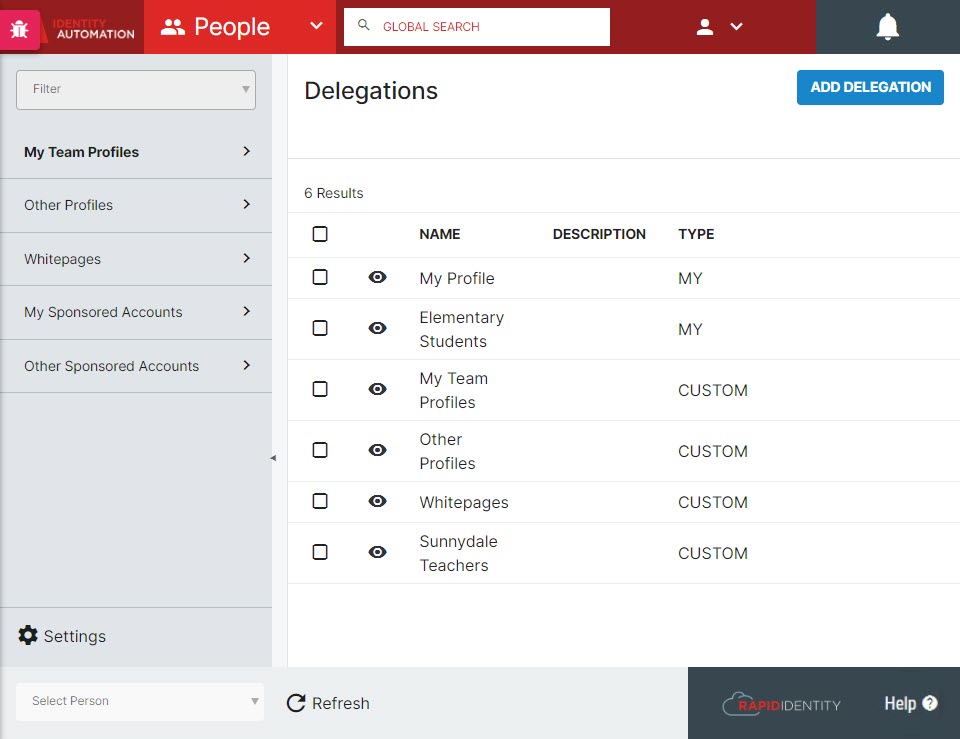
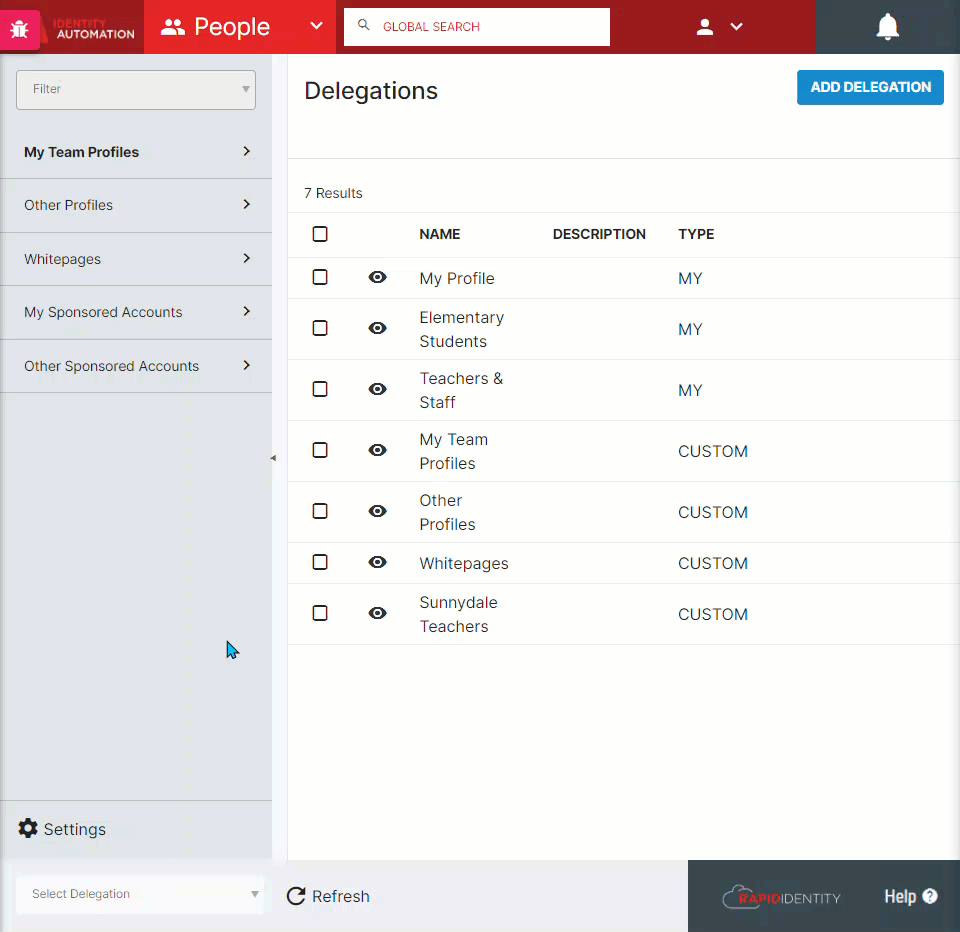
Now we need to apply this new attribute to specific people, so it needs to be added to the appropriate Delegation.
-
Navigate to People > Settings (bottom left) > Delegations.
-
Note that the two delegation types are MY and CUSTOM.
NOTE: The MY profile type is what a user sees when they drop down their name from the top toolbar. There can be multiple MY profile types, one for staff and one for students, for example, to tailor the self-service options that are available on the dropdown menu. To get even more granular, there can be multiple student MY profiles, one for Elementary students that does not allow self-service password reset, and another for Middle and High School students that does.
-
Hover your mouse cursor over the correct MY profile type, typically for staff members, to enable the Details button on the right and click to open the management pane.
-
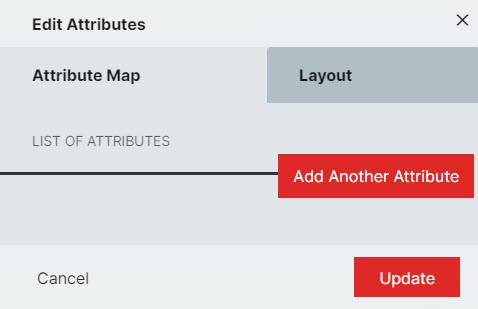
At the bottom of the screen, click Attributes to add the new field created in Step 1. Then click in the main area until you have an Add Another Attribute button.
-
Find the Attribute from the drop-down menu that you just created and click Create.
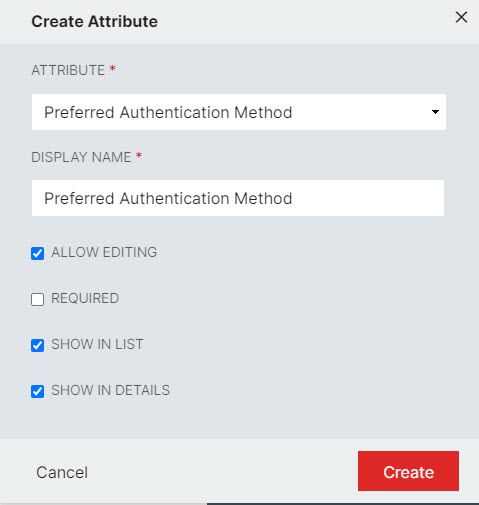
NOTE: The field name that the user sees can be tailored here in the Display Name field.
- Ensure that Allow Editing and Show In List are both checked.
- Click Create, then Update, then Save. All three steps are required for the information to be fully processed by RapidIdentity.
Staff members who edit Profile Settings to select a Preferred Method will force a match to one of the Authentication Policies defined previously.