Overview
This article covers deployment of the PIXM browser extensions on an organization’s Jamf Pro managed iOS devices in the Safari browser. The deployment will require access to the iOS App Config file, which you should confirm before proceeding. Please also note that, due to Apple System's Integrity Protocol, the full deployment will require end user enablement and permission granting steps, which will also be covered. The final section will also cover the uninstallation process.
Connect PIXM Mobile to Apple Business Manager
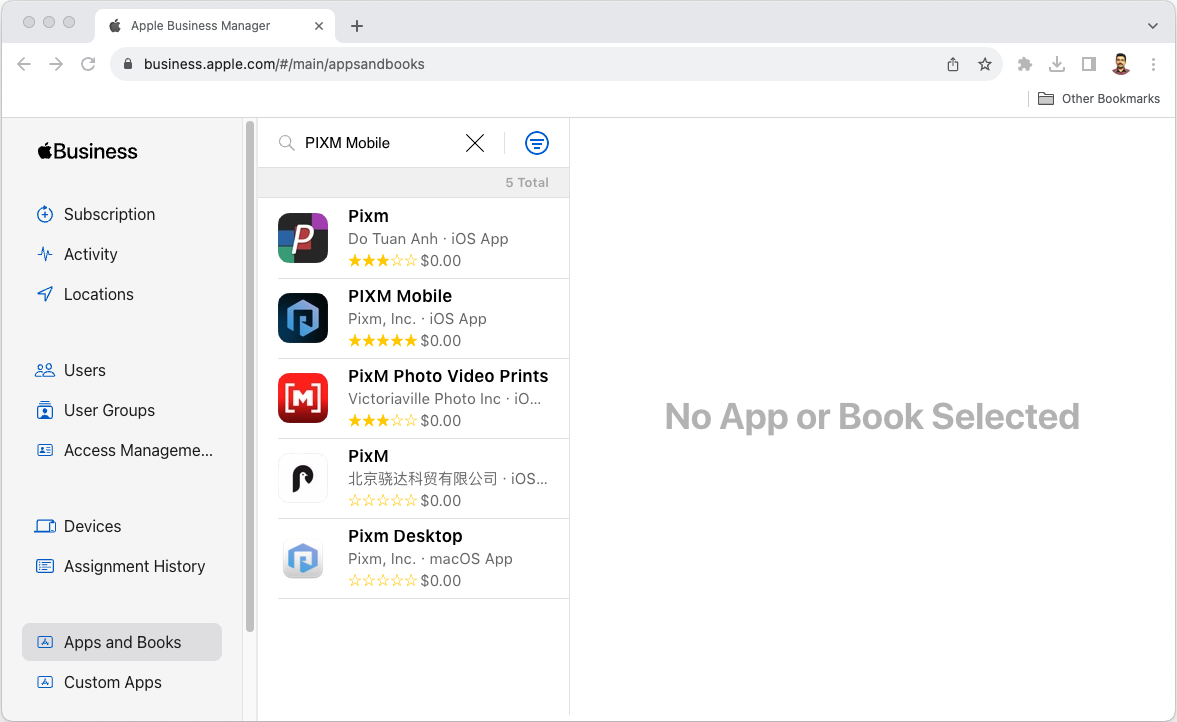
Deployment of PIXM Mobile requires connecting JAMF Pro to an Apple Business Manager (or Apple School Manager) account and the enablement of Volume App Purchasing, which should be confirmed before proceeding. Log into Apple Business Manager at https://business.apple.com and click on the Apps and Books option in the left panel. Search for PIXM Mobile and the app will appear in the list.
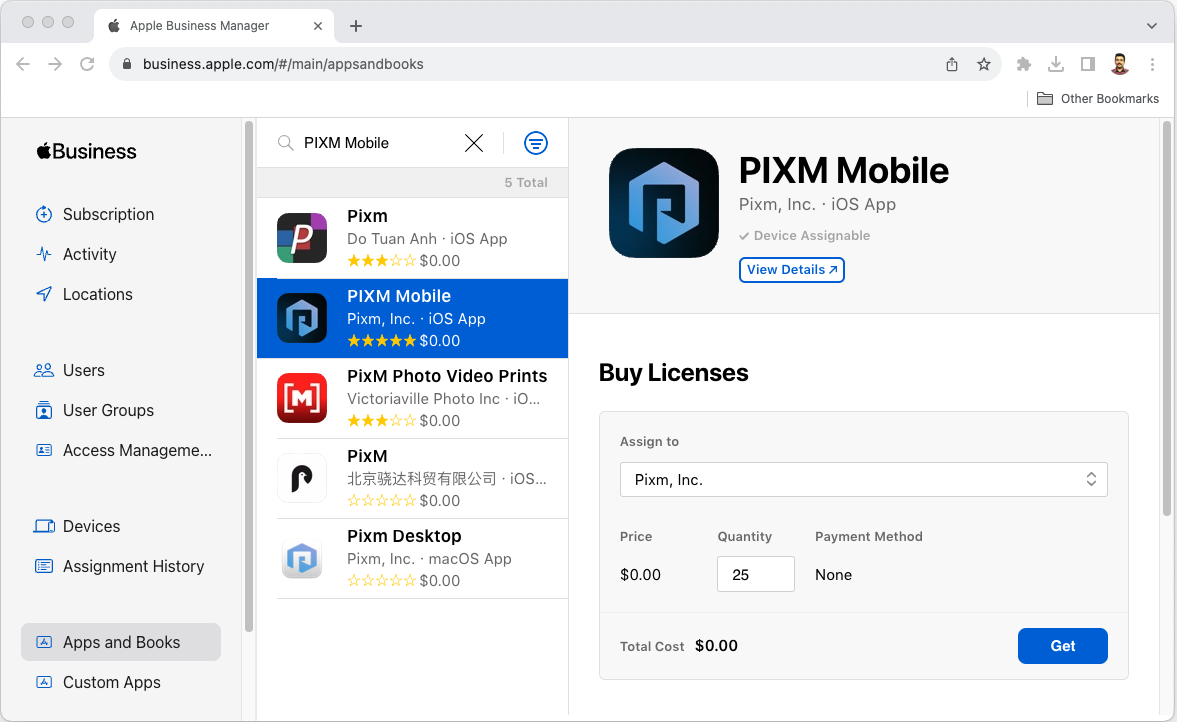
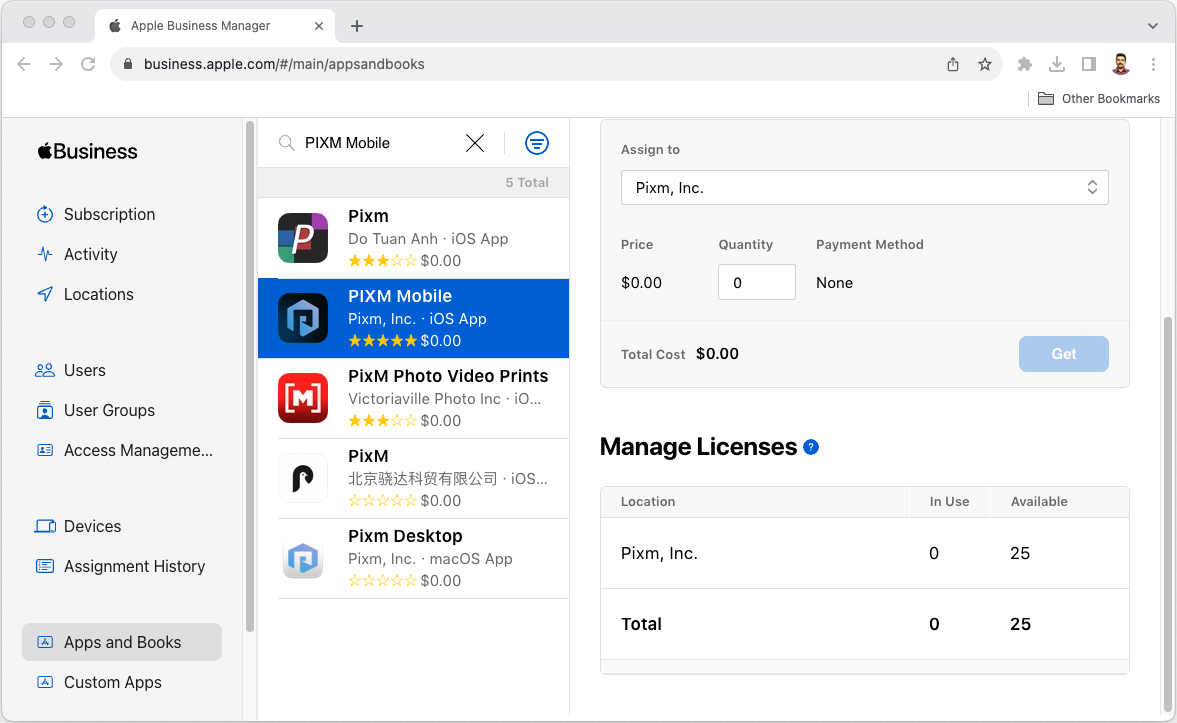
Select the PIXM Mobile app and, on the right-side panel, select your “Organization”. In the Quantity textbox, enter the total number of iOS devices you wish to deploy to and click Get.
Deploy PIXM Mobile Safari Browser Extension
As a reminder, Apple’s Systems Integrity Protocol requires end user enablement and consent steps for completing the deployment in Safari. This section covers those steps at the end.
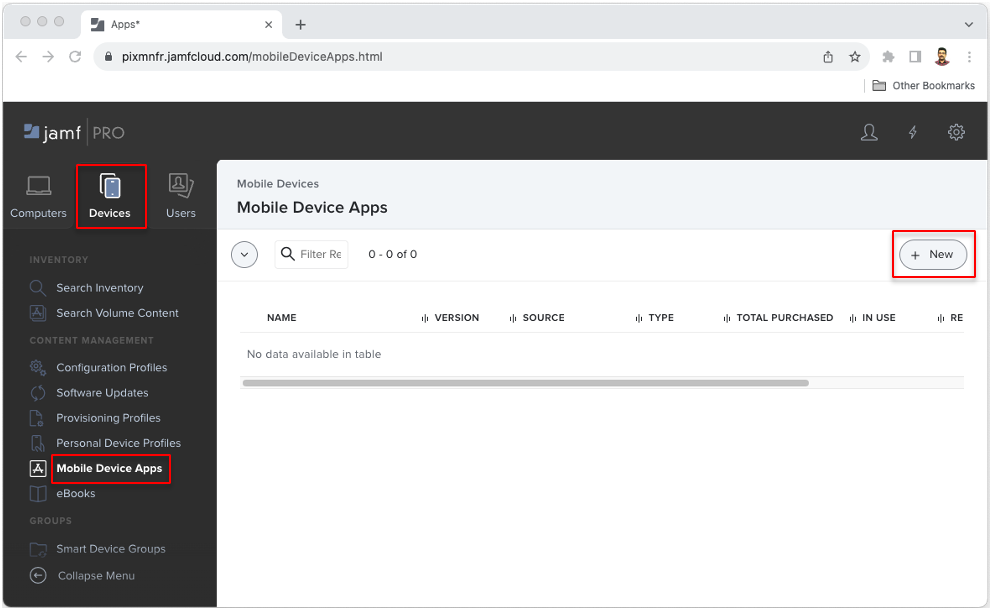
Login to the JAMF Pro portal and click on the Devices icon and click Mobile Device Apps in the left panel. Click New.
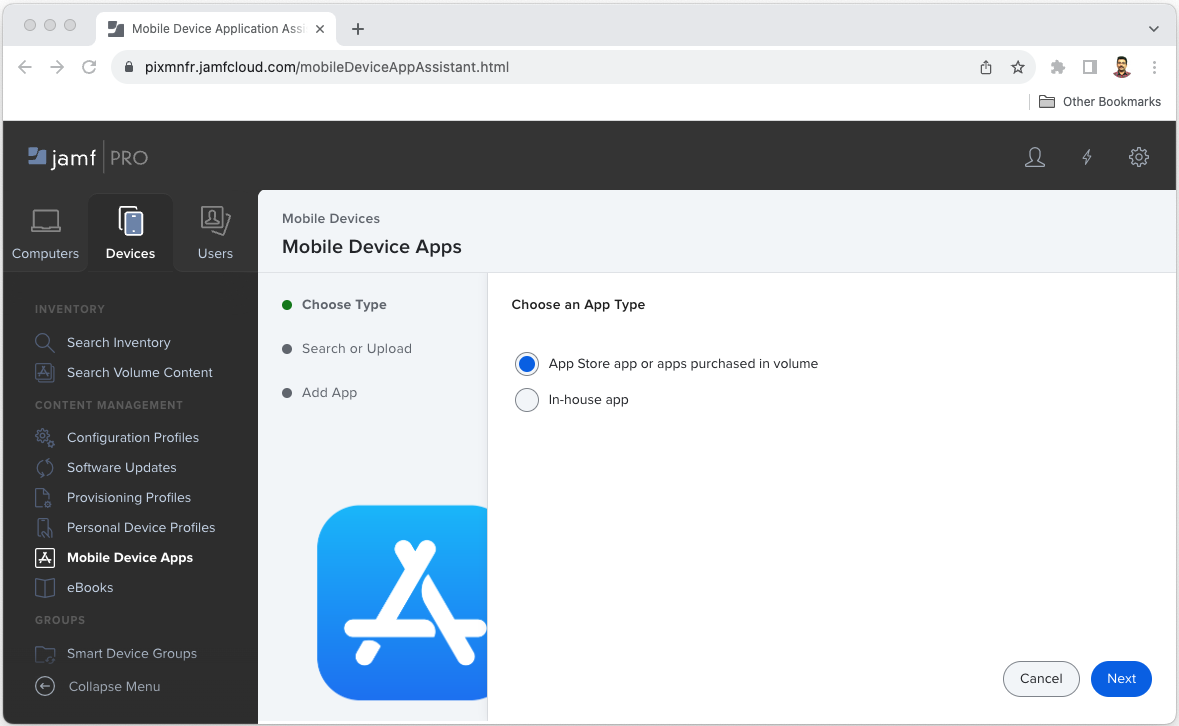
On the Mobile Device Apps page, select the option “App Store app or apps purchased in volume” and click Next.
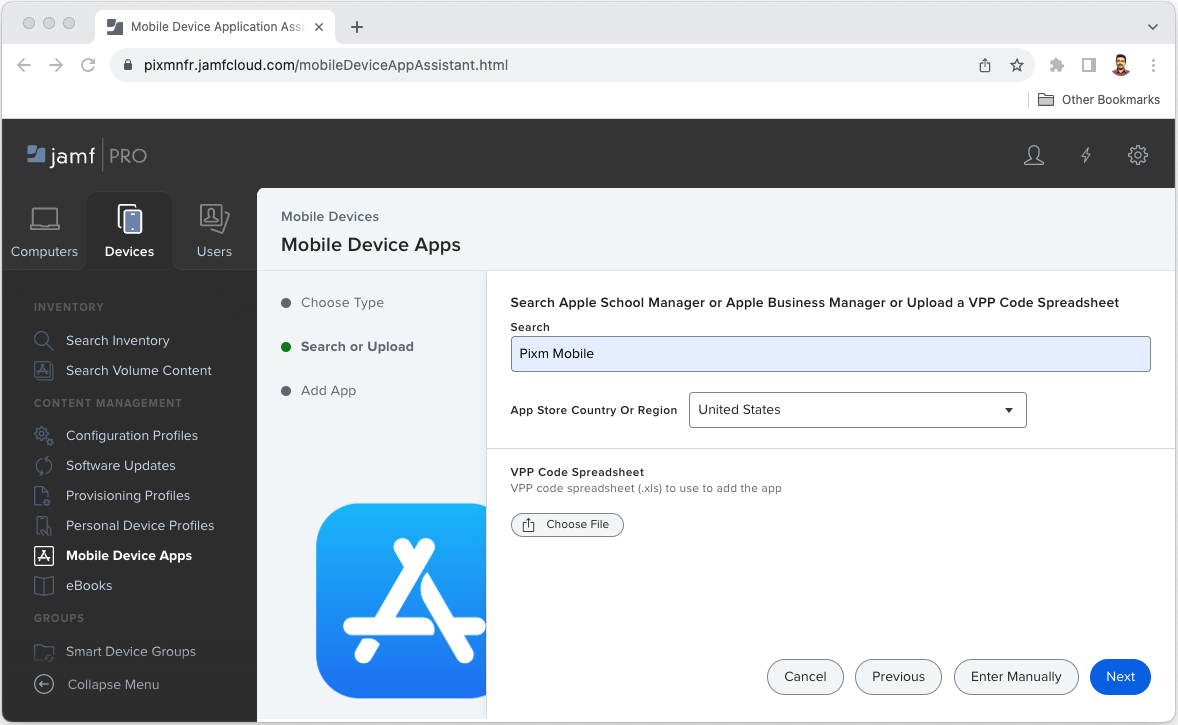
On the next page, enter Pixm Mobile in the Search box and select the App Store Country and click Next.
On the next page, select the tab “Apps Purchased in Volume”. The PIXM Mobile app that was added in the Apple Business Manager (or Apple School Manager) account should be visible now. Click the Add button.

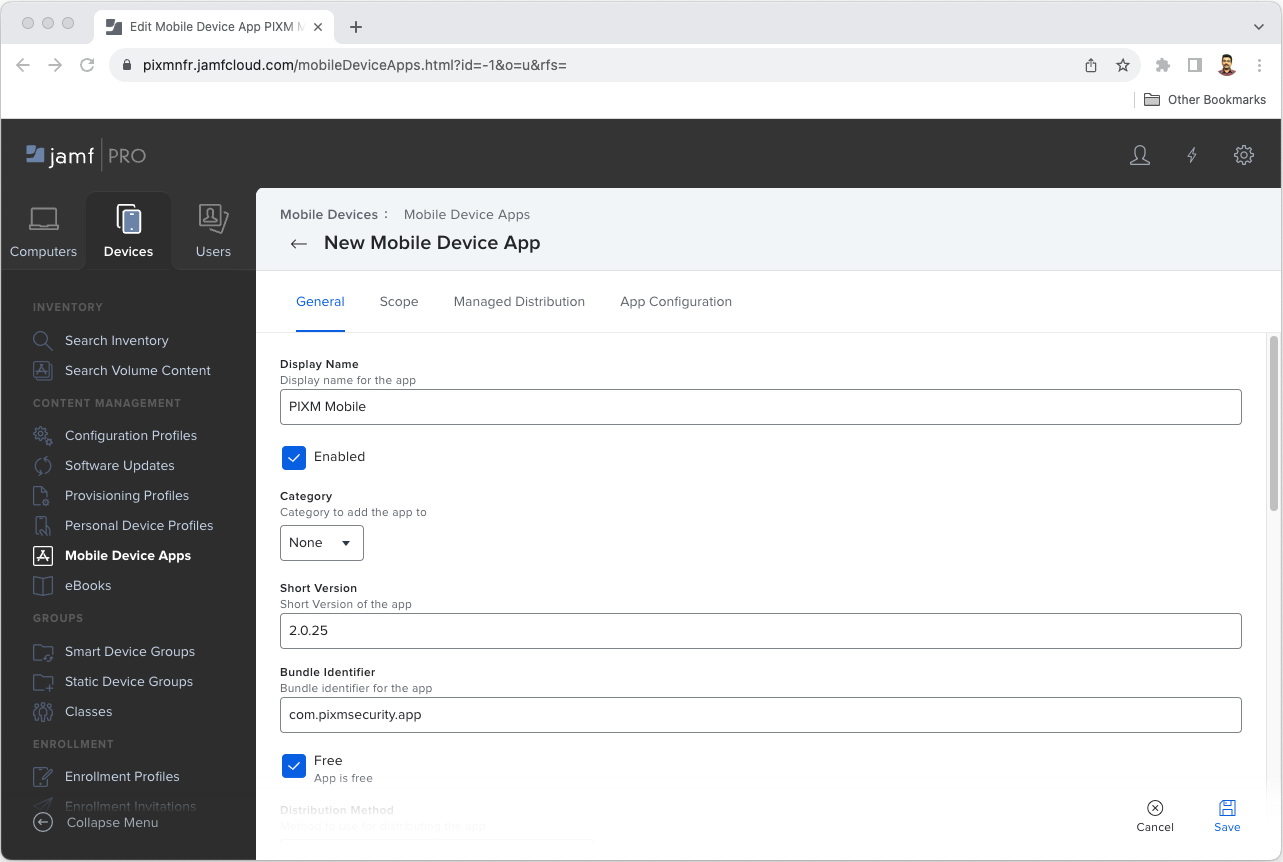
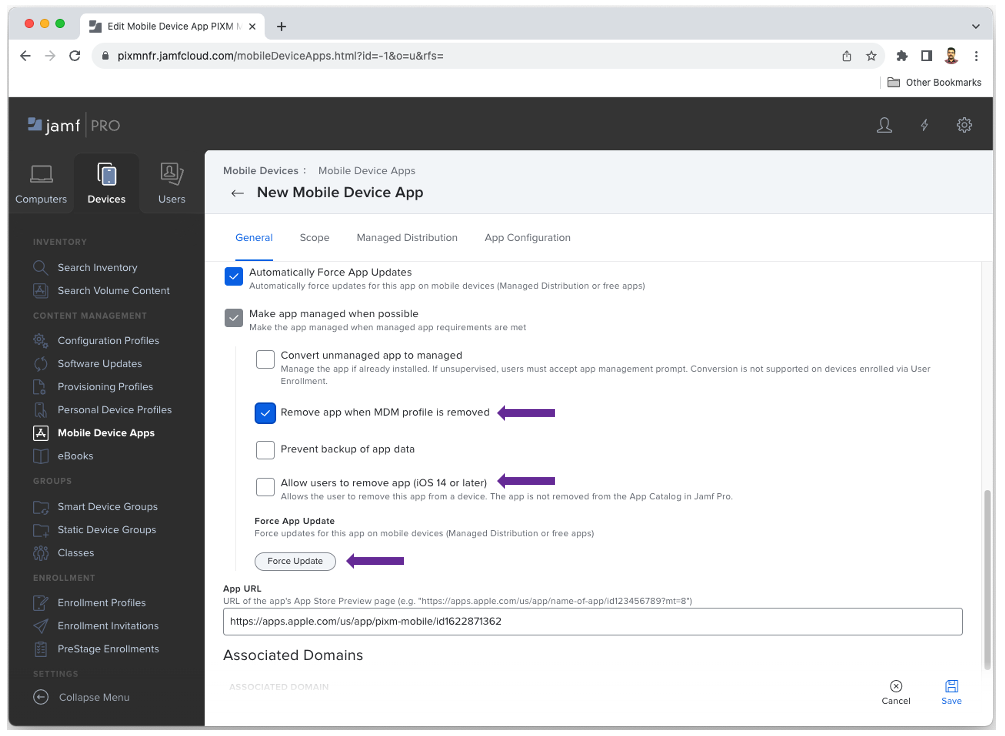
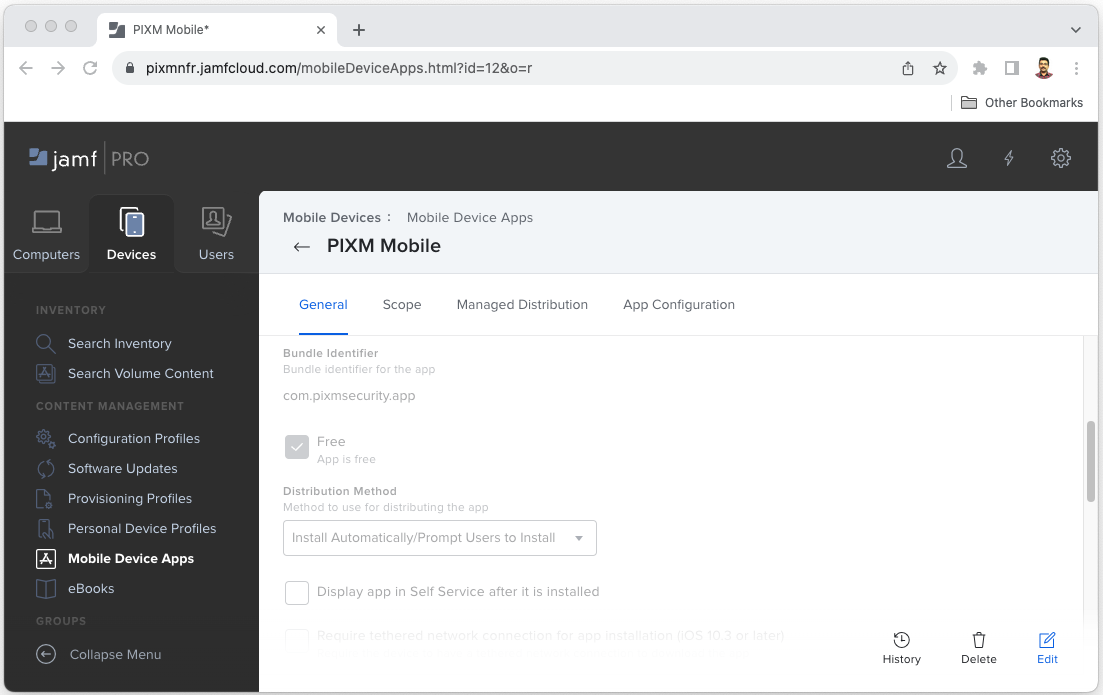
Once you click the “Add” button, you should see the app details page shown in the screenshot.
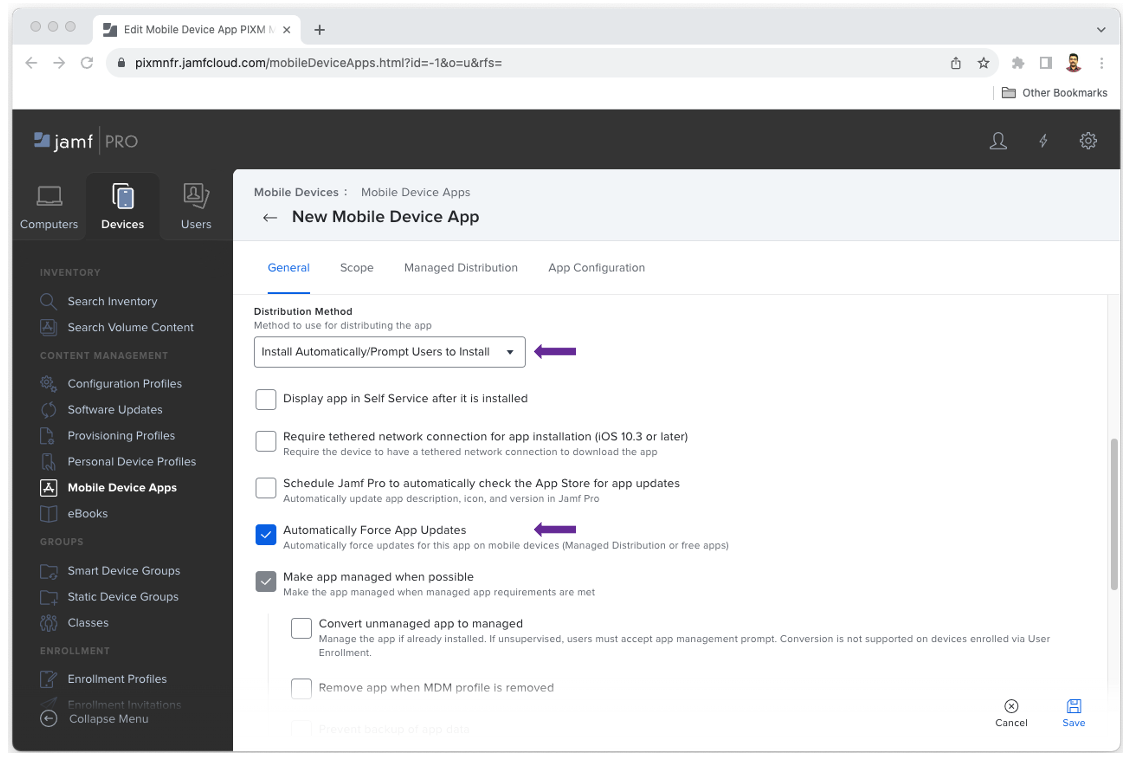
Scroll down. For the Distribution Method, select Install Automatically/Prompt Users to Install. Enable the option “Automatically Force App Updates”. This will push future updated app releases.
Enable the option “Remove app when MDM profile is removed”. Admin should deselect the “Allow users to remove app (iOS 14 or later)” option. Click the Force Update button.
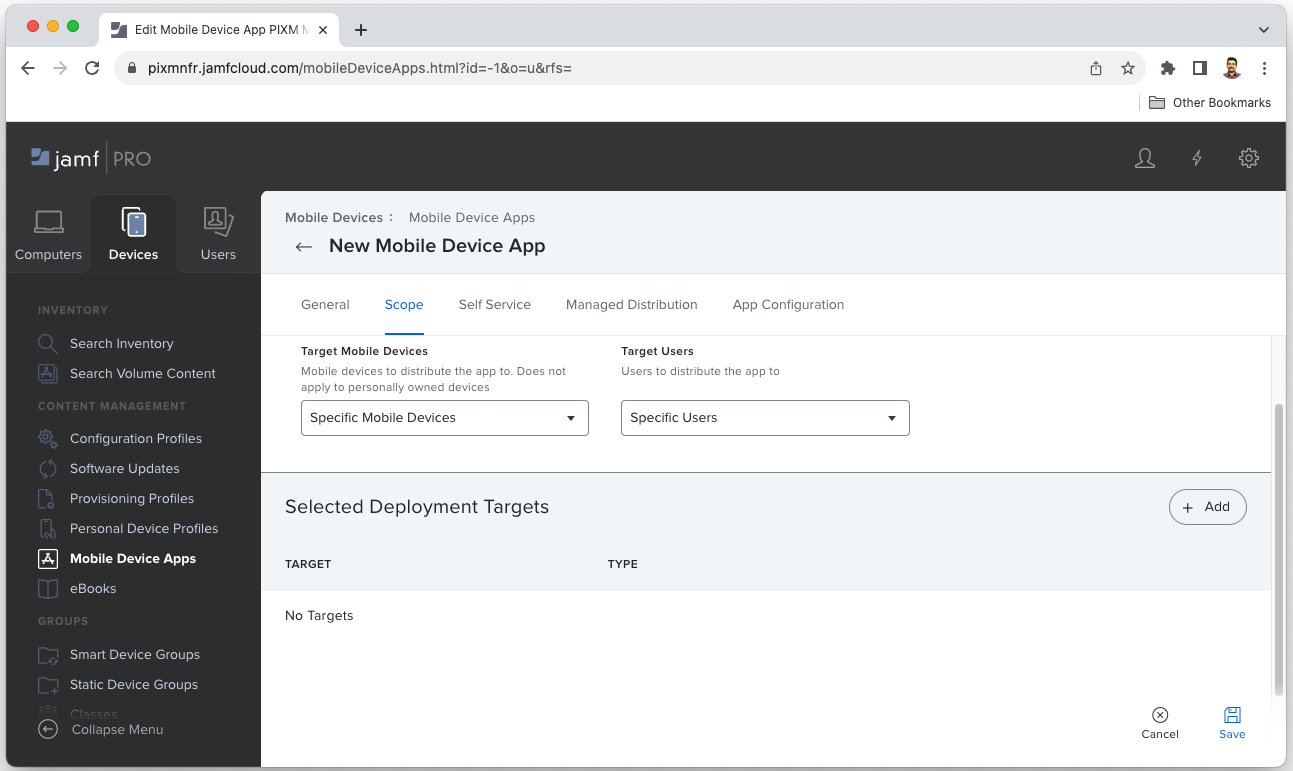
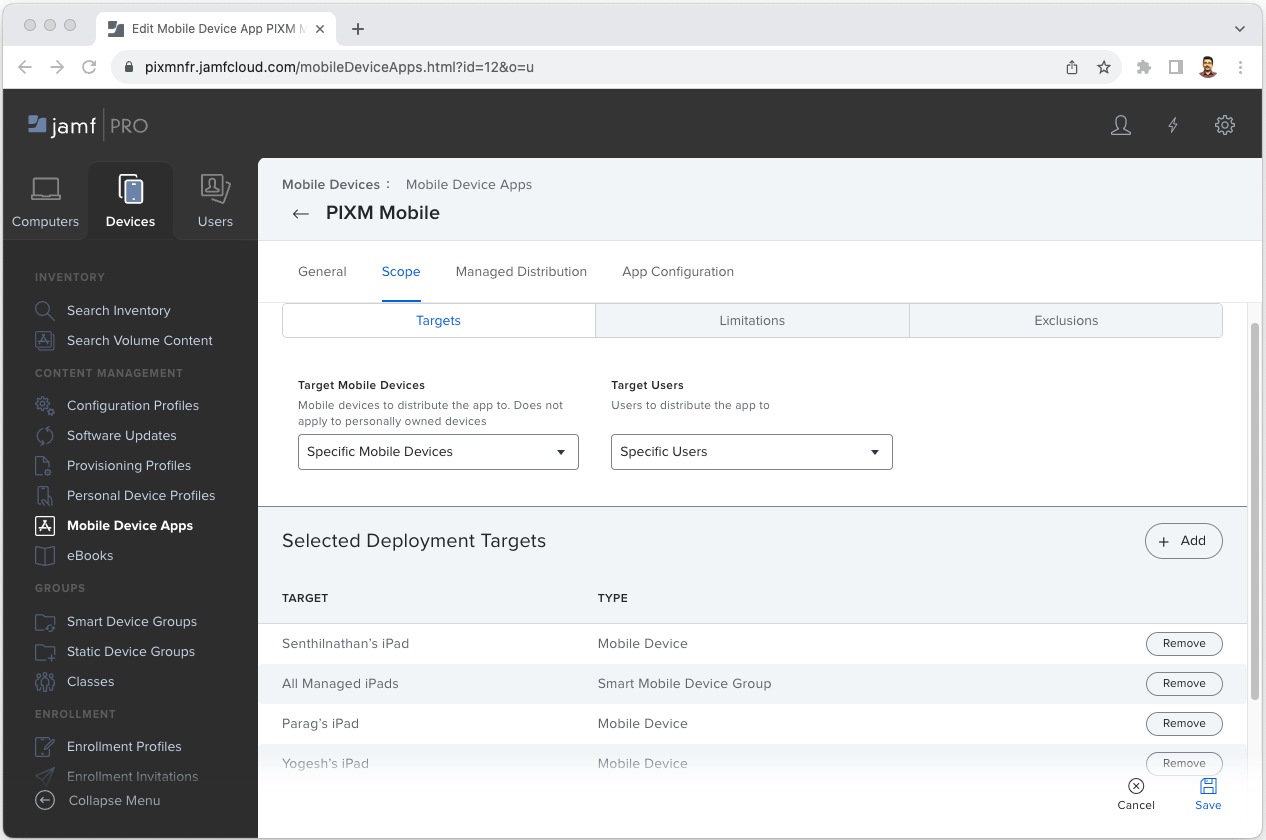
Under the Scope tab, click the Add button.
Select the Target Mobile Devices from the dropdown for deployment, eg. Specific Mobile Devices or Mobile Device Groups.
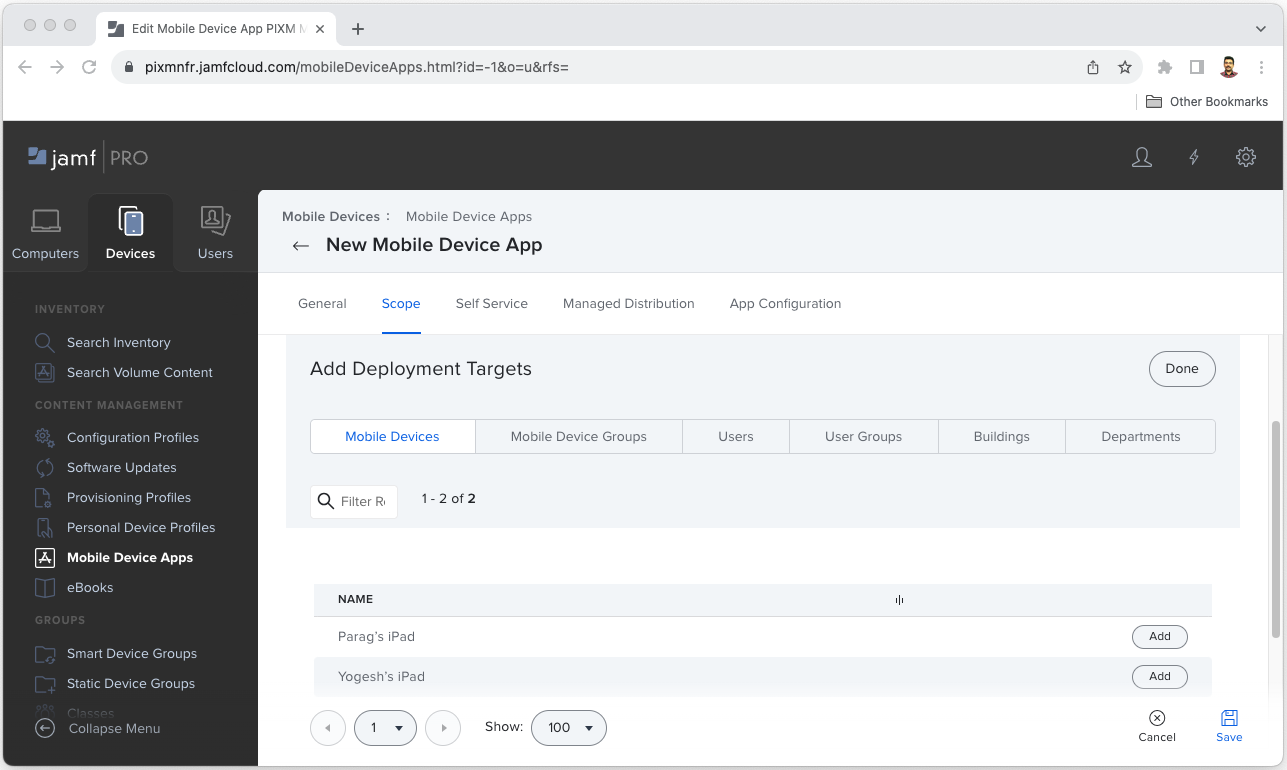
For example, if Specific Mobile Devices is selected, then individual devices can be added under the Mobile Devices sub tab.
If Mobile Device Groups is selected, then device groups can be added under the Mobile Device Groups sub tab.
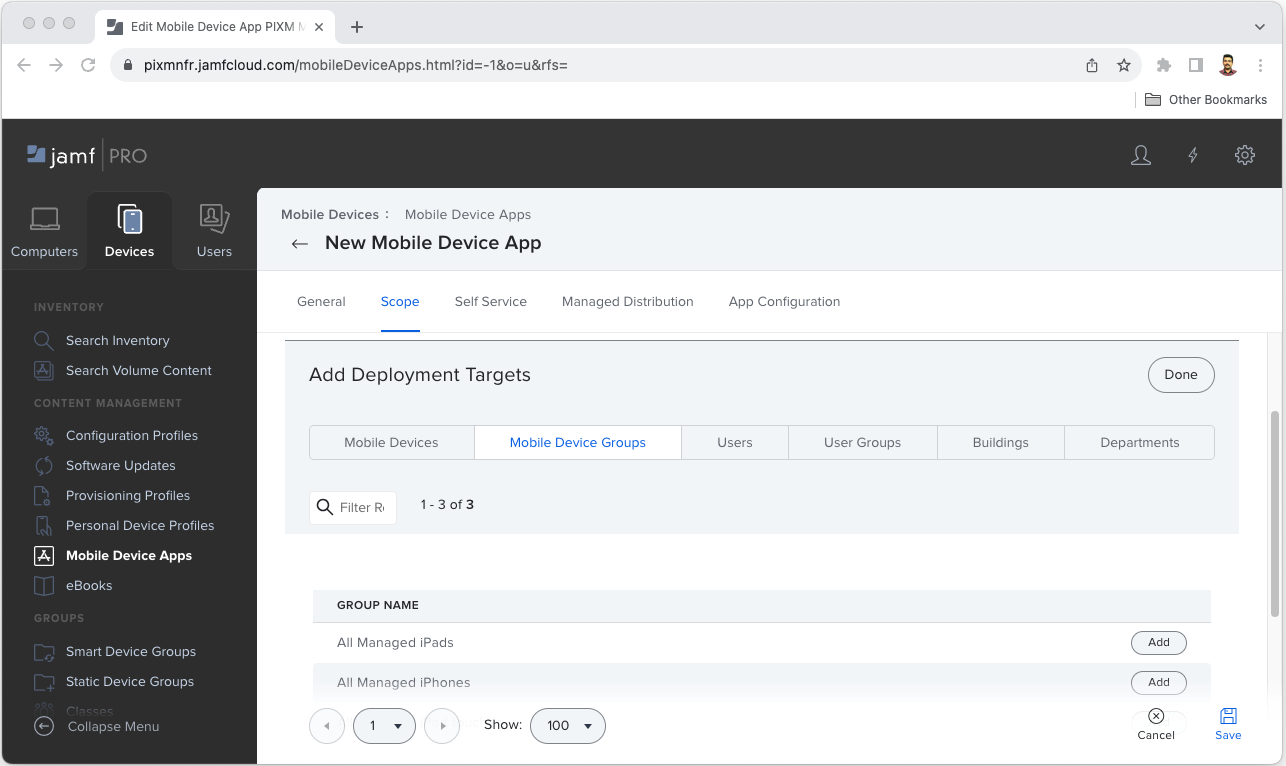
Once added, click Done.
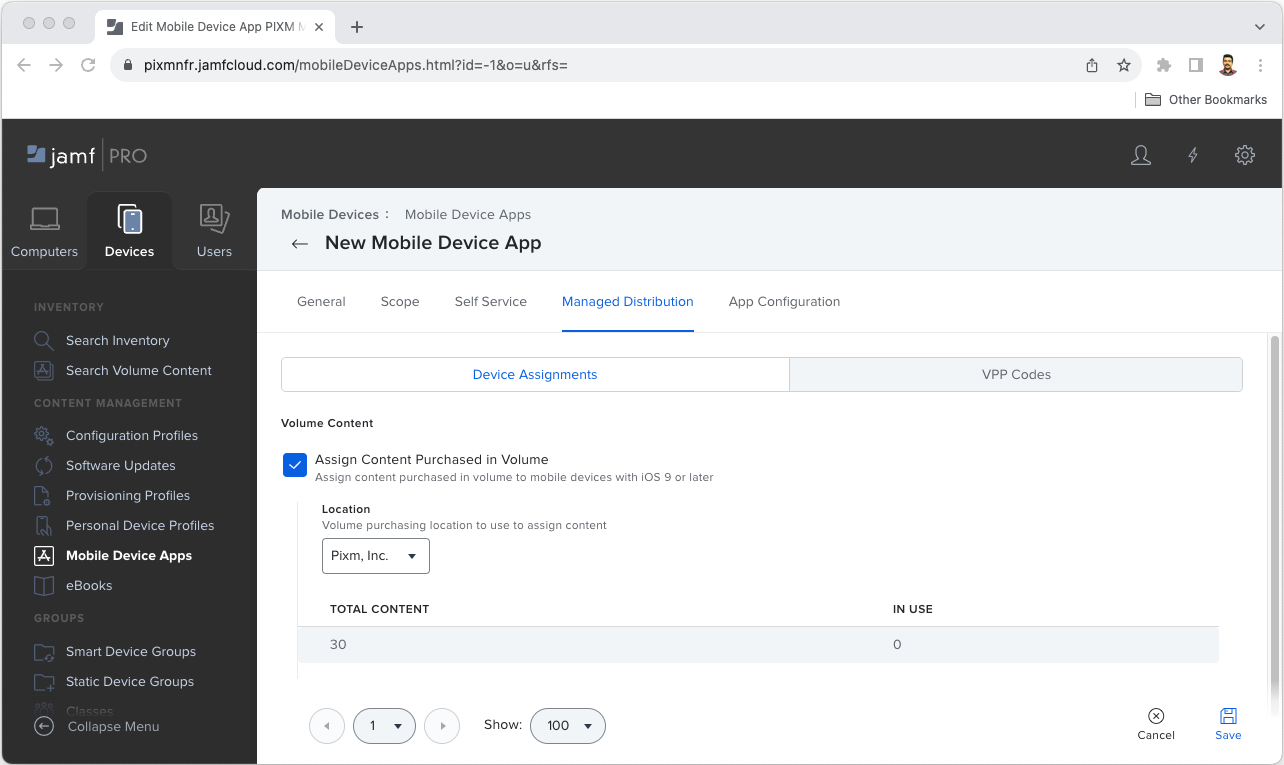
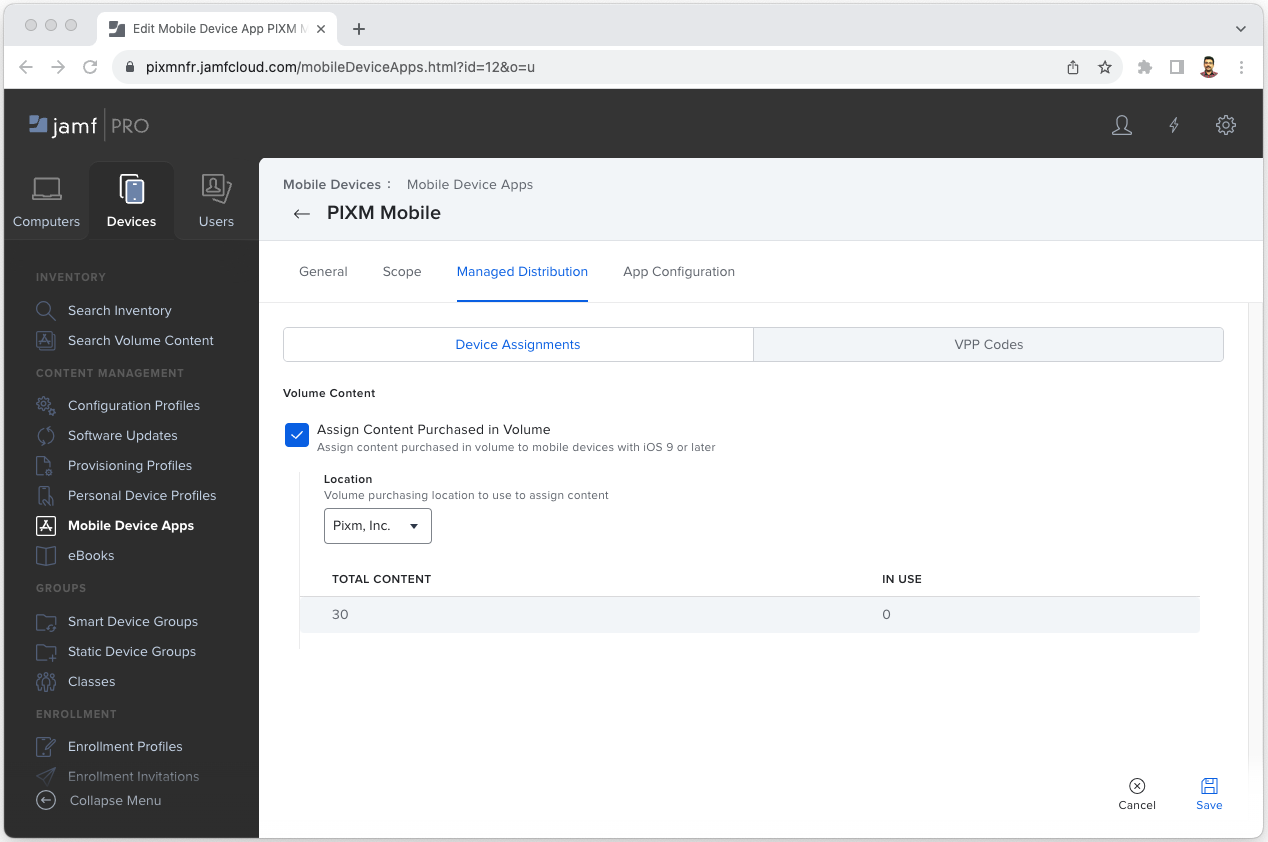
Under the Managed Distribution tab, click on the Device Assignments sub tab, and check the box for Assign Content Purchased in Volume.
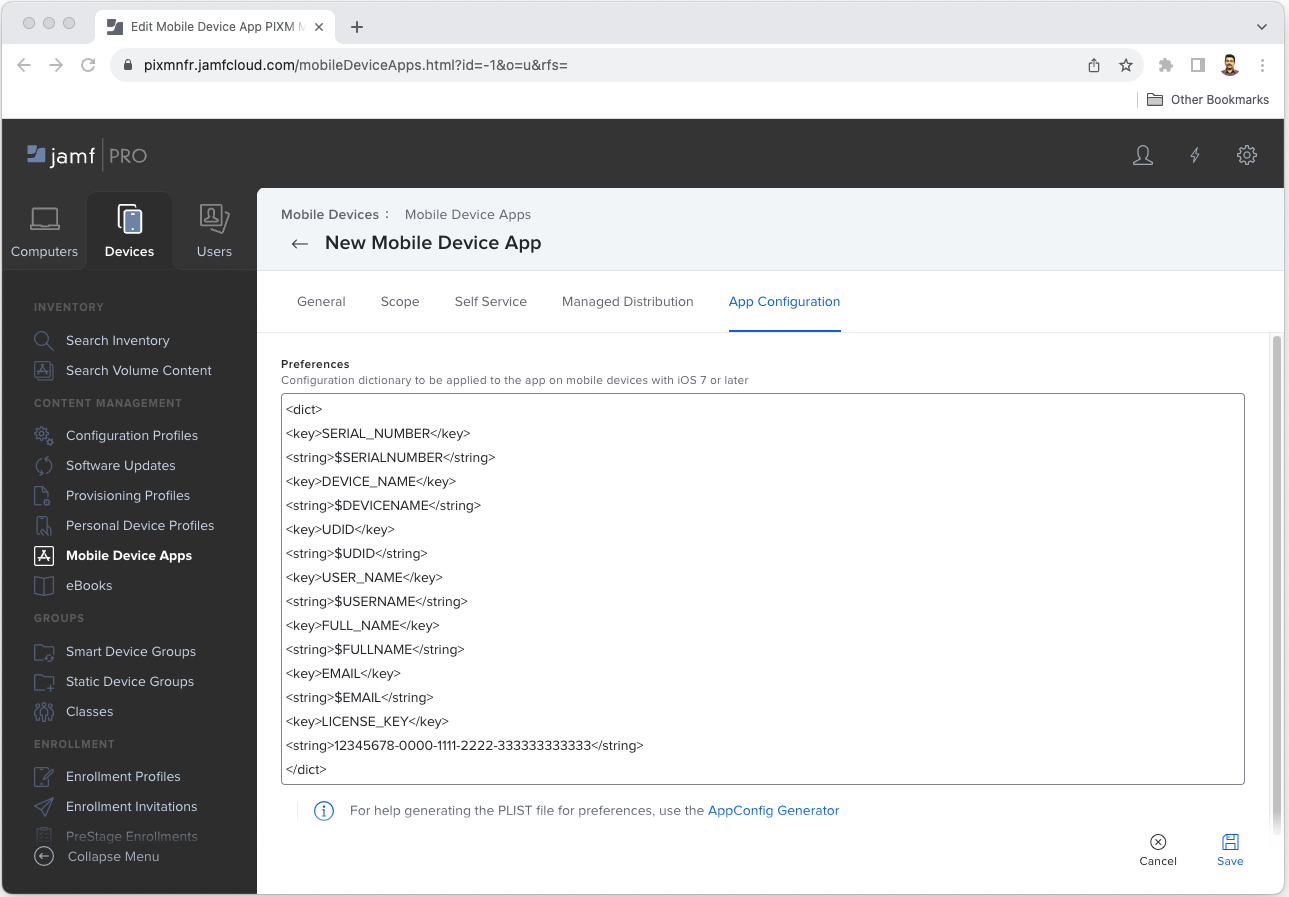
Select the App Configuration tab and find the Preferences field.
Open the App Config file, copy its full content and paste it into the Preferences field. Please note, the file includes your organization’s unique license key. This should not be shared with anyone outside your organization.
Click Save.
This will install the PIXM Mobile app onto all the iOS devices added in the Scope section.
End User Consent Steps
Once the PIXM Mobile app is installed on a user’s device, the user will need to manually enable the extension and grant it necessary permissions in order to receive protection in Safari. The below steps are covered from the end user’s perspective.
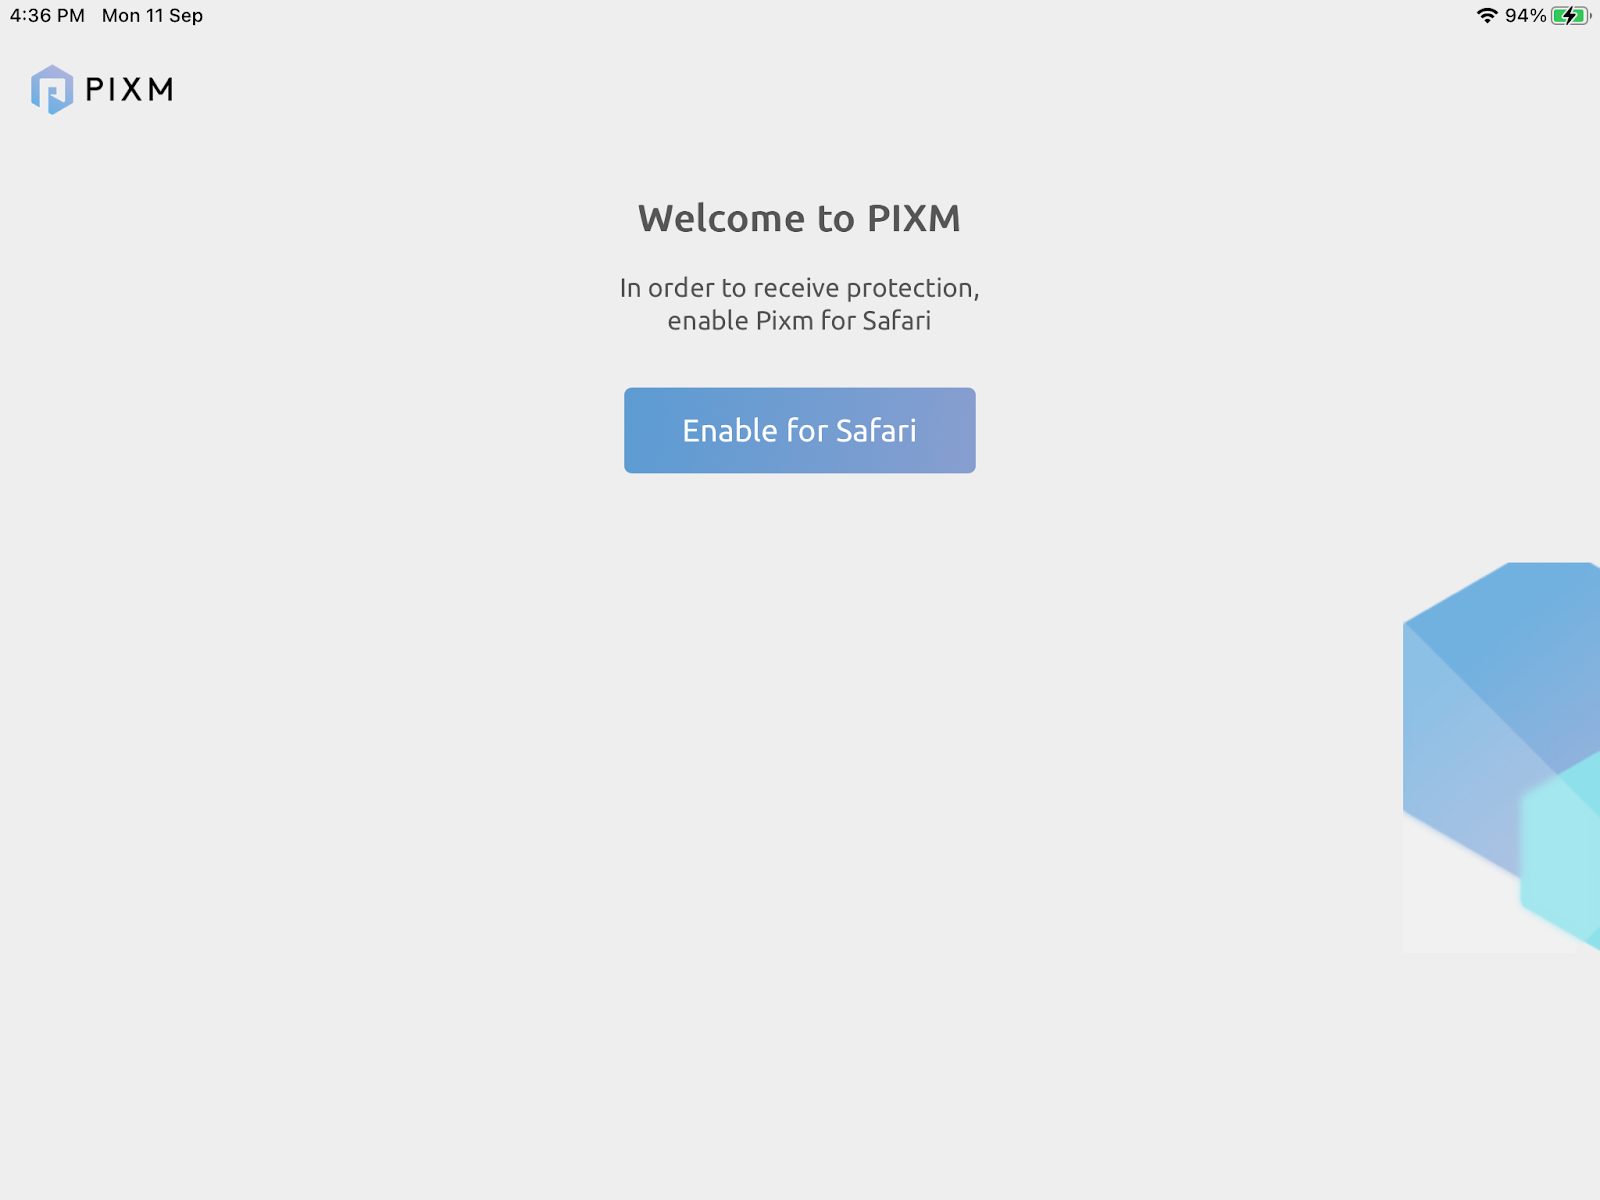
On the iOS device, click and open the PIXM Mobile app.

Click the “Enable for Safari” button.
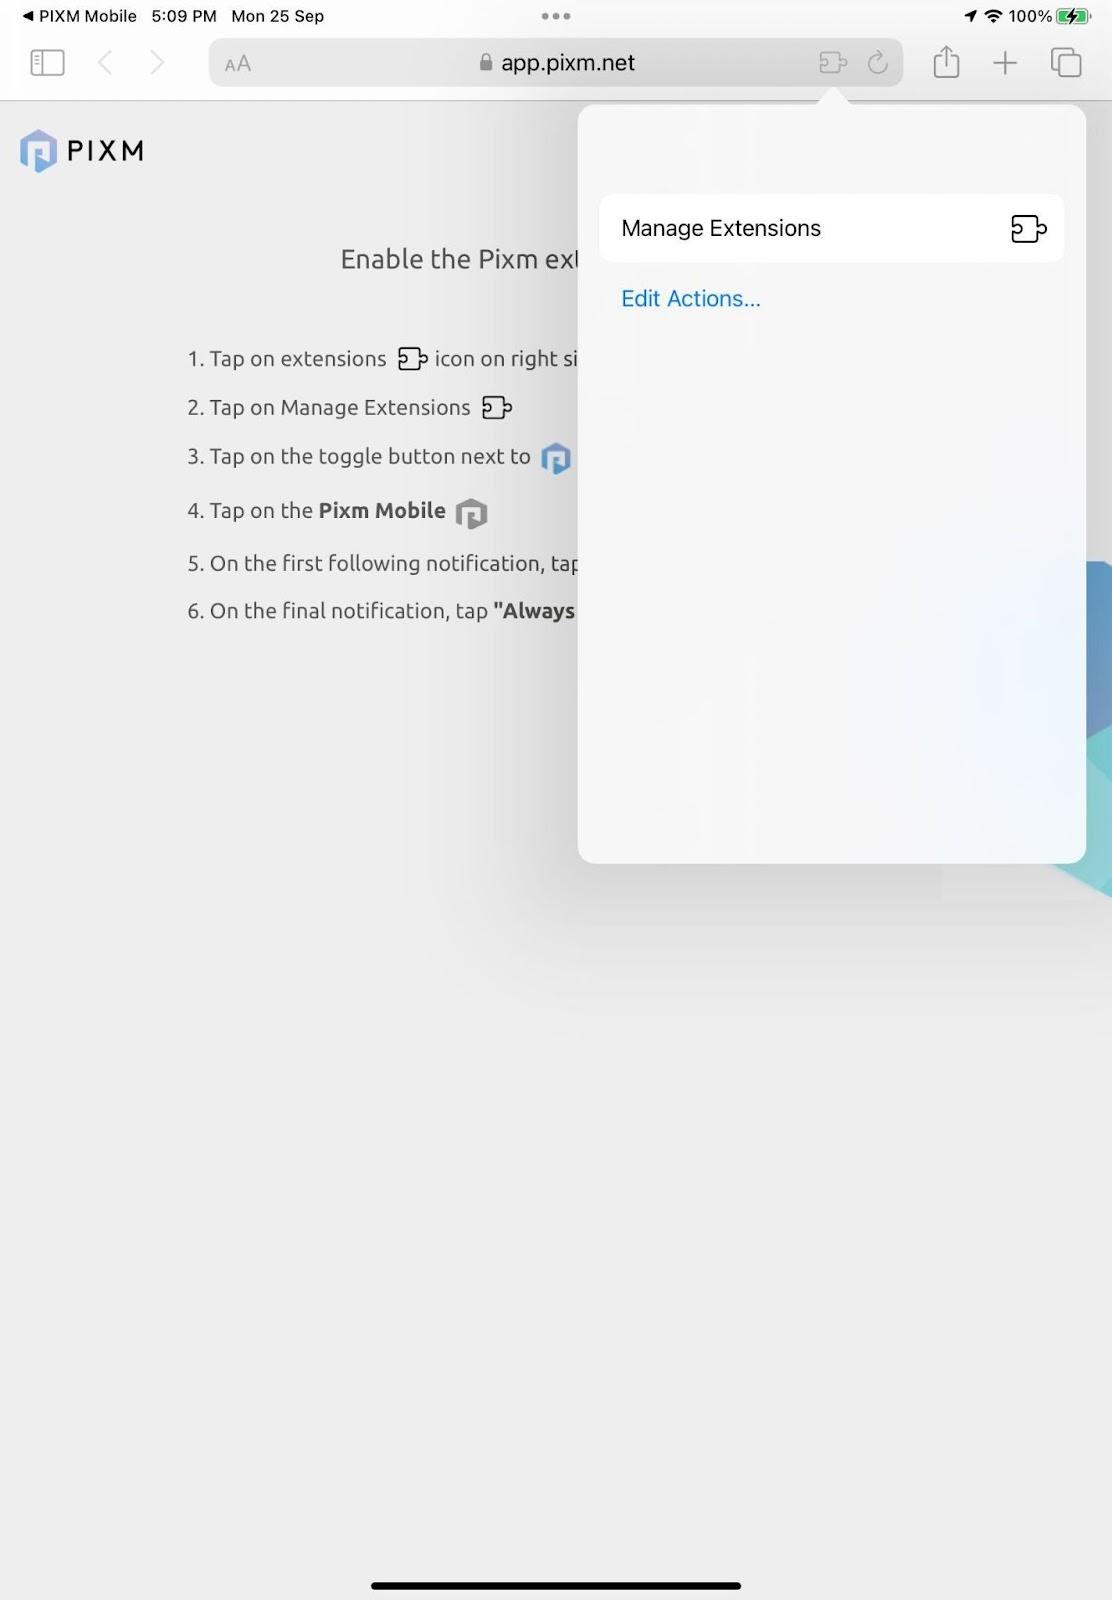
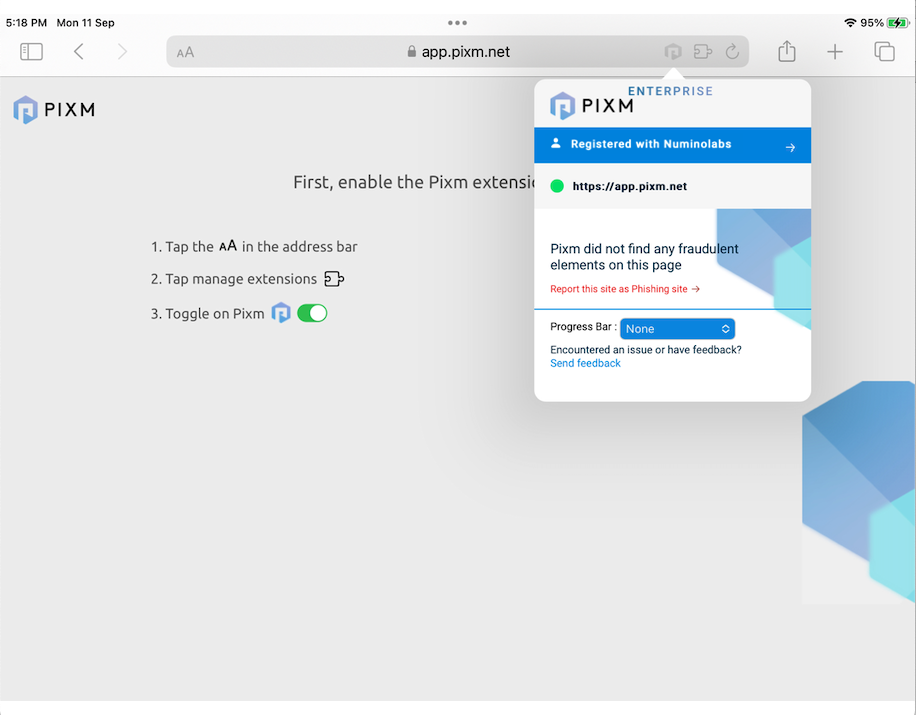
This will open the Safari browser and open an instructions page at app.pixm.net. We will walk through these instructions below.
Click the Extensions icon on the right side of the address bar

In the dropdown, click on the Manage Extensions icon.
In the Manage Extensions dialog, enable the PIXM Mobile toggle as below and click Done

This completes PIXM Mobile Safari Extension deployment on the end user device.
To confirm the installation, click on the PIXM extension icon on the top right corner of the address bar and you should see that it is registered with your organization.
Uninstall PIXM Mobile
Login to JAMF Pro portal.
Click on the Devices icon and click Mobile Device Apps from the left panel. Select PIXM Mobile app and click on Edit.
Select the Scope tab. Under “Selected Deployment Targets”, click Remove for the specific iOS devices if the app was deployed to specific iOS devices. Click Remove for the mobile device group if the app was deployed to mobile device groups.
Click the Managed Distribution tab. Uncheck the box for Assign Content Purchased in Volume. Click Save.
This will remove the Pixm Mobile Safari Extension from the iOS devices at the next user check-in.
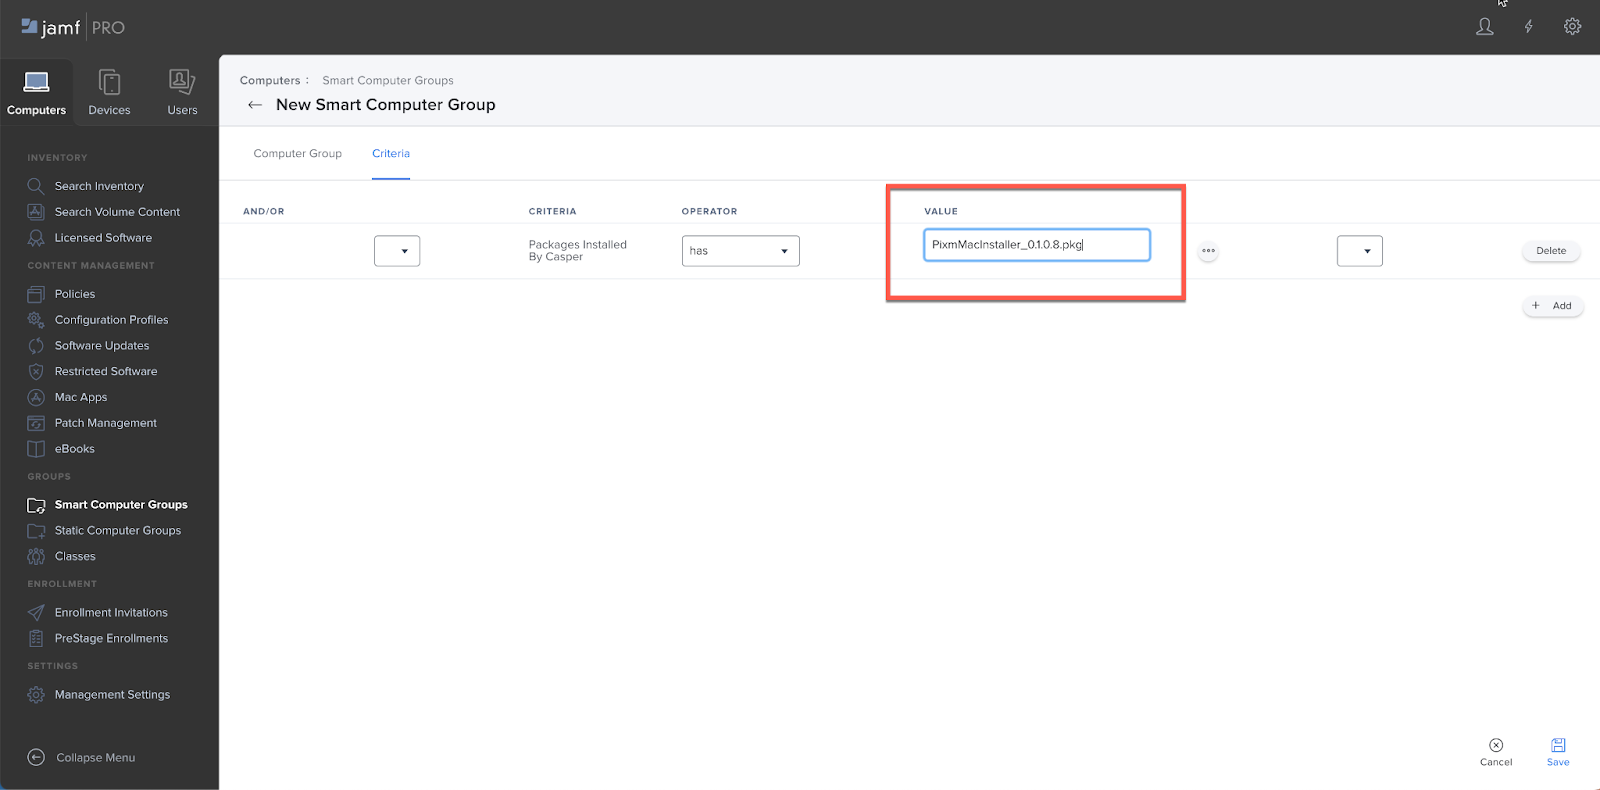
Click on the Criteria tab, click on Add and click on Show Advanced Criteria

Scroll down to Packages Installed By Casper and click Choose

In Value textbox, enter the filename that was uploaded (“PixmMacInstaller_0.1.0.8.pkg” in this example) and click Save.
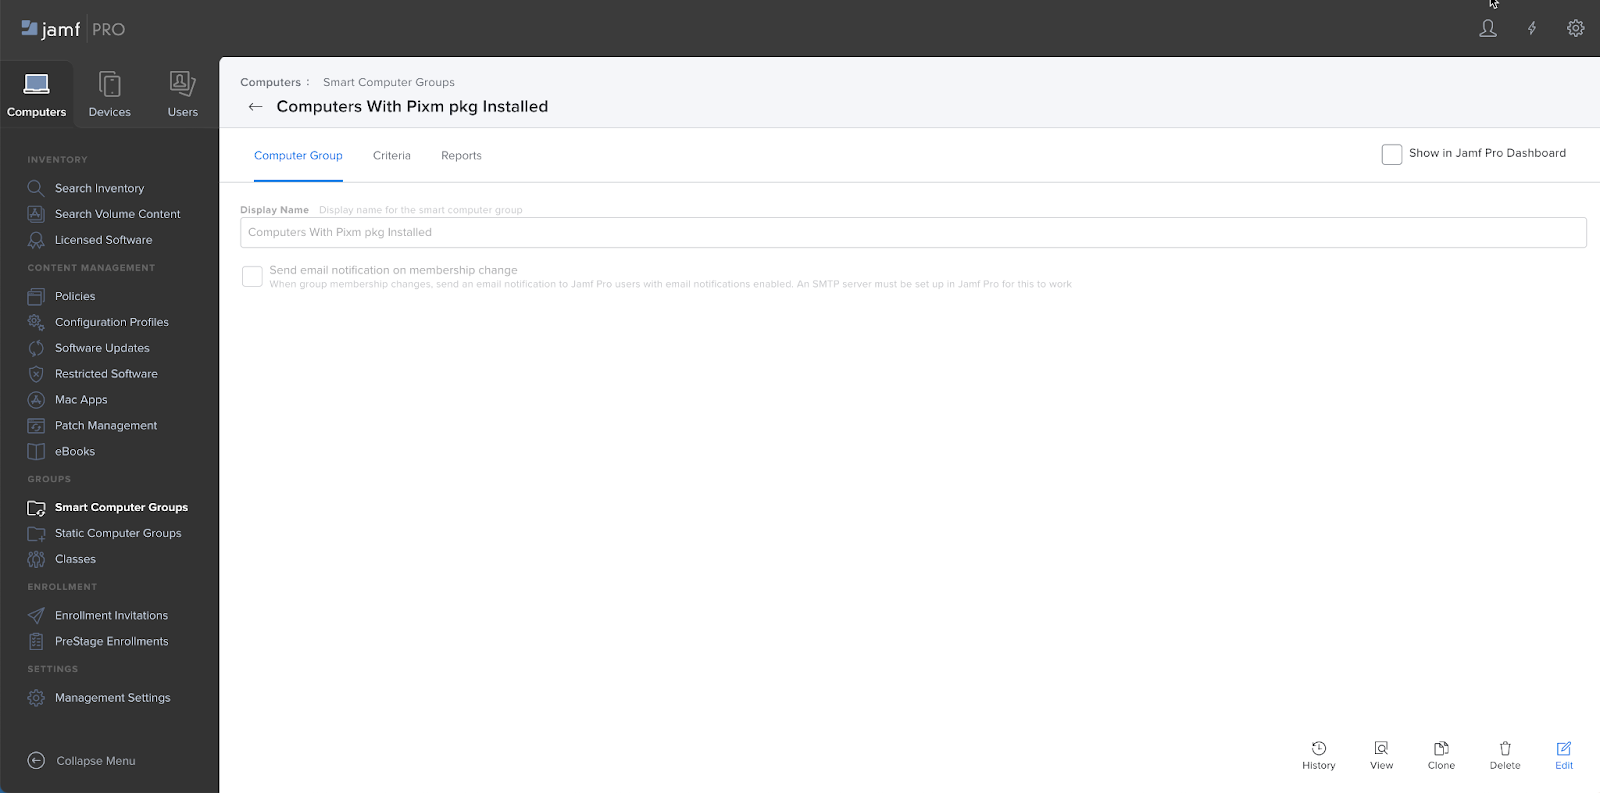
This will create a smart group of computers that have the Pixm Mac Installer deployed. You can click on View to see the members of this smart group
Deploying Pixm Mac Installer
Click on Computers icon, and click on Policies in the left panel
Click on New on the top right corner. This will open up the Policies page

Set a Display Name for the Policy. Under Trigger, select Recurring Check-in and set Execution Frequency to Once Per Computer

Click on Packages in the left column. Click the Configure button

Select Add for PixmMacInstaller_0.1.0.8.pkg. Leave Distribution Point and Action tab to defaults

Scroll down to Maintenance in left column and click on Configure

Confirm that the Update Inventory box is checked automatically

Click on Scope tab and click on Add
Add Computers or Computer Groups for deployment. After they are added. Click Save

(Optional) Check the deployment status in Options tab by clicking on Logs
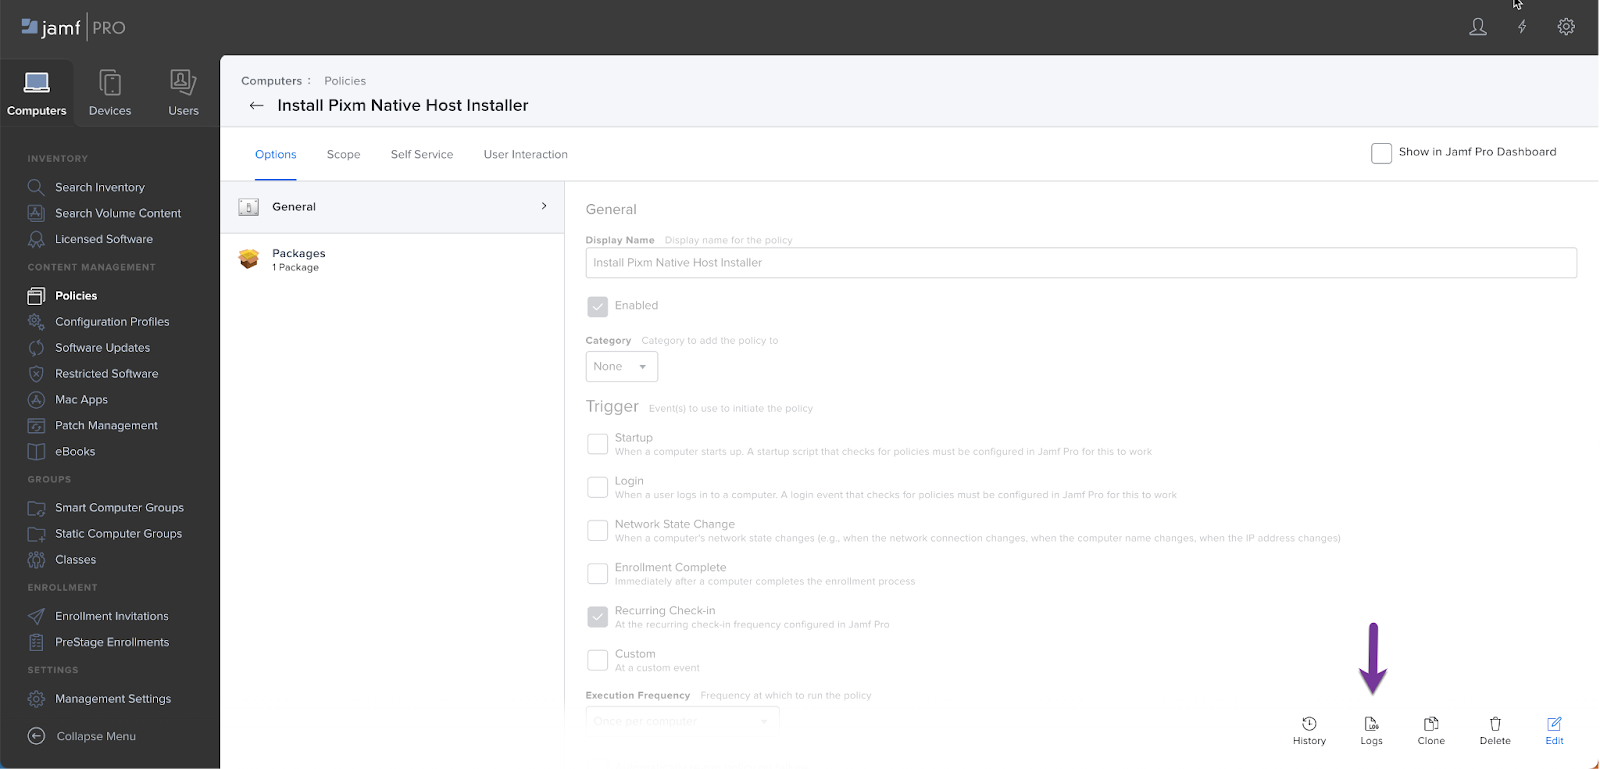
Package should install within 15 minutes, depending on the check in time with the devices

Deploying Pixm Chrome browser extension
This section will walk through the deployment of the Pixm Chrome browser extension.
Go to the Computers icon and click on Configuration Profiles in the left panel. Click the Upload button on the top right

Choose the file “Profile for Pixm Chrome Extension Prod”, click Upload and click on Remove Signature
(Note the Application & Custom settings may or may not be visible as below)

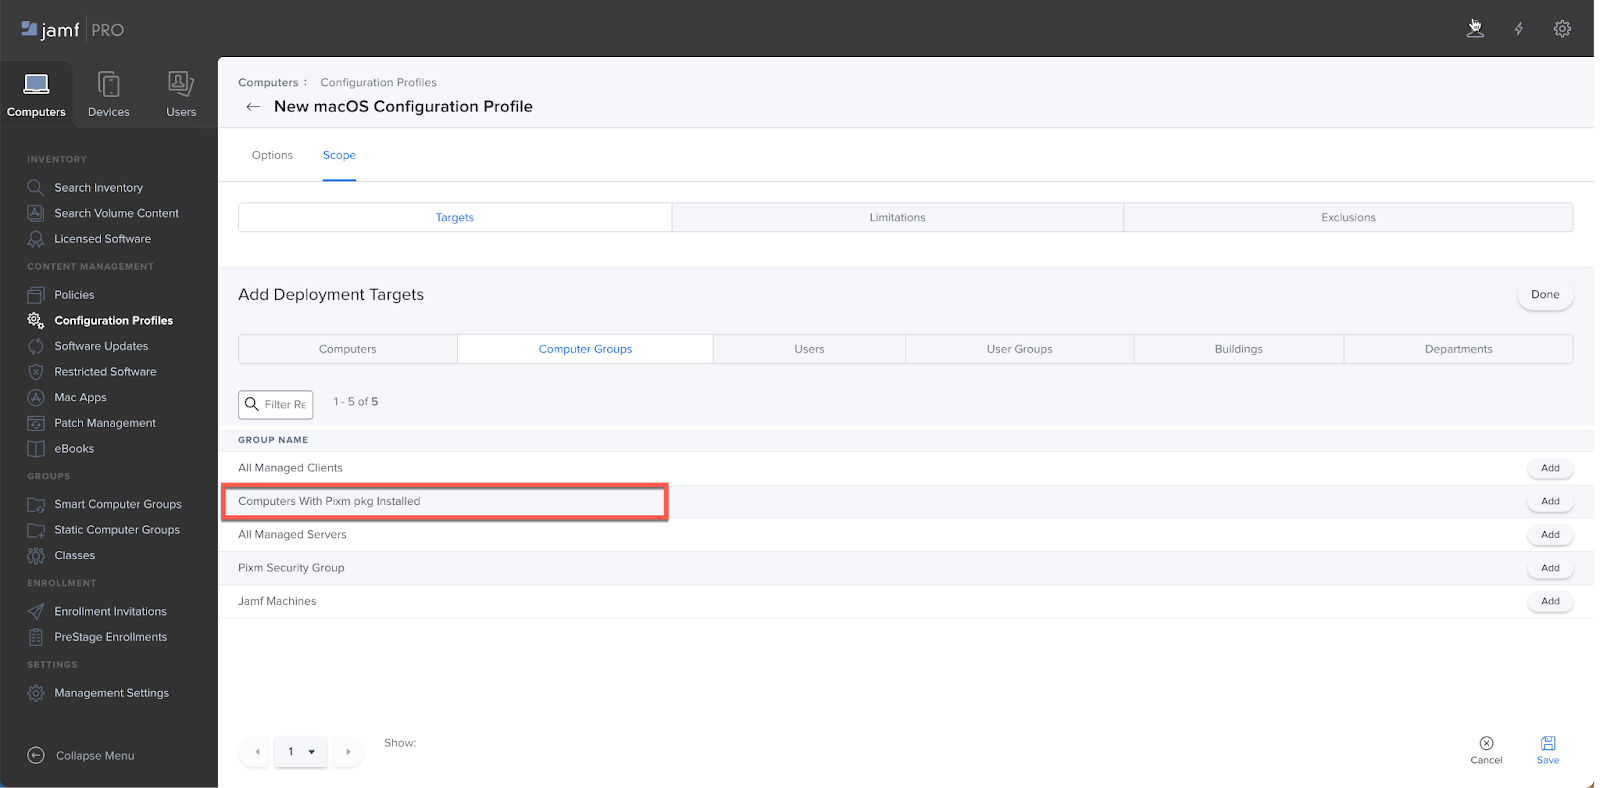
Go to the Scope tab. Under Computer Groups, select “Computers With Pixm pkg Installed”, click Add and Done
Click Save. This will deploy the profile on the Smart Group target. You can check the logs to confirm the status

(Optional) Once the profile is deployed to Chrome on a given Mac, the deployment can be validated optionally on the device. On the device, the profile should be visible in System Settings –> Privacy & Security –> Profiles

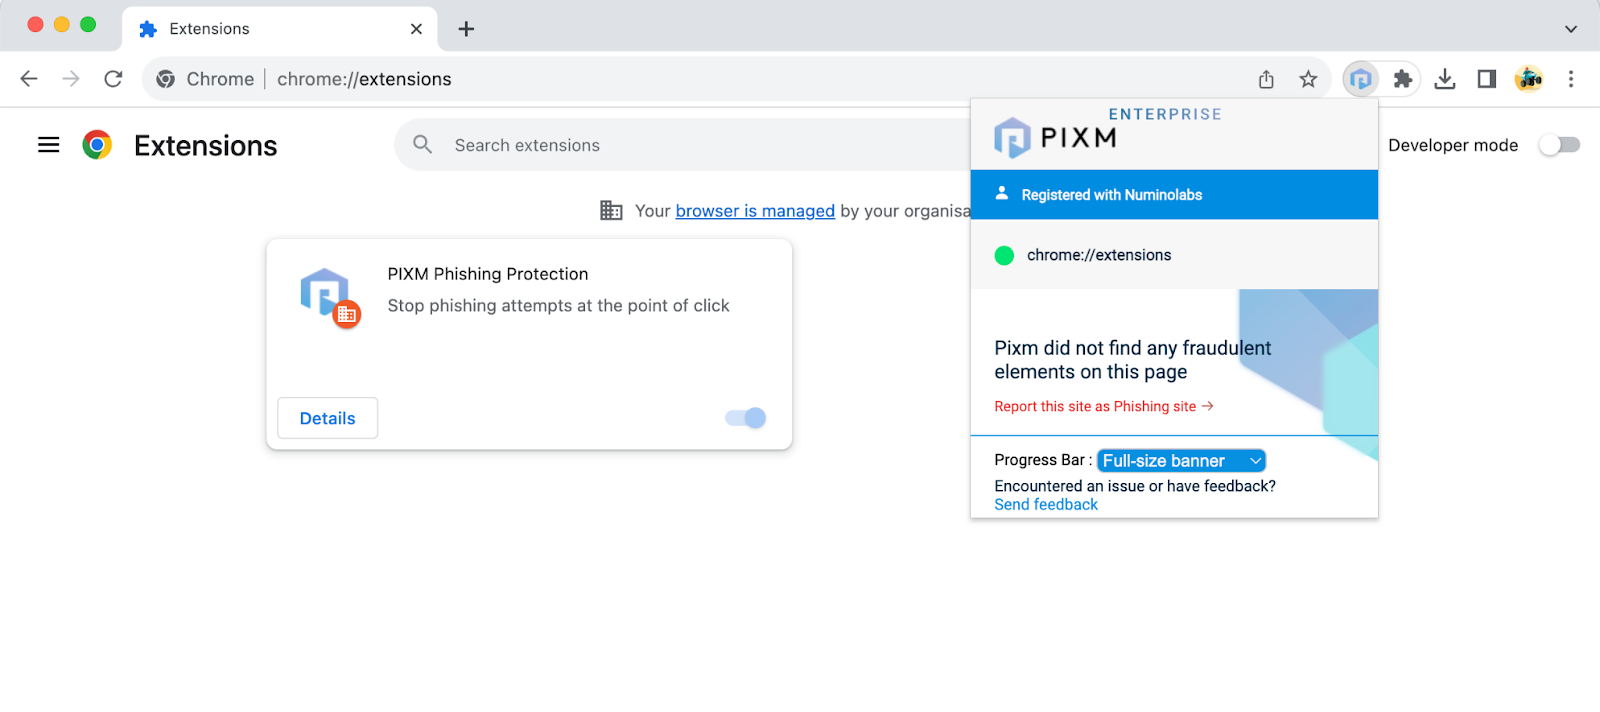
(Optional) To further validate the deployment, restart or open the Chrome browser. The blue hexagon Pixm extension icon should be visible on the top right of the browser. You may have to click on a gray puzzle icon to see it. If you click on the extension icon, you should see that it is registered with the appropriate organization.

Deploying Pixm Firefox browser extension
The steps for deploying Pixm Firefox Browser extension are exactly the same as the steps in the Chrome section. The only change is that the ‘Profile for Pixm Firefox Extension Prod’ file will be used instead.
Deploying Pixm Safari browser extension
Admins should be aware before proceeding: due to Apple’s Systems Integrity Protocol, completing Safari extension deployment will require consent steps from end users. This section covers those consent steps at the end.
Deployment of the Pixm Safari extension on Jamf Pro requires connecting JAMF Pro to an Apple Business Manager (or Apple School Manager) account and the enablement of Volume App Purchasing. Before proceeding, we should confirm these requirements.
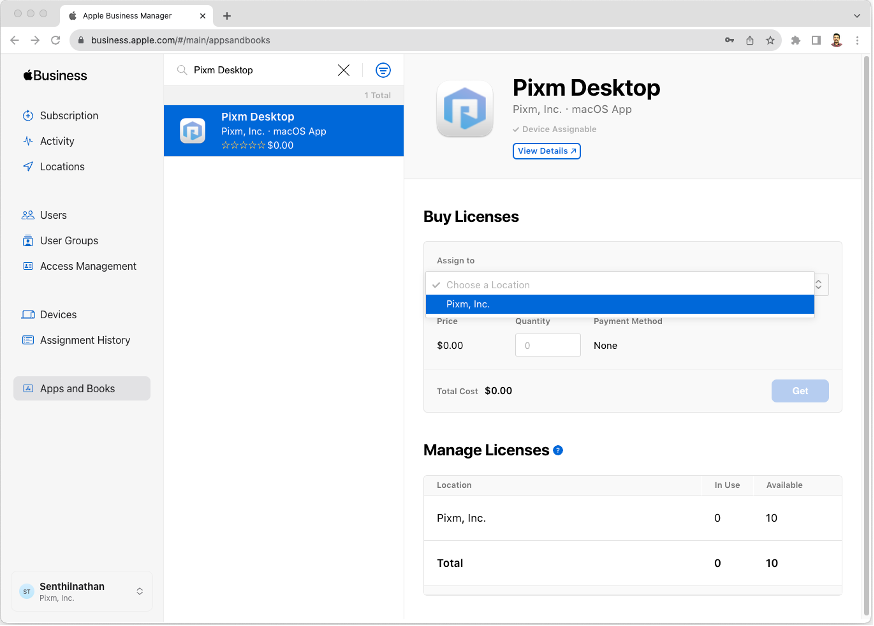
Log into Apple Business Manager at https://business.apple.com and click on the Apps and Books option in the left panel. Search for Pixm Desktop and the app will appear listed.

Select the Pixm Desktop app and, on the right side panel, select ‘Pixm, Inc’. In the Quantity textbox, enter the total number of Mac devices you wish to deploy to.
Return back to the JAMF Pro portal. Click on the Computers icon and click Mac Apps in the left panel. The Pixm Desktop app should be visible.

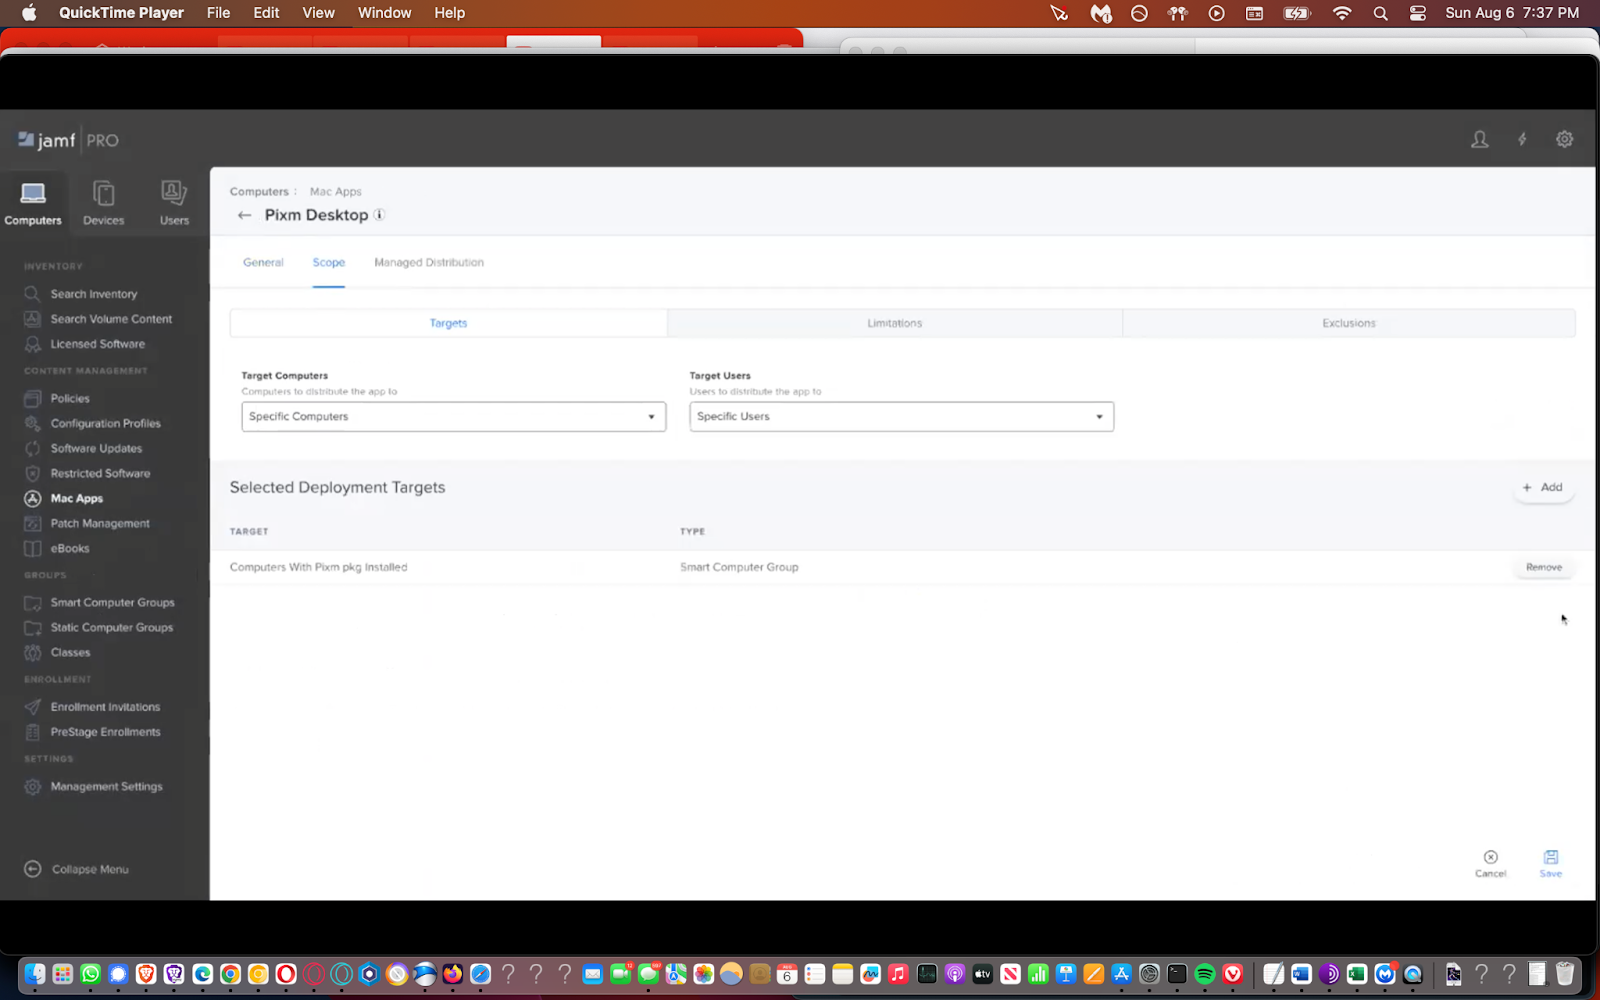
Click on Pixm Desktop and Click on Edit
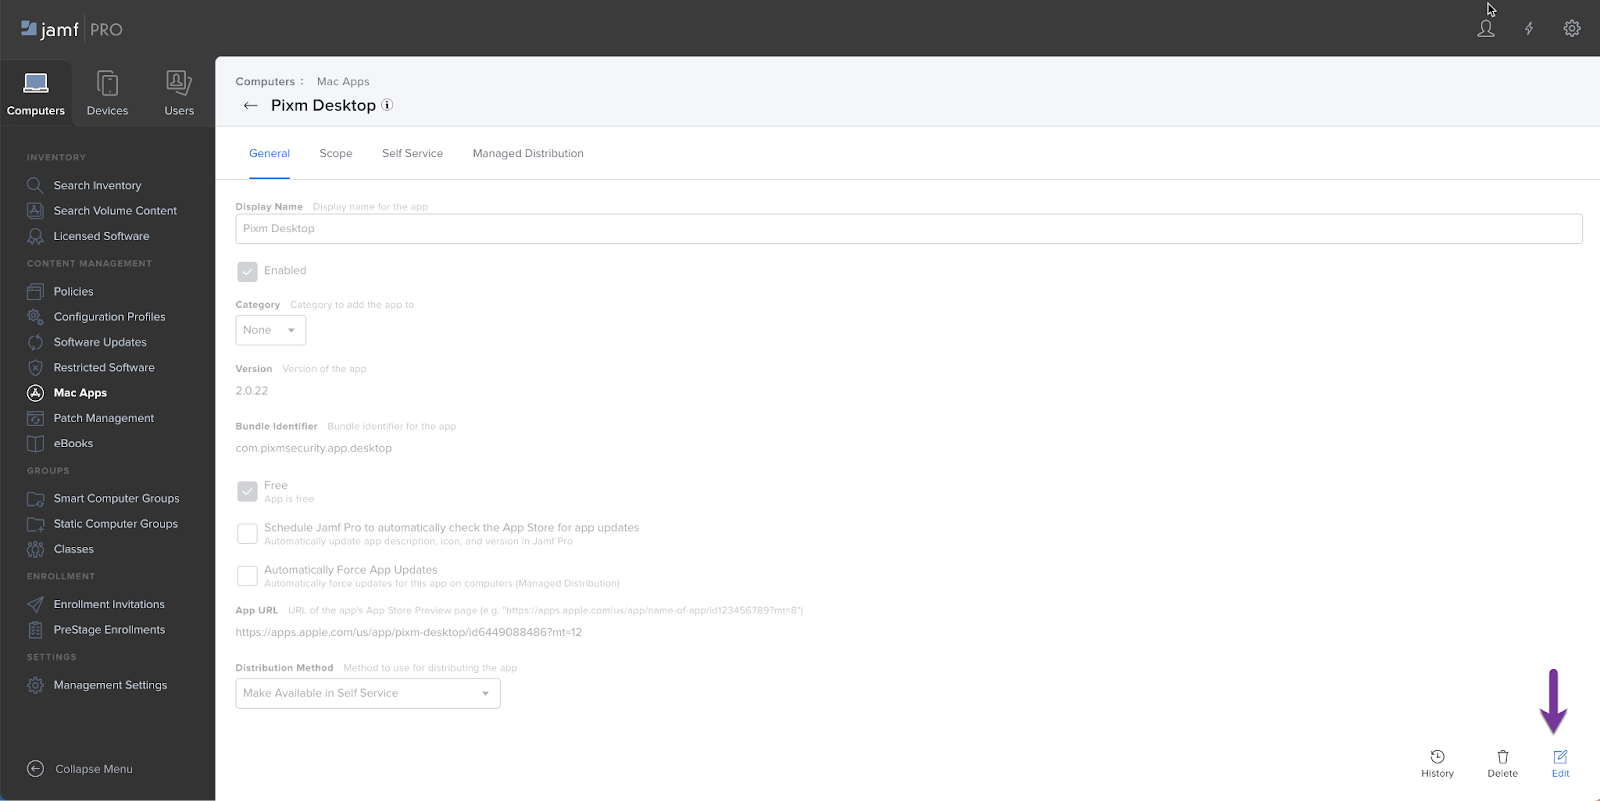
Click the Force Update button. For the Distribution Method, select Install Automatically/Prompt Users to Install

Under the Scope tab, click Add. Under Computer Groups sub tab, select “Computers With Pixm pkg Installed”, click Add and click Done

Under the Managed Distribution tab, click on the Device Assignments sub tab, check the box for Assign Content Purchased in Volume, and click Save

This will install the Pixm Desktop app onto all computers after the Mac Installer is deployed.
End User Consent Steps
Once the Pixm Desktop app is installed on a user’s device, the user will need to manually enable the extension and grant it necessary permissions in order to receive protection in Safari. The below steps are covered below from the end user’s perspective.
Navigate to the Applications folder. There should be an application called ‘Pixm Desktop.app’.

Open the application. In the Pixm popup window, select ‘Enable for Safari’.

This will open the Extensions settings for Pixm in Safari Preferences. Enable the Pixm Desktop Extension by checking the checkbox for PIXM Phishing Protection.

Click on the “Always Allow on Every Website” button.

Confirm, by again clicking on the “Always Allow on Every Website” button in the popup.

Now the Pixm Safari Extension is fully installed. To confirm, click on the Pixm extension icon on the top left of the Safari browser and you should see that it is registered with your organization.

Uninstalling Pixm Chrome browser extension
Click on Configuration Profile in the left panel and select the Chrome profile for removal

Click the Delete button. In next few minutes it will remove Extensions from the MacBook

Uninstalling Pixm Firefox Browser Extension
Follow the same steps as the previous section for the Firefox profile. Full removal of Firefox extensions from user devices will complete only after completing remaining uninstallation steps.
Uninstalling Pixm Safari Browser Extension
Click Mac Apps from the left Panel. Select Pixm Desktop and select Edit

Select the Scope tab. Click Remove for the Computers With Pixm pkg Installed group
Click the Managed Distribution tab. Uncheck the box for Assign Content Purchased in Volume. Click Save

This will remove the Pixm Safari Desktop from Macs at the next check-in
Removing Smart Group for Pixm Mac Deployment
Select Smart Computer Groups from the left panel. Select “Computers with Pixm pkg Installed”.

Click Delete on bottom right.


Uninstalling Pixm
The Pixm Mac Uninstaller will complete the full removal of the Pixm extensions and any other trace of Pixm on the devices.
Click on Computers icon and click on Policies
Click on New on the top right corner
On Policy page, set Display Name, (optional) for Trigger select Recurring Check-in and set Execution Frequency to Once Per Computer

Click on Packages in the left column. Select Configure and select Add PixmMacUninstaller_0.1.0.8.pkg. Leave Distribution Point and Action tab to default

Click on Scope tab and click Add
Select Computers or Computer Groups. Click Add and Done once selection is completed

This will deploy the Pixm Mac Uninstaller during the next check-in with Jamf. You can click on Logs to verify the progress