Within Insights menus, there is often an option to choose from the kebab that says Add to Pulse. Once at least one of these menus have been added, the notifications that are created by them can be managed.
Adding to Pulse
-
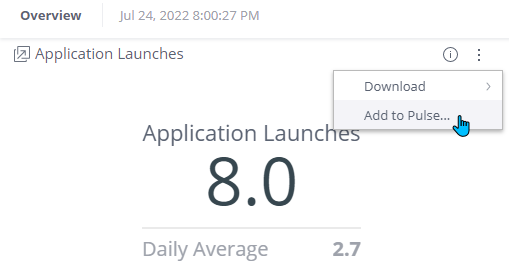
Some widgets have an Add to Pulse... option within their kebab menu. To add this menu to Pulse, click the kebab and select Add to Pulse....
-
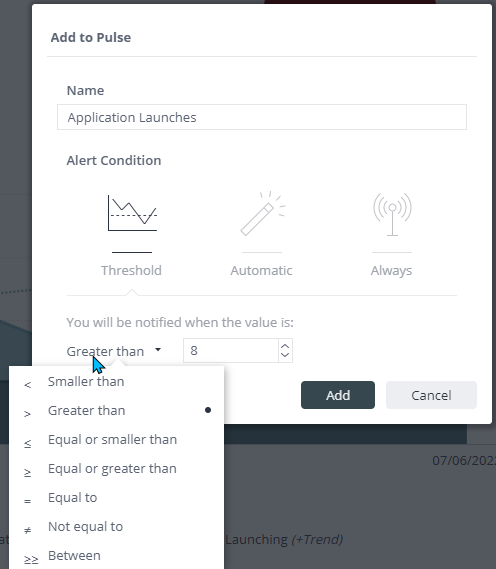
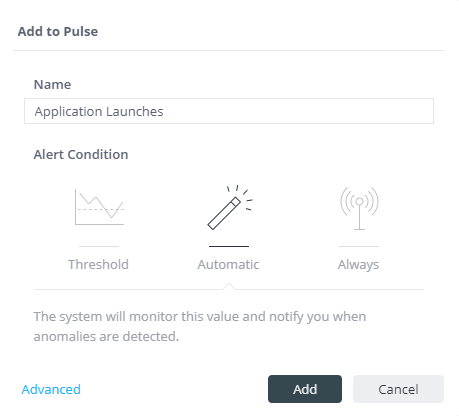
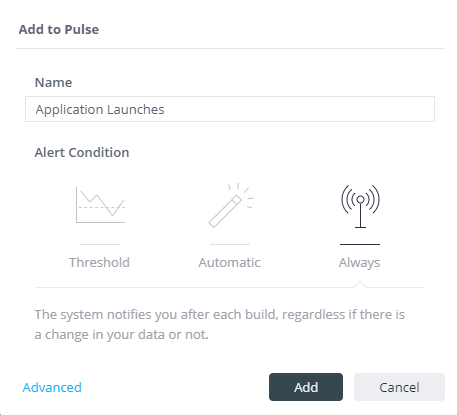
This will bring up a preferences menu where you can choose which type of report you would like to receive for this widget.
-
Threshold: This level enables the user to set a value and condition that, when met, will send an alert to the user.
-
Automatic: Alerts will be sent automatically when the indicator value is outside of normal operating range.
-
Always: Alerts will always be sent.
-
Alert frequency is based on when Sisense processes the information from RapidIdentity which is currently nightly. As such, Pulse Alerts will be sent nightly based on the “frequency” setting. Once these Pulse alerts have been added, they can be managed in a different Insights menu.
Managing Pulse Alerts
Now that you have added some Pulse Alerts, navigate to Pulse Alerts > Manage Alerts.

From here, simply click the hamburger menu at the top right of an alert widget to see the different options.

- Edit: Access the settings and alter them as needed.
- Duplicate: Make a duplicate of that widget and make minor changes to create a new useful data point.
- Receive Notifications: Use this to toggle whether you will receive alerts for this widget.
- Turn Off: Use this to turn off notifications for all users.
- Delete: Delete this widget. This is permanent and cannot be undone.